Blog

Impact Driver vs Drill – All You Need to Make Right Choice

impact driver vs drillI use a DeWalt tool as a drill and driver for my regular activities. It is a regular drill without hammer function. Nevertheless I like my impact driver and few years ago I only used  it. The reason is that each tool has its own advantages. In this article, we will discuss and determine the winner of the Impact Driver vs Drill competition for specific jobs.

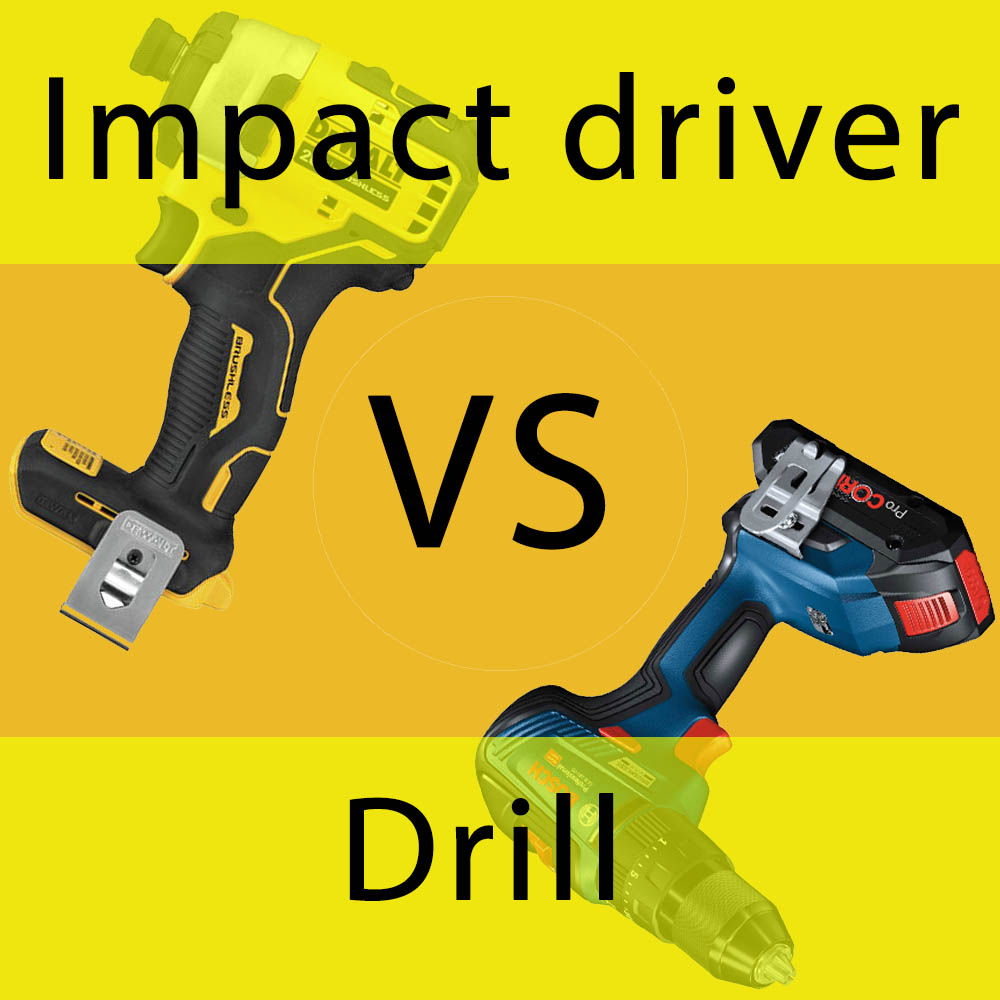
Impact driver vs drill

Impact driver

hammer drill vs impact driver
Compact and powerful impact driver – DEWALT Impact Driver Kit, 20V Max 1/4″

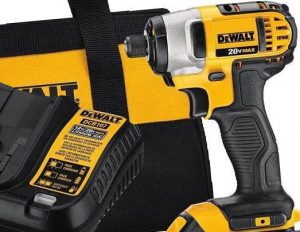
Impact drivers are high-torque machines primarily used for tightening nuts  and driving screws. You can use only ¼-inch hex shank in their chuck. But bit change is fast and simple, you either just slip the bit or pull up on the chuck sleeve and put the bit there.

Impact drivers are smaller and lighter than drill drivers and though they are not as versatile, the torque output is much higher and they get through work more quickly.

Generally the impact driver is for work with screws and it is very superior especially for commercial contractors who do it all day.
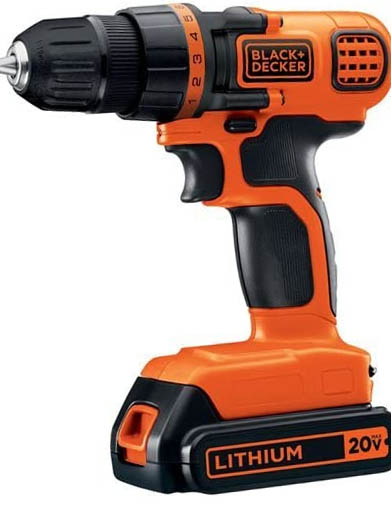
Drill

Impact drivers nevertheless are not universal choice.

They make noise and clients often ask to be quiet. Plus, I find it may do too much damage when using it. They don’t give proper feel when screws biting in, and too much power.

drill driver vs impact driver
Versatile alternative to impact driver – BLACK+DECKER 20VMAX 3/8″ Drill/Driver

An impact driver is a little similar to a hammer drill, BUT hammer oscillates the drilling action towards the surface into which a drill bit is driven. An impact driver produces the rotating force parallel to the surface into which the fastener is driven. So hammer drill vs impact driver problem is incorrect.

A drill is a more versatile tool. You can use it for both making holes and driving screws. In its chuck you can fix hex bits and conventional drill bits. The drill generates a constant torque that is easy to control to work with small screws and drywood.

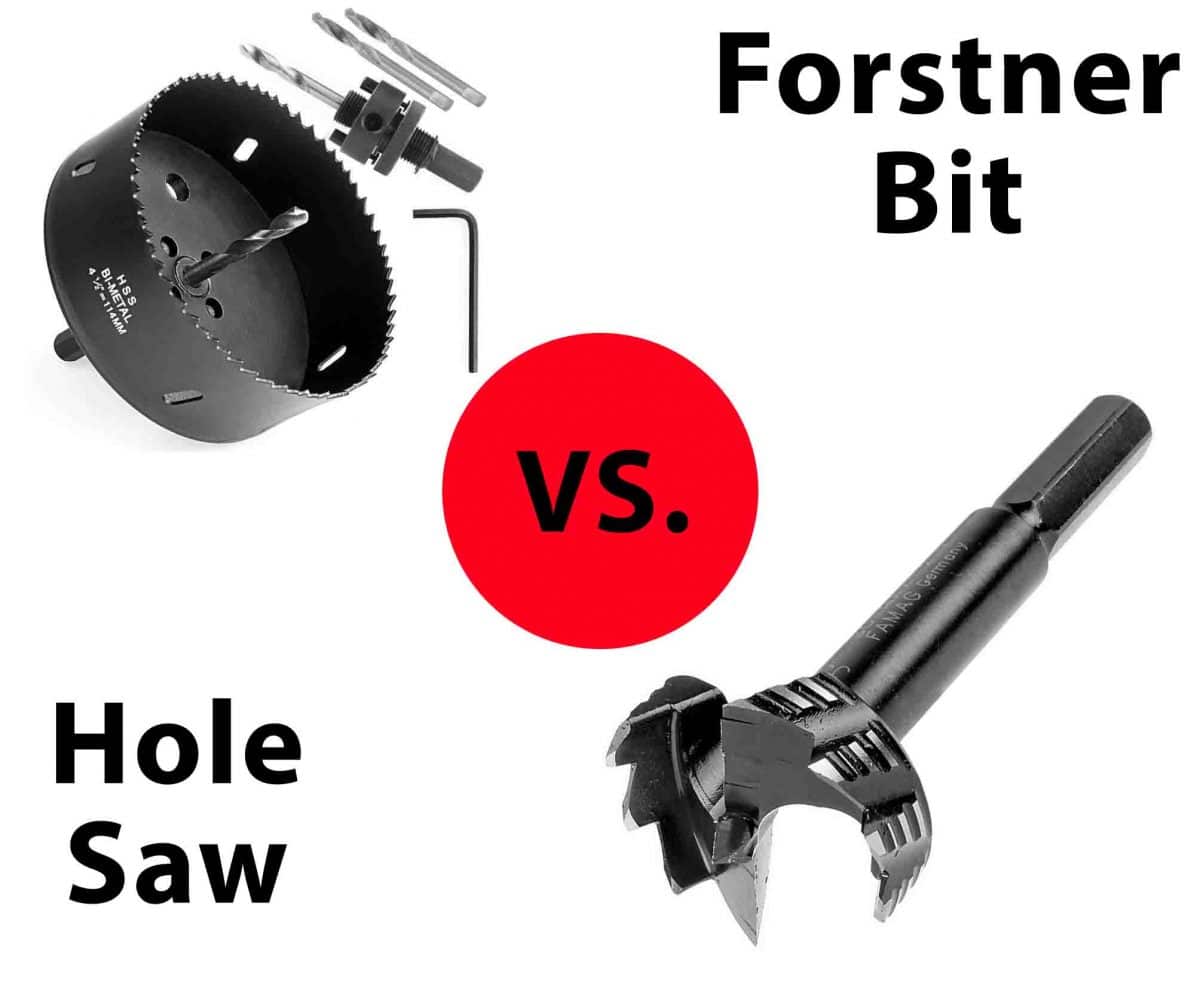
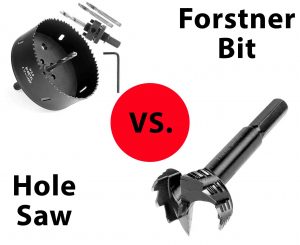
At the same time, a drill is a continuous drive device. So, you have to resist with your arms all the torque applied to screw. An impact driver is not continuous drive makes interrupted, short, rotational impacts. Therefore, when you drive a large screw, the driver twist your arm off much less. This is very good for bolts and screws, but bad for Forstner and spade bits, hole saws and large drill bits.

Power drill vs impact driver

Using drill or impact driver mostly depends on the task you got to go through. If you are driving any kind of screw the first thing you should reach for is the cordless impact driver. It gives a “rata-tat-tat” as they torque into the fastener. This process performs high turning power in a small package with less stripping of fasteners then it’s common with drills. Moreover much less torque from the tool is transferred to your hand.

The impact driver has big advantages

  1. Bit usually stay in screw head better and it doesn’t jump out
  2.  Impact won’t twist the arm like a power drill will. Running an impact all day is much easier on the elbow and wrist than using a drill
  3. When driving large screws depth control is much easier with the impact than

and few cons

  1. The impact is much noisier and for work all day long you need to use ear protection
  2. When working with small screws and drywall it’s easier to work with a drill
power drill vs impact driver
WORX 20 Volt Combo Power Tool Kit: Power Drill, 1/4″ Impact Driver, AXIS Saw, and 2 Lithium Ion Batteries

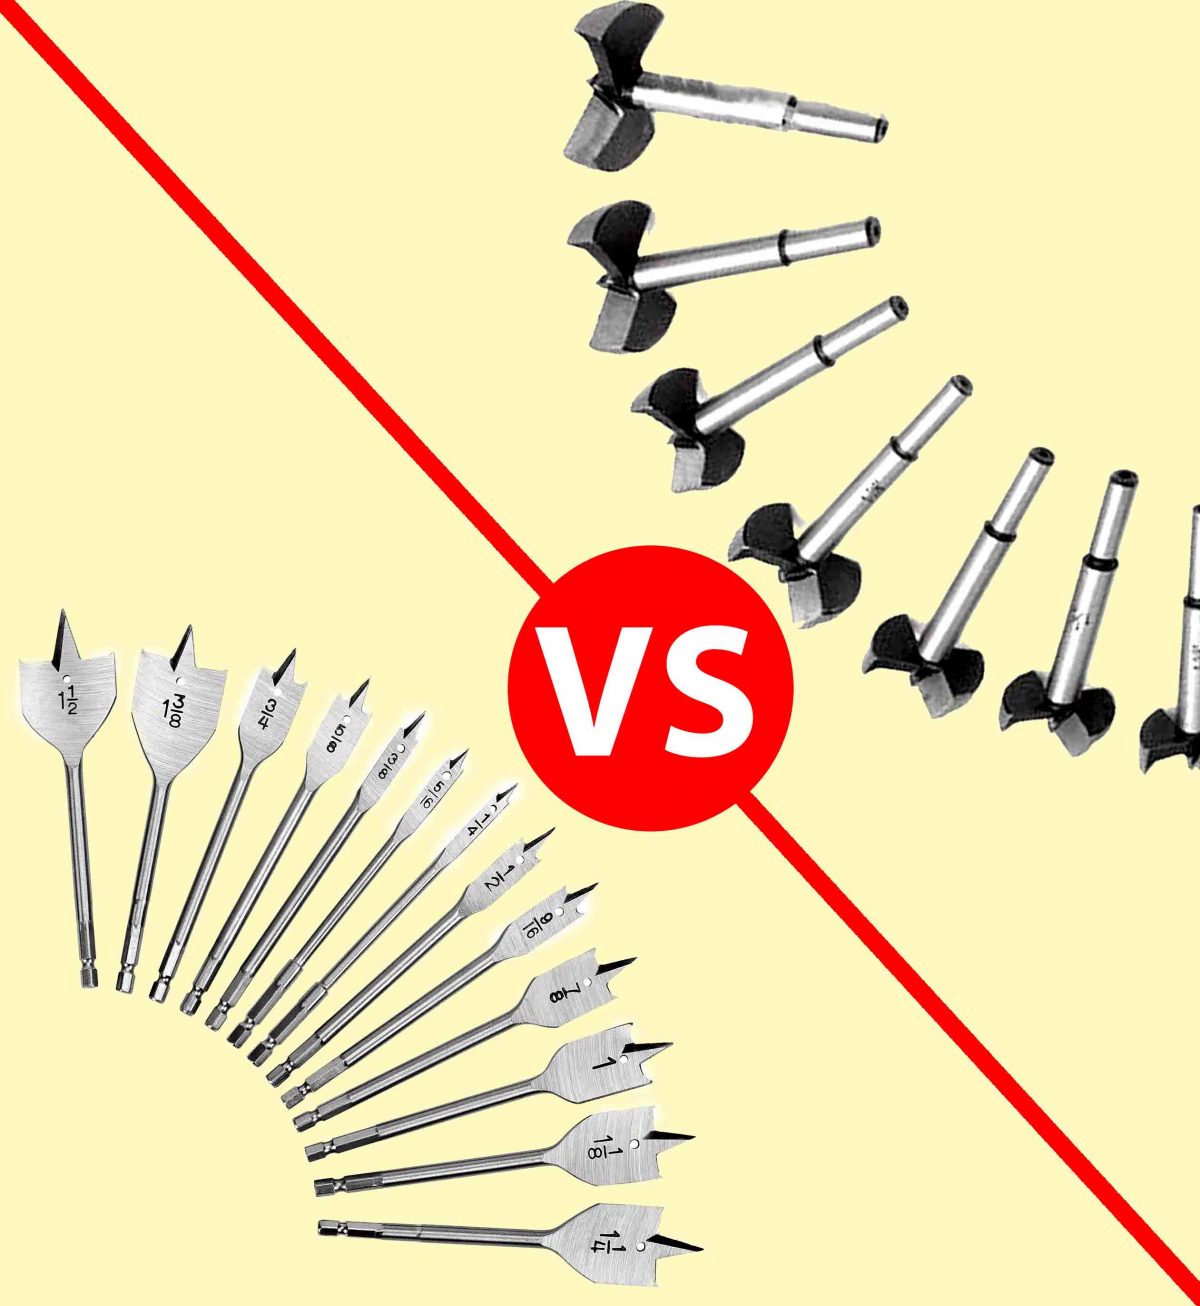
For occasional use the drill is much more versatile and convenient. You may use it for just about everything, and nobody will ever complain about the noise. You can carry a set of screwdriver bits, good HSS drill bits, spade bits and it will cover pretty much anything.

Also, be careful not to let the bit slip when starting the tongue-tites – it’s a tiny tip and rotating clockwise will dig itself into your thumb (which will be holding the screw) before you’ve even realised what’s happened.

If your floor is engineered then pilot-holes won’t be needed as you’ll be going straight into ply on the tongue.

If you need to work with large holes, compact hammer drill with an anti-kick shutoff so it doesn’t twist your wrist off if it binds on something.

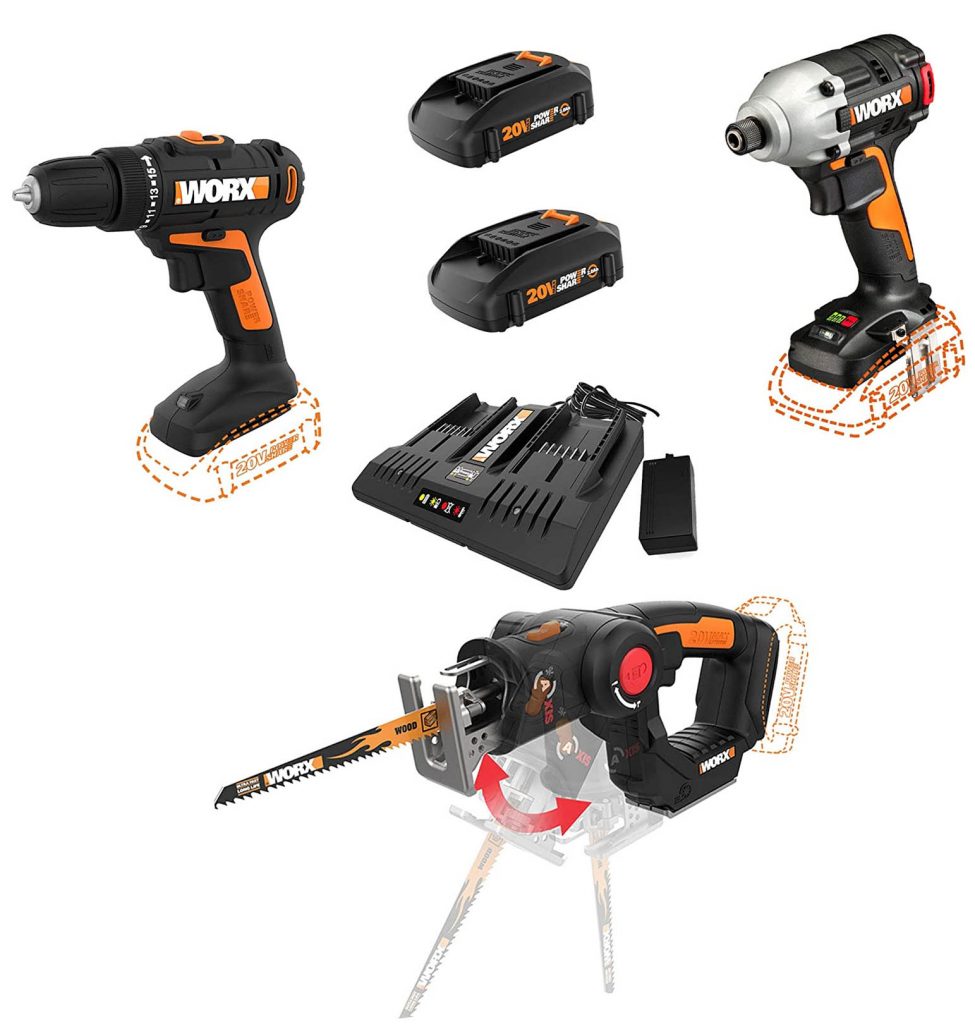
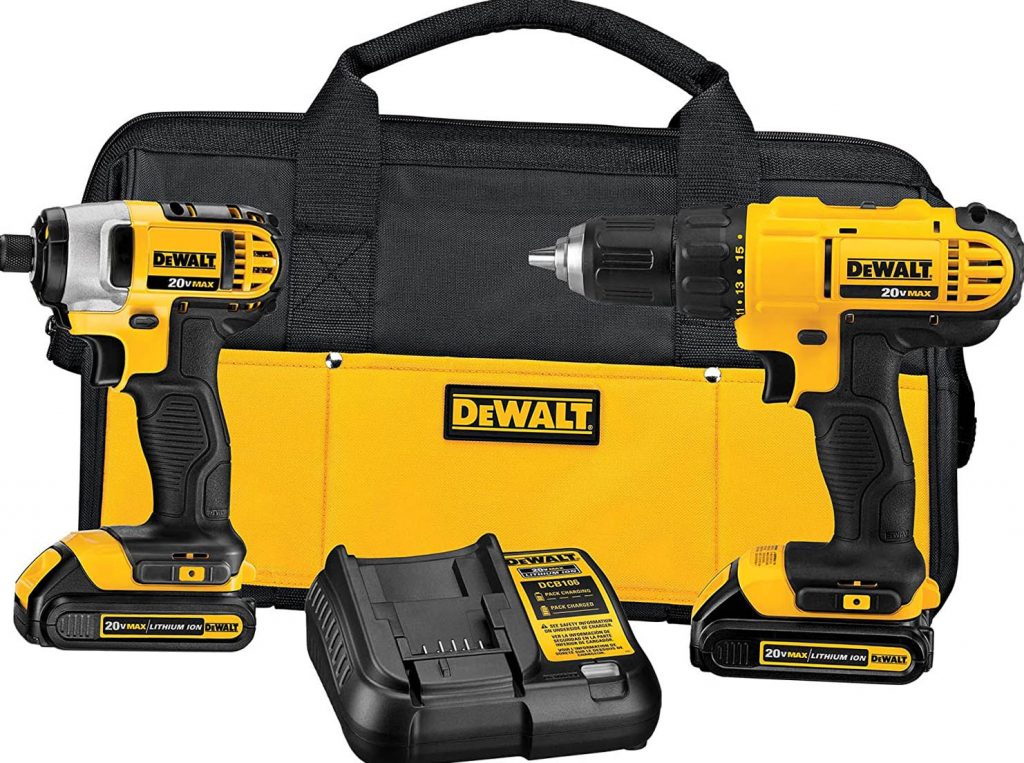
Cordless drill vs impact driver

If you are professional contractor, you need both. As an example, when working  with solid wood floor you need to pre-drill smalla pilot holes for tongue-tites. Constant swapping from drill bit to torx bit is just a headache. But if you can only have one then a tool like Makita drill/driver combo will be far more versatile. It’s quite cheap to get a second bare machine so you can easily upgrade to having both.

cordless drill vs impact driver
Best answer to cordless drill vs impact driver contest – 2 Tools DEWALT 20V MAX Cordless Drill Combo Kit

An impact driver is great for screwing in screws but not much good for anything else. It has a female hex and has an impacting action, even with a hex shaft drill bits impact driver is not nearly as good for drilling as a drill.

Guys who carry tools with them often want to carry a compact drill as it’s versatile tool. But the impact in the same case gives you a lighter weight device to drive screws.

Conclusions

I can’t imagine professional woodworker using a drill to drive screws these days. And I did for years until I used my first impact. Sometimes I even use  my drill driver to make a hole with a quick change drill bit.

  • But in general, the undeniable and obvious advice is to use the right tool for each task.
  • Use a drill to make holes
  • When removing screws, I use an impact unless it’s likely the head will strip, then I use a drill driver.
  • If the noise is a problem, get a fluid drive impact.

Best belt sander reviews: handheld, small, benchtop and floor sanders

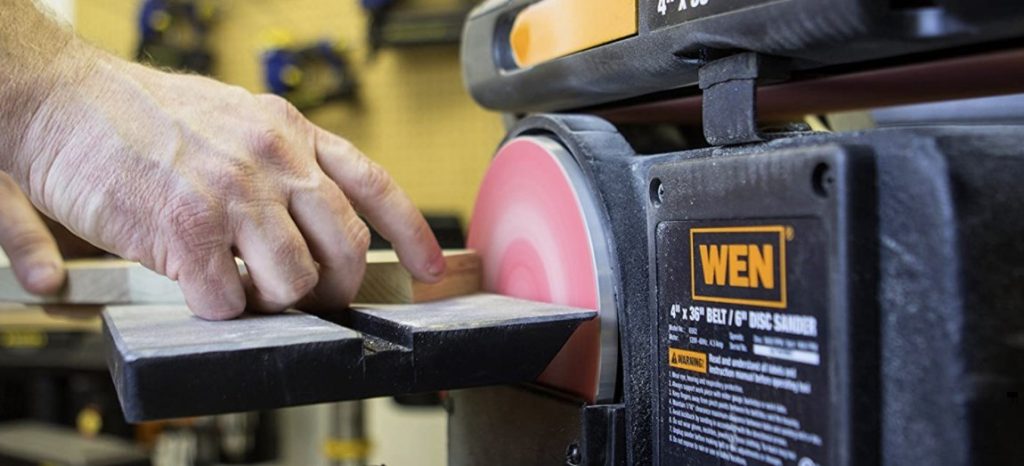
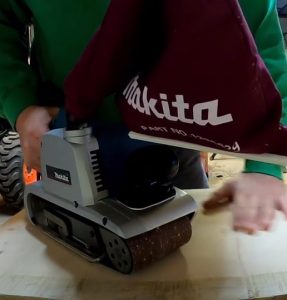
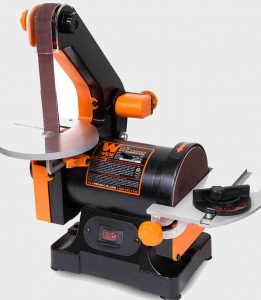
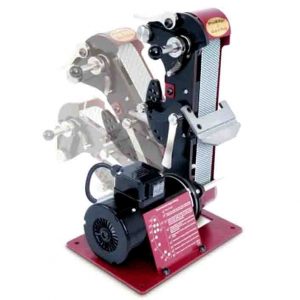
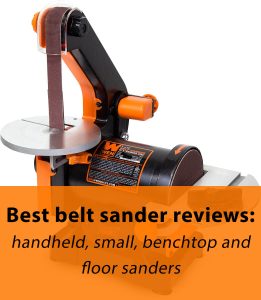
Long time ago I bought both belt and sheet sanders. The sheet device was replaced few times, but the belt one worked flawlessly. And finally, when my 20 year old belt sander (it seems to be Skill) gave up, I was wondering should I replace it with a small and cheap device or something better and may be heavier. I will share here some thoughts and the results of my search for the best belt sander on the market.

Best Belt Sander Under $100

All you need to know about inexpensive sanders is motor torque. Small sanders for DIY tasks with low power motors are very easy to stop with a piece of steel pressing to the belt. These devices are good enough for cleaning a bit of rust, deburring, etc.

best belt sander under $100
Best belt sander under $100 – KKmoon Multifunctional Device for DIY Projects

Cheap sanders can sand well, but you really need to keep them clean and lubricate from time to time with some dry lubricant. If you let them build up with dust, the belt begins to walk off running it. In this way for light DIY and all purpose work you can use almost any tool. But wide-known brands such as Bosh and Dewalt will almost never let you down.

My advice here is KKmoon multifunctional machine for DIY projects. This little machine works well with what it was designed for – simple sanding and grinding tasks. It is small enough for limited work space. The sander hasn’t tracking feature to keep a strop centered, so this is not the device for knife making. But KKmoon has multiple speeds and reversible belt direction.

Small belt sander: my recommendation

Many of my colleagues think their sanders are too heavy, but I think that is an asset. I just let the weight of the machine work for me instead of bearing down on the sander. So the weight and balance are essential.

The tool needs to be heavy enough to just concentrate on guiding the sander and not pushing it down. Excessive pressure only overloads the paper and causes excessive heat. The balance is critical to make equal pressure all over the contact area.  If the weight isn’t centered over the pad, the sander want to dig in in the heavy side and leave tracks.

I like Black+Decker handheld belt sanders because they are generally well balanced, have some weight, and hold up pretty well. Of course, with such a small machine you can not sand a whole room or outside of your house without pauses. In general, small sanders are tools for small jobs. Read the manual, adjust the track of the belt with a small knob so it does not swing out of track. The sander is handy and small, the dust bag collects only a fraction of the dust unless you buy the optional part and connect the machine to a shop vac.

Best benchtop belt sander

Good benchtop belt sander will not be cheap. It should have the proper  power and SFPM to back it up. Cheap devices from HF usually severely lacking in both. They also are going to be pretty wimpy. If you need to make Harbor Freight sander acceptable, do some “tuning”, which requires a lathe.


My advice is to pay a little more and buy the WEN you are talking about and Its motor and the body are very good. They are built quite well and the only things lacking are the disk sanding table and angle slide thingy.


But despite that WEN owner get more than paid for in my opinion. The tool tracks the belt very well and the disc sander turn wood to dust so quick that you should be careful. Common use of WEN benchtop belt/disk sander is in woodworking. I think, you would buy it again if needed a second one.

You just can’t overload this device. It can stop, trip the breaker, but always able to get back up and running. Get the model with the cast iron base – a steel model work too, but the extra mass in the iron helps to stabilize sander and make it steady.

Yes, the miter gauge is darn near useless and taped labels are not precise. But it works, it’s making your work much easier and faster. The only probability to replace it with a note powerful version if you’ll need to use it 8 hours a day. If you only need it occasionally and for relatively light work, you’ll likely never need anything better.

Kalamazoo S4 - good even used
Kalamazoo S4 – good even used

If you plan to use sander often, but budget is a big concern, a high quality used machines is likely your best bet. For example a Kalamazoo S4 belt sander is well suited for light fab work. While it is not true industrial grade unit, the sander will outperform anything available from the box stores.

Best belt sander for deck

Floor sanding is a pretty time-consuming task for both DIY and experts the same. If you are planning to sand floors for a living you will need to invest in a best belt sander for deck.

Belt sander for deck is a big and expensive machine, the best way to find “your” tool is to rent a few different machines to see what you really like. However, the professionals in sanding floors are typically using devices that are quite different from those you may find in the rental yards.

I usually do one or to refinishes a year as part of remodeling and get the best results with a buffer. This tool flattens the floor much better than anything else I’ve used, including the sanders used by the last two floor finishing outfits we’ve used.

In addition to an edger I really like the Porter-Cable 6″ psa orbital sander that resembles a small angle grinder. The type of pad and larger orbit flatten areas much better, and remove twice as much material as a typical RPS, yet can be slowed down for a light touch.

My advice is to do some research, talk to a floor vendor that has everything you will need, try to find some courses or at least professional to demonstrate how each machine works, and rent before you jump in. This is an expensive tool.

Best belt sander for woodworking

I think, 3×21 or 4×24 belt sander by good brand is more than adequate tool for light duty woodworking tasks. They are easy to get a flat smooth surface. It is great if the sander come with a holder that allows it to be used in a stationary position on it’s side. Sometimes it is convenient to lock the device into a vice so that the bottom is facing up. This position is great for edges and sharpening hatchets and axes.

best belt sander for woodworking
Best belt sander for woodworking – Makita 9403 4×24″ Belt Sander

Makita makes great sanders, I think, it is certainly the market leader in belt sanders. In my opinion the Makita blows the Ryobi into the weeds, it is in a different league. I’ve tried 400m/min belt speed Ryobi and Makita 9403 works much better and faster. I saved about 3hrs of working time on sanding the components of a bog stock modular two bay oak frame. And the specs says that Makita has a belt speed of 500m/min.

The main difference between a 4 x 24 and 3 x 21 is your arm won’t fall off sanding edges. If you work all day long, you really only want to be using 4 x 24 sanders on the flat.

On the other hand the 3 x 21 is the most versatile if the tool will live in a truck and will be used for installations.

And I’d avoid no-name sanding belts, they often refuse to track properly and sometimes have thick joints bumping all the time. Most of my sanding I do with P40 – P120 grits. Anything finer than P120 on a belt sander in my opinion doesn’t make any sense, the random orbit sander is more appropriate in fine tasks.

P40 and P60 work good in grinding steps in joints, high spots on floors, etc. P60 to P80 are widely used for paint removal. P100 to P120 are common for medium quality sanding.

Best belt sander knife sharpener

best belt sander for beginner knife making.jpg
Best belt sander for beginner knife making – WEN 6515T 1×30″

If you have already made your first knife, chances are that you made it with a cheap and simple bench grinder and it was a very bad experience 🙂 Lots of knifemaking guys start with a 1×30″. Working with a 1-inch belt takes much longer, more belts are used, and machines usually have problems with bending and bending of the structural elements. So, in knife making the problem with cheap sanders is that they work, and makes it harder to buy a better tool.

Therefore, if you really want to buy 1×30″ sander, combine it with a hand filing jig. You will need you buy many belts with a 1×30″ grinding steel. They work but are better used for finish polishing on steel and handles.

belt sander knife sharpener
Best belt sander knife sharpener – Robert Sorby ProEdge Plus

In my opinion, the best belt sander-knife sharpener is a Sorby ProEdge plus sharpening system. These devices are designed for sharpening tools, but I also use it for sharpening knives, removing machining marks and grinding lathe tools. The only disadvantage is a the small size. The belt is 2″ wide and pretty high price (around $490 – for occasional use it maybe a bit spendy). But it’s a very good machine. Its design and build quality are in a different league from DIY type tools. The tool is made of good quality materials. Its tool rest is rock solid and repeatedly adjustable, the motor is powerful and reliable.  These facts, as well as the speed of the belt (very good for steel) make it the best belt sander for knife making.

Conclusions

Small and cheap belt sanders are strictly speaking for DIY use. However,  passionate DIYers sooner or later replace all of their most commonly used “DIY” tools for more professional models because always find the DIY machines inadequate. Nevertheless, you cannot always predict whether you will like the device. If it turns out to be not so necessary in your practice, then a cheap and compact sander will not be superfluous.

Pro tools are expensive and tend to be both designed for use by competent users and accurate. You really need good and expensive device when working with floors, knifemaking etc.

Best oscillating tool blades in 2021: saw, cutting, tile and drywall blades

best oscillating tool blades
Best oscillating tool blades in 2021: saw, cutting, tile and drywall blades

I have been using a multimaster tool in my work for around four years and have worn out a lot of blades: Fein, Makita, plenty of cheap Home depot blades, even Imperial blades. Most of them have shown efficiency significantly less than expected, but I’ve created my own set of best oscillating tool blades that includes saw, cutting, tile, drywall blades by several brands. And the set is very reliable and effective.

Types of oscillating tool blades

Sanding blades


best oscillating tool blades
Bosch Starlock Sanding Oscillating Saw Blades – Check the Price on Amazon

In addition to sawing, the multitool can be used for quick sanding purposes. With a wireless tool is especially convenient, you don’t need to dig up the extension cord. Just set the sanding attachment and get it done. Mos of sanding attachments, are available in triangle and circular shapes. Both are good, but I prefer the triangle shapes.

Bosch sander pads are perfectly compatible with Makita, Milwaukee and any Starlock oscillating tool. Some people complain that it melts after overheating, but myne works well. Don’t pushed too hard when sanding with a power tool, it isn’t a manual sanding block. Let the multitool do the work for you.

Best saw oscillating tool blades

best oscillating tool blades
Best oscillating saw blades – 40 PC Accessory Kit that Fit almost any tool

These blades are most common. A straight blades are good for plunge cuts, for linear long cuts better to use a round saw blade. You can also use a wood blades to cut multiple materials, such as drywall, paneling, plywood, etc. But you’ll get the most of your multitool if you use specially designed blade for a specific material.

My advice here is to purchase an accessory kit that fits  Dremel, Milwaukee, Rockwell,  Chicago, Bosch, Fein, Makita, Multimaster, Craftsman and Rigid. If you use a multitool for lots of various works from cutting drywall to cutting nails, this set of well made blades that are pretty cheap and last long if you work with proper material, labeled on each piece. They are good enough to do the job and purchase another set when these will worn out.

Cutting

Cutting blades for multi tool are designed mostly for light work with a soft materials: rubber, carpet, leather, and so on. Cutting blade can also be used for removing old caulk.

Blades for grout removal

best oscillating blades
Best oscillating blades for grout removal – DEWALT DWA4219

An oscillating tool can help you to quickly remove the old grout. The grout removal blades can have carbide or diamond edges. Carbide edged blades are enough for the most of applications. Diamond edged tools are more expensive but run faster and last longer when used with proper cooling.

I prefer to use carbide DEWALT blade for grout removal. This is the best tool to remove old grout. The DeWalt cuts through grout very fast and last long. All you need is a spray bottle to mist the grout line before cutting to avoid fine dust in the air. It holds up pretty well it is the cheapest blade among trustworthy brands.

Polishing

Your multitool can make polishing much easier. You can find different densities pads, just like regular sanding paper. Using polishing pads you can achieve a beautiful polished finish on steel,  chrome, wood and other materials.

Rasping

oscillating saw blades reviews
Best rasping blade in our oscillating tool blades review – Dremel Carbide Rasp

Rasping blades work great for coarse sanding of fillers (read also our drill sander attachment review), wood, concrete, or even bricks. As usual these blades are available in round and triangular shapes, but sometimes you can find finger-shaped one.

My choice here is Dremel carbide rasp. This is a 24 GRIT rasp and the manufacturer picked the 24 grit rating for a good spacing between bits for easy removing debris from the carbide. It’s good, you don’t need to clean the blade every few minutes. With this blade grinding is effective enough and much safer and accurate than using an angle grinder. You can work with concrete, epoxy, mortar, etc.

Best oscillating tool blades by brand

Up until a few years ago, there were a bunch of blades patterns/style. Each brand seemed to have their own hole pattern for the tool attachment. Then the blade manufacturers figured out how to make multiple hole cheme in the blades to fit almost any tool brands.

So, the “universalness” is provided rather in the design of the tool than the blade. Oscillating tool attachments are now a lot more universal than before, even the cheap no name blades. But of course, not all tools and blades are interchange.

Rockwell oscillating tool blades

Rockwell accessory kit

I have Rockwell oscillating tool blades, they are a 10 pack from Amazon for  for about $25. They work efficiently in removing old subfloor glue from joists. I’ve also used them to trim the bottom of the trim around all doorways to slip the laminate under the trim. Just lay a scrap piece of laminate, place the oscillating tool blade on top of it and cut the trim around the doorway at the perfect height. These oscillating blades absolutely cut where and in a way no other sawing tool can.

Imperial Blades

Imperial blades drywall blade
Imperial blades amazing 4-in-1 drywall blade

The only brand of oscillating tool blades I know who makes them in the USA i Imperial Blades. Moreover, I noticed that their blades almost in all of the god lumber yards that I visit. These blades aren’t often sold at big box stores, the price is at about $30 per blade. But after a 10 months of usage, cutting embedded 16d nails out, I still haven’t unwrapped the second blade of the carbide “MetalHead” type that is now called the “Storm CarbideExtreme”. The blade number is “360” for carbide tool and 330, the 340, etc, for titanium coated tips.

I’ve been using another Imperial blades on my Fein tool since they came out. If you look on Amazon, can even find them cheaper than $16. I usually buy them in 5 or 10 at a time, they are cheaper in the set.

Bosch Blades

One alternative to expensive Imperial Blades is one model of Bosch blade with carbide made in Switzerland. The tool is not as long as the Imperial 360, and also isn’t as wide or as thick. But at least there is an option.

Fein oscillating tool blades

fein oscillating tool blades
Fein oscillating tool blades – E-Cut Saw Blade for Wood, Drywall and Plastic

About five years ago I wasn’t spending too much money on tools and Fein oscillating tool blades was the only option for me. And the prices were very high at that time. I should say that switching to the Fein 250 after low power Dremel tool was like going from an old carriage to a brand new Ferrari. It had much less vibration, noise and overall feel.

The Fein 350 or supercut is most likely much better than 250. So in my opinion, buy the best quality you can, you wont regret it. In my experience they last longer, but like any cutting tool, feed and speed make the difference.

Conclusions

Multi tools are a little weird devices that you can’t understand why everyone loves them so much until you own one. And as soon as you purchase one, you start thinking why not doing it sooner: they are really good at making “impossible” jobs very easy!

My advice is to buy best quality blades that are designed for the right type of job. Preferably Imperial Blades, but if you don’t use them every day, something cheaper (Fein or Bosch) will be good. Sure, some cheap noname disposables may be useful but if you try really good blade once, you’ll never look back!

But there is one detail. It’s a bit like choosing a handsaw. If you saw everything, sooner or later you will hit a nail a damage the tool. So, for used plastic and used fence boards buy a cheap saw and throw it away once a month. But if your work with clean wood and need to cut quick and precise, buy a tool of a different class.

What is the best drill bit for porcelain tile

what is the best drill bit for ceramic tile
What is the best drill bit for ceramic tile

Drilling holes in tile wall is a pretty common task. Installing soap dishes and paper rolls hardware, hanging mirrors, etc is all that requires wall anchors and drilling through tile. In most cases you also drill through the cement or bricks behind it to to secure the mount. In our article we’ll help you to find out, what is the best drill bit for porcelain tile.

If your work is urgent and there are no tile bits at hand, you can use a masonry bit. It is harder to start drilling as it tend to wander and move from the starting hole. Using the masking tape helps a lot, but it’s still a bit tricky. Therefore, the tiles bits are a worthwhile investment in my opinion.

What is the Best Drill Bit for Porcelain Tile

I think that drilling ceramic tiles is a job serious enough to not be sure of your drill bits. I have used many of these, from cheap Home Depot tools to Bosch for small holes and diamond drill bits for hard work and am happy to share my experience with you.

Bosch carbide tipped tile drill bits are quite inexpensive, but high quality tools. These work really well if you keep a spray bottle to keep them from overheating. Bosch bits drill porcelain pretty good, and I can feel them grind through. The tip is sharp and prevents wandering and walking of the bit. 1/8″, 3/16″, 1/4″, 5/16″ bit set will cover most of your needs. I always use an 1/8″ to start, then move up in diameter.

what is the best drill bit for porcelain tile
Bosch Carbide Tipped Glass, Ceramic and Tile Drill Bit Set – one of the best answers to “what is the best drill bit for porcelain tile” question

My colleagues use a spring punch to mark the hole with a small chip in it, but I usually don’t because of worry about cracking a tile, even it is a very slight risk.

Once I drill through the tile, I switch to a regular masonry bit and set the drill up to full speed but without using the hammer mode. Very rarely when the wall is very tough, I have to use hammer keeping it steady and straight to prevent damaging the tile.

Yeah, all the bits, even expensive don’t last forever. But high-quality ones last long, I have had mine quite a while and most of them are still sharp enough.

For occasional use you can also use cheaper bis such as this 10 Pieces ceramic tile bits set that comes in sizes 1/8, 5/32, 3/16, 1/4, 5/16, 3/8, 1/2″. A larger range of sizes may be useful, while a slightly lower quality may be acceptable if you rarely drill tiles.

best drill bit for tile
10 pieces masonry drill bit set for tile

I was also using the Ryobi porcelain bits, but they didn’t hold up for more than a four or five holes.

Best drill bit for ceramic tile

best drill bit for ceramic tile
Bosch natural stone tile set – best choice for ceramic tile

Drill bits for ceramics and porcelain differ, check the specifications of the tool to make sure it is specifically designed for ceramics.

I’ve had good results with Bosch “Natural Stone Tile” drill bits on hard ceramic tiles. As usual, spray bottle required. Drill carefully, don’t overheat and this bits will chew thru tile in seconds. Having someone else spray the water helps a lot.


Best Diamond Drill Bit for Porcelain Tile

I prefer to use a porcelain bits with electroplated diamonds. You need to drill with them at a low RPM and a lot of water. Make the tile surface wet, hold the chuck of the drill between your thumb and forefinger starting at a nearly 45º angle. Touch the tile with spinning bit, it will prevent the tool from skipping across the surface.

After the little lip is started cutting, work further on 90 degrees to the tile. Ask your colleague to shoot a stream of water into the surface your grinding through.

My favorite diamond bits for porcelain are Neiko. These work good for porcelain, ceramic, glass and marble as well, and they are strong enough to make the hole in the toughest tile!

best diamond drill bit for porcelain tile.jpg
Neiko Diamond Hole Saw Drill Bit Set – Best Diamond Drill Bit for Porcelain Tile

Hole saws with pilot bits do not work properly on tile. They are designed for stone and clay. On porcelain the carbide bit often pops out. So hole saws CAN work but they work slow and their edge can easily crack the tile. And even with these use squirt bottle shooting water every few seconds into the hole.

Diamond tipped core drill bits are designed for drilling at moderate speed with plenty of water. All you need – just start at an angle and don’t overheat them.

diamond bit for porcelain
1/4″ Inch Diamond Core Drill Bits for Porcelain and Ceramic Tile

I’ve also had decent luck with the Milwaukee diamond drill bits. I’ve made a lot of holes with them at slow speed and keeping them wet with spray. Surely if you are professional, you should have a cache of bits that are sometimes hard to get locally more than 2-3 at a time. Many fresh bits as you go will save lots of time. Way worth it.

Tips and Tricks

If your task is really difficult and (or) you want 100% confidence in the results, make a template of the hinge holes out of plywood or plastic sheet. Find the position on the wall and fix the template on the tile with a hot glue. Insert your bit or hole saw into the holes and at a 90 degree angle. With an exact layout you don’t have to worry about the bit wondering and your holes will be perfectly oriented. Even using a bit of masking tape helps a lot because it gives you a way to mark on the tile and stops the drill bit from moving around at the start.

If you drill too fast and press to hard, you can overheat both the tile and drill bit. The bit will dull quickly and heat will rise even more. Tile heating could have it crack.

Avoid drilling too close to the edge of a tile, that also increases the risk of tile damage. Use the drills lower speed and don’t use the hammer function.

To drill through the tile neatly put a bit of masking tape on the location of the holes, this also allows you to mark accurately where you want to drill as well as protecting the tile. Then slowly drill through the tile with a tile/glass bit, use the drills lower speed and do not use the hammer function.

How to sharpen scissors at home (hair, fabric, sewing and manicure)

Anyone has few dull scissors. And of course, most of us saw one of the demonstrations how to sharpen scissors at home with sandpaper, aluminum foil or glass jar. The truth is that all these methods are ineffective and may damage your tool. So if you are not in a desperate situation, take sharpening seriously and your results will be much better.

General principles

Tin foil, glass jar, and sewing pin methods are rather deforming the cutting edge on both sides a bit. It “closes the gap” and make the fit a little tighter between the blades. Therefore the tighter fit actually appears to make your  scissors cut cleaner. But to be honest, this is very difficult to say for sure, especially considering that scissors are rarely completely dull in the beginning.

how to sharpen scissors
A high-quality sharpener in most cases is the actual answer to the question “how to sharpen scissors” – check the price of a folding pocket diamond sharpener

If you do not want to devote some time to manual sharpening, just purchase a special set. Even the the cheapest kit will be more effective than a sewing needle. Some knife sharpeners can be used on scissors, we’ll discuss it below.

The most versatile method is using a stone or file. Just buy a small whetstone or diamond sharpener and slide the blade back and forth over the scissors.  If this is not difficult, the blades can be previously separated for convenience.

It is a traditional and perfectly acceptable way to sharpen scissors. But be aware that  sharpening the inside grinds of the blades may damage any pair of scissors by helping ensure the cutting edges not meet as the blades are closed. It takes pretty much attention to detail and possibly readjustment of the curvature and pivot of the blades.  If you use use a stone, it’s much safer to grind the outside facing bevels.

If you’ve never tried it before, find few pairs of dull cheap scissors, try and see how they stack up.

Sometimes it’s convenient to use the triangle rods and sharpen the blades free-hand. Has worked well for me so far.

How to sharpen fabric scissors

For larger scissors like fabric and sewer you may need power tool, such as Tormek edge sharpener or a belt sander on low speed to get controllable and good results. Any device with angle control helps a lot on when you’re doing expensive shears. Also take into account that many scissors have different angles on each blade. Don’t re-engineer them, just sharpen as it comes.

how to sharpen hair scissors
Work Sharp Sharpener – best way how to sharpen scissors at home

Don’t create too smooth edges, play it safe and sharpen no finer than 220x grit. If the blades are too polished they push the fabric out of the blades rather than grab and cut.

Tighten the screw tight enough to be able to cut the fabric that is expected to be cut. The scissors should be tighter for thicker material and looser for thinner. Carbon bladed shears should be dried off real good and you need to apply oil on each pair. If you forget it, you’ll be making rust very soon.

The absolute best way to deburr a fabric scissors is to run the blades through a wooden block and then crunch the rest off while closing them on a paper towel but not each other. It takes off any burr and performs a test cut at the same time.

If the blades do not close after sharpening, you should remove a little height from the stop to allow the tips to meet.

If you want quick results and don’t need to sharpen your tools every day, just use special sharpeners. In any sewing room there are several types of scissors from Fiskars. And I have used the Fiskars sharpeners on the Fiskars scissors for a long time and they worked nice. All you need is to maintain correct the position of the metal on the edge and don’t grind it down.

How to sharpen kitchen scissors

sharpen scissors at home
Sharpen scissors at home with a Sharpal Kitchen tools sharpener

I sometimes sharpen my own kitchen scissor especially those messed up shears when someone uses them to cut through chicken bones with. I don’t thin out the bevel as this will seriously weaken the edge. Actually, scissors do not generally cuts into the material, but works by shearing. So, you do not need a low bevel angle as you do a knife.

I sharpen various kitchen shears by raising the smallest possible burr on the bevel side and deburring on the back after it. Working this way I never mess with the geometry.

Not all scissors can be taken apart, therefore I grind near the edge of my table so that the second blade points downwards out of the table edge.

Sharpening scissor with sharpeners

Of course, the best way to sharpen any tool is to use the proper machinery to exactly duplicate beveled angle and maintain that angle along the entire cutting surface. Almost any household scissors can be sharpened with table top belt sander. Just grind blades on the belt lightly with the cutting edge facing upwards into the downwards moving belt. Several light passes will be just enough to to create a new cutting surface. You can also buy compact sharpener with 30-70 degree angle guides.

As I already mentioned, I have Fiskars scissor sharpener and use it on all my scissors: spring loaded Fiskars, Mundial metal shears and a small pair of snips. I use the tool to sharpen all of them and it works very well. I open the blades close to the handle and squeeze quite hard, as if cutting through several layers of thick cardboard.

how do you sharpen scissors
Universal desktop scissors sharpener – quick and easy way to get the tool sharp

Diamond rods will do great touch-ups on scissors but it usually they are not so good in recreating an edge bevel.

How to sharpen hair scissors at home

When my sister started a beauty school, she started using her scissors. In their intro, the instructor informed students that they will need to send their sheers out to professional sharper and it will cost close to $200.

I consulted about how to sharpen hair scissors at home with an acquaintance who did this work for about five years in salons. And my friend said, that sharpening shears costs about $25 per pair almost everywhere in US and evan super great rep sharpener hardly can get more than $40.

how to sharpen hair scissors
Professional sharpening of hair scissors is not much cheaper than buying new ones – Professional hair shears

He told me that I’ll ruin the hair scissors with 99% certainty the first time I do it myself. Salon scissors are Japanese convex, barber ones are German style single edge.

Japanese ones have ride lines on the inside and they have to be sharpened properly, the screw usually needs some tweaking, and the angle of the convex face is pretty complex and varies along the length of the blade.

Therefore, for the first time, sharpen hair scissors which can be sacrificed for the sake of experience and (or) there is an opportunity to send them for professional sharpening later. Don’t work with the broad sides, just touch the thin cutting edges, and look really carefully at what you are doing. Study a new sharp scissors, keep it close and constantly look at what you are striving for.

Conclusions

Sharpening scissors is similar to sharpening any other tool. It is a multi step process where each process must be done correctly to perform like new.

This is not rocket science and only requires a little attention and some efforts at first. Plus, you don’t need to invest a lot. A whetstone is sufficient to adjust the cutting edge of your scissors from time to time.

The sharpener makes things easier and if you are not a professional, a $ 10-15 device can solve all your problems.

Handling hair scissors requires a lot of effort and experience, so if it’s not about neat fix of the cutting edge, it’s best to entrust the job to a professional.

Best Shop Vac for Woodworking 2021 – Dust Collection, Fast and Efficient

best shop vac for woodworking dust collection
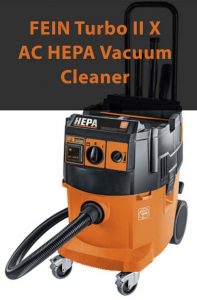
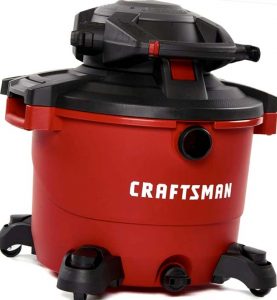
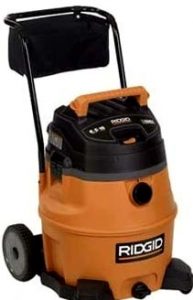
Even having good dust collection system in the shop, you really need to purchase a vac for use as dust collection for small power tools, cleaning up the fine dust here and there without spewing it back out, etc. Best shop vac for woodworking should be quiet with very good filtration, it must be reliable enough to work flawlessly for a long time. It’s great if you can plug your power tools into vac and it will turn on when you turn on the tool. We’ll discuss brands you should consider and give you our recommendations to make informed decision.

If the quality is in the first place: Best shop vac for woodworking brands

The Festool and Fein are the two brands that get talked about the most. Both are expensive quite a bit, but you will be amazed at how quiet they are, and of course, you can plug your power tools into it.

what is the best shop vac for woodworking
Best professional shop vac for woodworking shop – FEIN Turbo II X AC HEPA

One of the best setups you can have is pairing an Oneida Ultimate Dust Deputy with Fein dust extractor. You will mount the deputy atop the vac and roll around together. The set collects all dust and dirt whatever you need, with hardly anything ever making inside the vacuum and into the filter bag.

The Festool vacuums come with very efficient filtration system, and when using the dust deputy, will work for a long time with high suction power. You just empty the deputy when it fills, clean vac filters occasionally and it will work for many years.

Another fact not mentioned is that the higher price vac do not use the air pulled in by the vacuum to cool the motor. On these type vacs the motor is cooled by it’s own fan and does not overheat if the airflow is restricted through your vac hose.

Festool and Fein are both high-performance vacs. Festool comes with ability to adjust suction at the unit. The older Feins also had this setting, but it is not  available on some newer items. Full suction power is not needed every time you use the vac, but when connected to an Orbit Sander or even drill sander attachment, full suction helps to operate better.

Best intro shop vacs for woodworking

As mentioned earlier, most of the better vacuums out there are much quieter than the cheaper ones that are available. But if you don’t use them 24/7, it is may not be so important.

For example, you can buy a 16g Shop Vac from less expensive brand like Craftsman, 5g bucket with lid, good dust deputy and an iVac switch. This set will save to you literally hundreds dollars. Yes, the set won’t be so quiet, but you can Spend the savings on other goodies.

best intro shop vacs for woodworking
Craftsman – may be the best intro shop vacs for woodworking – check the price

My DIY enthusiastic friend is amazed how well his Dust Deputy works. I saw his system, the deputy works really effective and everything end up in the bucket under it. The vacuum is not even shop vac, but it has HEPA filters, so in fact it works as good as high dollar vacuums.

Apart from a little more noise, this system has another disadvantage. It’s not mobile, but is permanently mounted in the attic of the shop with the pipes and  several inlet ports where needed. The vac does a great job of vacuuming the floor and collecting the dust from the smaller tools.

Best Ridgid shop vac for woodworking

best ridgid shop vac for woodworking
Best Ridgid shop vac for woodworking – 31693 WD1851

I have also seen at work a Ridgid shop vac. According to my feeling, it is much quieter than Craftsman. Another great option is that you can buy a HEPA filter. With an iVac switch and a HEPA filter it costs less than $200 – less than half the cost.

In my opinion, optimal Ridgid vac is 14 Gallon vac, for example Ridgid Wet Dry Vac. It has a rugged construction and with a wet dry vac you will meet the demands of any cleaning job. I do like the pricey vacuums talked about above, Fein, Festool etc., but I Ridgid’s work great enough for occasional work and the customer service is great.

I think, Ridgid vacs are cost effective solution, especially if you have a central collection system for the big tools. And if not, you always can hook up a Ridgid through a DIY Thien top-hat separator on a can setup for your semi-stationary tools. With a separator a bag and HEPA filter will rarely need attention since the top-hat collects all very well.

Conclusions

For a professional who uses shop vac every day Festool and Fein tools are no question choice. There is nothing more more valuable than your health and productivity.

For a DIYer and occasional use cheaper devices may be up to par. You may well run out with more noise and less reliability if you use the device once a month. After all, when using this way it will still last forever, and the impact of dust on your lungs will be less significant than inhaling air near a busy road.

If you really want to get high effective and low cost solution, you really can. Just buy a dust deputy, middle-priced HEPA vac and iVac switch. This set will meet most needs. You can choose any models with needed equipment/features/capacities and save a lot of money.

Forstner Bit vs. Hole Saw: Which One to Use?

Forstner Bit vs. Hole Saw

When I started stuffing my carpentry toolbox, Forstner bit vs. hole saw was quite an important and relevant issue. And now that I have both, I can share my experience with you.

Using Forstner bits

Forstner bits work great for anything needing high precision and a clean finish (see also best Forstner bit set review). They are also more “powerful” and with low speed and feed you can easily cut hardwood where hole saw will end up burning itself. The other pros of a Forstner bit is that it can drill as deep as you need. Of course, a hole saw cuts only as deep as the height of the bit allow.

hole saw vs forstner bit - Irwins are the winner
14-Piece IRWIN Forstner Bit Set – check Amazon

All that is needed is to keep the bit sharp. Of course, anything beats a dull Forstner bit. Blunt edges splinter plywood, and tend to overheat quickly. As a result, the steel deteriorates and even after sharpening the bit does not work well. The best forstner bits will serve you for a very long time, you just need to work slowly and keep the tool sharp.

Fortunately, even if you are a complete novice when it comes to sharpening  tools, you can sharpen a Forstner bits and it won’t take much. Just like a chisel, flatten and smooth the bottom, and then lightly sharpen the angle. It is convenient to use a small and smooth file. And although the bit may not become as sharp as brand new, but the difference will be huge!

Now I have own set of Forstner bits 1/8 – 3-1/4” in size and they are from a different manufacturers that I acquired over the years.

Hole Saw – works great if used properly

Hole saw is very useful instrument for construction and rough work. The tool leaves a rougher finish and worse and has less precision in diameter. It can easily be +/- 1/8″ or even more from the desired size.

I also often use my hole saw kit. Recently work with the tool on my drill press table build. Just put the tool on the drill press and cut the hole. It was chattering while cutting, but did the job with ease.

Hole saw vs forstner bit 2 hole
Jellas inexpensive 19pcs Hole Saws – check the price

The hole saw cuts with more sawing action while the Forstner bit is more like a chisel. After drilling you just split the circular material with a screwdriver or a chisel and remove it.

You can drill out in one go only full depth of the saw. Further cutting becomes a problem, but it is doable. You can also use a dremel bit for cutting wood for final processing. I sharpen bits all the time. But hole saws are pretty cheap so it’s no big loss if its butchered while sharpening.

A hole saw is able to drill precise holes too. You have to account for the actual size of the resulting hole and not the stated size. But I prefer Forstner for fine work and use hole saws mainly for drilling a big starter hole in finished cabinets to cut in receptacles.

I use like Irwin hole saws since they seem to be the most precise. I’ve measured many of them with dial calipers in the store. The Irwin saws are also a lot easier to get the cut-out piece out of the bit after drilling.

Irwin hole saw vs forstner bit tolerance is almost the same
Irwin hole saws are most precise – check Amazon

Conclusion: Forstner Bit vs. Hole Saw

A hole saw is usually used for cutting through holes in thin material. Forstner drills are great for drilling clean, precise holes that can be blind and flat bottomed or go fully through the workpiece.

Hole saws are quite a bit cheaper than a Forstner bits and it does not cut the entire volume of material into shavings. Saw cuts the wood around the perimeter and this is often an advantage – you can make the hole faster and with less effort.

In general, the answer to Forstner bit vs. hole saw question depends on how large of a hole you need. For small diameter holes less than 1 3/4″ I prefer a Forstner bit. Larger diameters are easier to cut with hole saws. They sometimes create a lot of burn marks, so if for a better looking holes I use Forstners too.

With both tool types it is important to clamp the wood to the table whenever possible

Read also our “Forstner bit vs spade bit” article

Forstner Bit vs Spade Bit – How to Make the Right Choice

Forstner Bit vs Spade BitNovice woodworkers often wonder about the advantages and disadvantages of the various tools that can perform similar functions and forstner bit vs spade bit problem is one of the most common.

Should you use a spade bit or forstner one? Which bit will provide the best performance and accuracy? We’ll help you to find answers!


What are they designed for?

Spade bits are mostly used for rough drilling in wood. They are good for faster cutting in construction where tear out doesn’t matter, such as holes in floor joints, studs, etc. The bits are ordinarily available in diameters from ¼ to 1½ inches.

Forstner bits have cylindrical cutter around the perimeter, it helps to guide the bit into the material and shears the wood fibers at the edge of the bore. The cylinder may also have teeth that add more cutting edges to cut faster. Forstners are commonly available in sizes from 0.3″ to 2.0″ diameter. But you can find bits up to 4″ (see also our best Forstner bit set review).
Both Forstner and Spade bits make flat bottom holes. Since both bit types remove a large volume of wood and drill large holes, you shouldn’t go too quick.

If you are going to drill into end grain, neither Forstner bits nor spade ones work very well at the bottom of the hole, when they chop the fibers across the grain.

Forstner Bit vs Spade Bit: cleanliness and precision of the cut

Spade tends to leave quite a messy entry point and starts a bit wobbly and at times. They also tend to cause splintering when they emerge from the workpiece. You can avoid this by finishing the hole from the opposite side, but it takes extra time and effort. So in general, spade bits are and good for rough holes through stock.

A Forstner bit makes holes with much cleaner sides. The bottom is also more clean and flat, so you can make specific depth holes easier. You can think of the Forstner bit as a rotating plane. It “shaves” the hole. But the planes work good only at slow speeds and light pressure. Even then Forstner bits heat up pretty quickly. Toothed bits works quicker, but the result is not so precise.

Thus, if you just want to make a hole, the spade bit will do it quickly, but if you need a consistent diameter hole with smooth sides, use the Fortsner.

Efficiency comparison

Spade bits are intended for high speed use and are most often used with electric hand drills. You can even use them to cut thin aluminum and copper. Spade drill bits also work better with plastics as they are less prone to overheating and melting the material. You can also sharpen and even tune up a spade bit to make a cleaner cut. Sharpening Forstners is much difficult.

Forstners are not high-speed bits at all. With them you should use the slowest speeds. And make sure that you do not apply a lot of pressure when using them, especially when drilling hardwood. You can use Forstner bits in a hand driven drill but they work much better in a drill press because of the extra control of downward force that a press can apply. I use them in a handheld drill too, but I gotta put some weight into it, and clean out the hole more often.

So, when working in rough construction with pine or other soft woods, spade bits are much more efficient. But for fine woodworking I would say spend a little more money and buy some good Forstner bits.

Forstner Bit vs Spade Bit in a drill press

Forstners deliver much better results than spade bit when used in a drill press. A spade bit works like a chainsaw, where a Forstner bit cuts more like a table saw with a fine blade.

With Forstner bits you can drill overlapping holes, and they are the only bits that are suitable for this. They also drill into angled sides vertically, making hole alignment and spacing easier than with any other drill bit. And while even in a drill press, the spade drill works faster, the versatility, precision and cleanliness of the Forstner drill make it the undisputed winner.

Conclusions

The winner of forstner bit vs spade bit question depends on the project, because if you won’t mind shaving the hole down a little bit spade bits are just fine.

Spade bits are much cheaper and good for rough holes through stock. They are flat, compact, and lightweight, you can easily carry them in your toolbox.

Forstner bits chip less, have cleaner cuts but work much slower, are more expensive, take up more space and weigh more.

Due to the complex design and high cost, best Forstner bit set is carried in a box to avoid damaging the cutting edge on the inner cylinder. This is convenient in the workshop, but not at all suitable for those who carry tools with them.

Most times, better to use the Forstner bits in a drill press, whereas the spade is often used in a corded drill.

Best Router Table in 2021: Professional, Combo and Portable

A router table is a useful piece of equipment for woodworking at a garage or shop. Whether you are a professional carpenter or an enthusiast, the best professional router table will make the woodworking easier. It is essential to do some research before choosing the tool that really suits your needs. Where do you get started? Don’t worry, we got you covered!

Best router table

We’ll bring you a comprehensive list of the most advanced router tables 2021. By consulting several specialists and customer reviews, we’ve created  highlighted features along with pros and cons, and the article will help to choose the the most suitable tool for you.

1.1 Best Professional Router Table: KREG Precision Router Table System

The KREG Table System is our top pick as the best professional router table. Its sturdy design and workspace make the tool perfect for larger wood pieces. You will not have to worry about any space limitation as it comes with a large user surface area.

best professional router table
Great professional router table – KREG Precision Router Table System, check the Amazon price

This router table is very versatile. Its system for height adjustment helps in routing with the most precision any level that is convenient for you.

One of the best features of this table is its combination of miter and aluminum T-Track. It enhances the flexibility of your work. Moreover, it comes with numerous safety features such as two feather boards to prevent any accidents.

This professional router table has an excellent build quality. With its stainless-steel material, it can endure much weight.

best router table for the money
Excellent build quality, stainless-steel constructions, safety systems

The tool can collect large amounts of dust and makes cleaning the machine easier. Moreover, this feature also helps to keep your equipment clean and prolong its life.

The table is compatible with most wood routers and comes as a complete set. It includes a router table, steel legs with lockable casters, and a tabletop.

Another amazing feature of this best professional router table is its portability. You can move this router table around effortlessly. In this way, you can avoid carrying heavy wood to the router table each time.

If you are looking for efficient performance, precision, and stability, this router table is for you.

Pros

  • Sturdy surface
  • Portable
  • Adjustable height
  • Dust Port

Cons

  • Expensive, like any professional equipment
  • Fence could be better

1.2 Best Router Table Combo: Bosch Router and Table Combo

If you are looking to buy both an efficient router and a router table, this is the best router – table combo.

Bosch router comes with a powerful 2.3 horsepower motor and a trigger control system in its handle. It offers better control, you can adjust the speed as you desire with a dial between 10,000 and 25,000 RPM.

Great router table combo
Router part of the most convenient router-table combo – Bosch 1617EVSPK Wood Router Tool

The router table in this combo is known to be one of the best ones available in the market. It comes with a router guide, pivot plate, attachment hardware, and many other components.

The table also comes with fine adjustments and is compatible with many routers. The Bosch router is, however, the most advanced router with above table adjustment. The Bosch router comes with threaded holes to to mount this fixed-based machine on to the Bosch router table quick and easy.

best router and table combo
Table for the most convenient router and table combo – Bosch RA1141 Portable tool

The router guide that comes with this router and table combo makes an excellent addition. It adds more versatility to the router.

You can also convert this router guide into a circular guide. It allows you to make precise arcs and circles of about 32 inches into your woodwork.

Pros

  • Stable and sturdy
  • Efficient router
  • Adjustable
  • Best compatibility

Cons

  • Expensive
  • Plastic legs

1.4 Best Inexpensive Router Table: Dremel 231 Portable Rotary Tool Sharpener and Router Table

If you are looking for a router table within a lower budget, this is the best inexpensive router table. It is multi-functional and is best for most craftsmen.

Its tabletop provides adequate surface area for your woodwork, taking into account device’s portability. It is also pretty easy to set it up and take it down. Moreover, this tool is lightweight and you can carry it around effortlessly. It is also compact, does not take up much space and is easy to store when you are not using it.

top Inexpensive Router Table
Dremel 231 Rotary Tool Shaper and Router Table – nice inexpensive router table

The Dremel router table also comes with one adjustable fence. Its predrilled holes establish secure connection to any surface that you prefer.

This tool is also very durable and you can also use it to cut wood (see also our related article best Dremel bit for cutting wood), but the small power of the power tool allows to use it only for light woodwork: small cuts, making grooves or slots and sanding items.

You can, nevertheless, accomplish efficient woodwork with this router table. It is one of the top inexpensive router table for light and precision work.

The disadvantage is that the router is compatible with corded and cordless Dremel routers and there is no guarantee that other tools will work with it.

Pros

  • Value for money
  • Good for precise work
  • Adjustable fence
  • Portable

Cons

  • Not very compatible
  • No Dust Ports

Conclusion

A router table enhances the efficiency and safety of your woodwork. The choice of a specific device depends on what tasks you set. Professionals typically require maximum performance, precision and reliability, which is why the renowned Bosch quality is the best fit. For amateurs and craftsmen who work on the road, compact versions are well suited. Go ahead and pick the one that suits your needs and preferences the best!


Best Compact Circular Saw for Woodworking in 2021

It doesn’t matter if you are in the profession or you are looking for tools to set your workshop, a mini circular saw is a must-have. This is a very useful and important tool that you can own in your toolbox. The range of circular saws in the market is simply remarkable, and you definitely can find an option that suits your likings. Your best compact circular saw will enable ease of work and it should be light in weight, easy to carry, and loaded with necessary features to tackle any job.

If you are looking for the best mini circular saw, get ready for a well-informed read!

Corded vs. cordless circular saw

The primary contrasting feature in the debate of corded vs. cordless circular saw is the power source of the tool.

The power source of a corded circular saw is reached through the electric socket. Mechanical power of a corded circular saw is usually much higher than the cordless one, but the usage is restricted by the cord length. So you cannot move around freely as the functionality will depend on the presence of a cord and electric outlet.

Corded vs. cordless circular saw
Makita corded circular saw – one of the best tools on the market! (check the price)

Even though there is mobility restriction, in the power battle of corded vs. cordless circular saw, the corded saw is way ahead in performance. They can be used in the toughest possible situation without any worries.

Though the power output of the cordless circular saws is a bit lower in comparison, they aren’t far behind. The cordless versions can also cut through hard and tough material quite smoothly. For the power output that they deliver, they are quite lightweight and handy.

Another significant point of comparison is the dimensions of the blade. Ideally, for a circular saw to be functional in a wide range of tasks, the blade should be in the range of 32 to 80. This feature is available in both corded and cordless full-size saws. Compact tools are limited in the maximum blade diameter.

circular saw reviews 2020
Great cordless saw from DeWalt

The corded and cordless models both can come with highly powerful motors. To support such a high-power cordless device, you need a good quality battery that runs for a significant duration. This is being successfully delivered in every top-grade model of cordless circular saws. They are also equipped with technology that prevents overcharging and overloading.

Here are a few advantages of both models for better clarity.

Advantages of a corded circular saw

  • Highly powerful
  • Continuous functionality without a break
  • Perfect work on tough materials
  • Durable and long-lasting

 Advantages of cordless circular saw

  • Battery operated
  • Light-weight
  • Highly portable
  • Power cut off in case of overloading or overcharging

Best Corded Circular Saw in 2021

The Makita 5007 Mg Magnesium is the best corded circular saw that you could find in the market. The components of the saw are made with magnesium that gives lightness to the machine. It also provides a much stronger and ergonomic design to the basic circular saw.

It is driven by 15.0 AMP 5,800 RPM motor. The engineers at Makita have worked hard to create a machine that delivers the true definition of perfection and accuracy with every cut it makes. The power output is simply remarkable, and it will not leave you disappointed in the middle of a task.

Best Corded Circular Saw in 2021
Best Corded Circular Saw in 2021 – Makita 5007Mg Magnesium

The Makita 5007 Mg Magnesium is a true sign of durability and longevity. You can purchase a variety of blades which differ in size, thickness, tooth number and form. Each blade type is designed to perform a specific function, so you can purchase a blade to suit every task.

Apart from its terrific, power-packed performance, this saw also comes with an additional LED light that is adjusted right next to the blade. This feature provides ease of functionality and you can achieve better precision.

The finesse and precision that you get with the tool are quite amazing. Be it plywood or hardwood, with every operation you get is a precise and clean cut.

The only issue that we saw with the machine was the lack of brakes. For a saw that operates at 5800 RPM, having a brake is highly desirable. It takes about a minute to stop the blade without load.

Pros

  • Very fine cutting
  • Lightweight
  • Ease of use
  • The depth and angle adjustment for precision

Cons

  • Lack of brake delays the stopping of the machine
  • The power cord is a bit short in length
  • Manual guard adjustment

Best Cordless Device in 2021

The Worx WX531L Worxsaw is the best cordless circular saw amongst all the other machines available. It comes in a slim and compact design that is not just classy in looks but also quite handy when it comes to usage.

Despite its lightweight, the power of the motor is exceptionally good. It can easily cut through hardwood and plywood, giving a fine and true cut in one go. The machine delivers quite the craftsmanship when it comes to slicing a two-inch stock lumber.

The feature that shines through in this machine, making it the best cordless circular saw, is the one-hand design. It lets you work with ease without facing any pressure or spurts. The vibration-absorbing handle doesn’t let those annoying motor ripples to reach your hand while working.

Best Cordless Circular Saw 2021
Best Cordless Circular Saw in 2021 – WORX WX531L Worxsaw 20V

The slim and compact design of the machine isn’t accompanied by less power output. It delivers a performance equivalent to a full-sized larger saw. The 20 V battery provides long-lasting cutting.

With the Worx saw, you don’t have to pull your hair in understanding the blade adjustments. The company has engineered quite a convenient way of adjusting the blades with ease. The easy-to-use spindle lock lets you change the blades in a snap.

However, one caution needs to be taken while changing the blades. Make sure the battery is not in place when you are changing the blades. The size, cordless design, and high-power motor make this machine a very handy tool for both professional and domestic use. Its excellent portability and maneuverability will make it one of your favorite tools in the workshop.

Pros

  • Cordless design
  • Vibration absorbing handle
  • One hand easy use
  • Great performance
  • Strong motor

Cons

  • Costly blades
  • Turning on is a little inconvenient due to safety features

Best Compact Budget Saw

If you are considering buying the best compact budget corded circular saw, then the Worx Worxsaw 4-1/2” makes a perfect choice. It is one of the most efficient power saw in this category.

It is one of the most amazing machines that you can find in the category of compact circular saws. It is quick and highly convenient to use. The small handle and compact size provide a comfortable grip that lets you work with ease.

great compact circular saw
Best corded compact circular saw – WORX WORXSAW 4-1/2″ WX429L

The blade is strong enough to cut through hard and tough materials. It comes with a 24-tooth carbide blade with a 4-1/2-inch dimension. The machine is durable, but the longevity is still a bit questionable.

The Worx Worxsaw 4-1/2” is a great choice for people who like indulging in light crafts at home. It is a perfect tool for carrying out some repairs at home or fixing things. The cuts made might not be as straight and accurate as you will achieve from other saws. This is the reason why this saw doesn’t make a great choice for professionally accurate tasks.

Pros

  • Cheaper tool
  • Ease of use
  • Storage space for the cord

Cons

  • Not very powerful and strong
  • Lacks precision
  • It can be a bit slow

Summing up

After this elaborate read, one thing is very clear that if you work with the saw every day, a corded tool has a lot more advantages than cordless one, especially in terms of power output.

With technical advancements and improvements, a cordless saw has been made to match the power of a corded saw. However, its ability gets restricted by limited battery backup.

The key to making a perfect choice of the best compact circular saw is to analyze the type of work you want to use the saw for and then make a purchase. Depending on your tasks and needs, you can choose a saw with many features. But main characteristics are motor power and battery voltage and capacity for cordless machines. You can also benefit lightweight, laser-guides, an integrated dust system if you really need it.