Diamond Tip Drill Bit for Stone, Tile and Glass Choosing the Best tool 2021

diamond drill bit.jpg
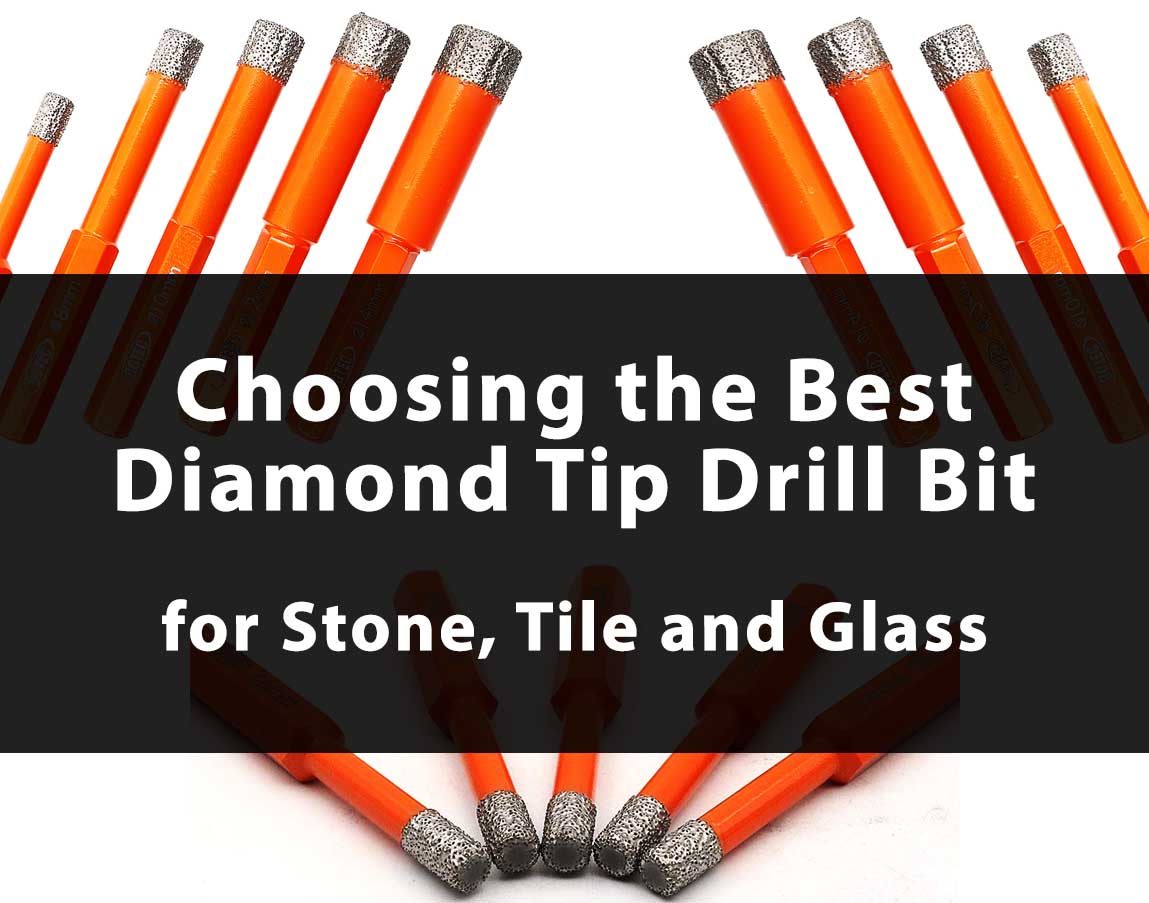
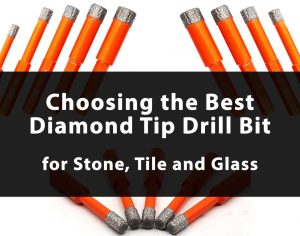
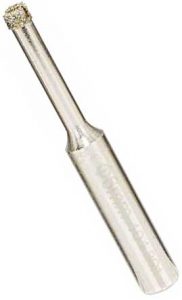
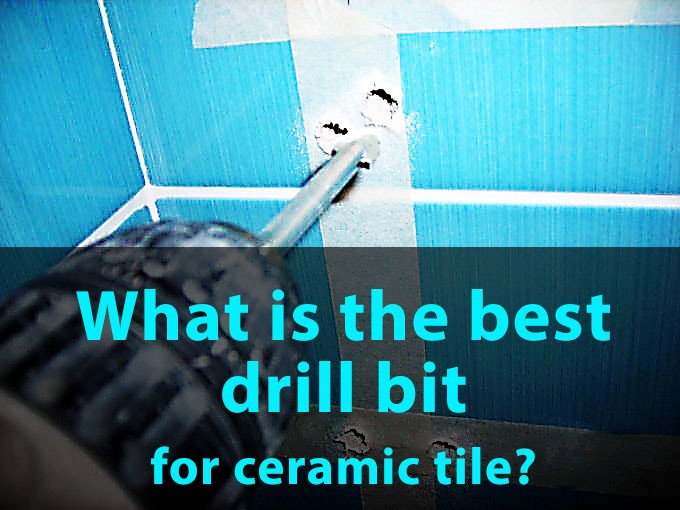
Drilling hard and tough materials such as  porcelain, ceramic, stone, glass, and marble needs some extra cutting power. Twist diamond tip drill bits have little pieces of diamonds embedded in the metal base. Diamond drill bit is particularly useful in bathroom and kitchen applications to make holes in tiles for vanities and mount towel racks. Read our article to find out what tool you should purchase and, most importantly, how to use it correctly.

Diamond Drill Bit: what are they and why do you need them

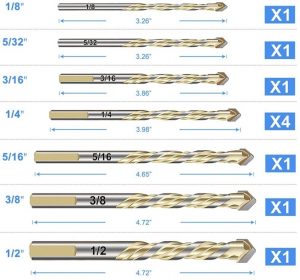
Typical diamond drill bit comes in a range of diameters up to 2″. Larger holes are made with core bits (read our best diamond hole saws review).

diamond tip drill bit
Diamond tip drill bit set – BGTEC 6/8/10/12/14mm with hex shank

Into the metal structure of the drill bit tip are embedded industrial grade diamonds. Drill bits that cut faster has a shorter lifetime, at a slower rate and proper cooling the life of the tool can be extremely long. The more the number of diamonds, the higher durability is. Light-set bits with less crystals drill more aggressively and wears out faster.


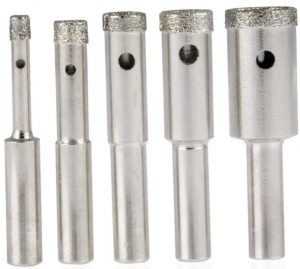
Electroplated, or coated diamonds are bonded to the drill bit using nickel in a single layer,  and although they won’t last as long as sintered, they are a cheaper alternative.

Sintered diamond drill bits – the diamond grit has been bonded to the matrix at very high temperatures and therefore has several layers of diamonds which by dressing or cleaning with an aluminium oxide stone will help maintain the life of your drill bit or burr revealing a new layer of diamonds each time.

 tiny jewelry bits
Tiny jewelry bits

Electroplated diamonds are coated onto the drill bit tip in a single layer,  these are the cheapest and popular tools for DIY and home use. “Sintered” bits have several diamond layers of diamonds and they are expensive professional tools with a long lifespan. Sintered diamond drill bits are popular among stone carvers, sculptors and glass engravers.

Using diamond drill bits on soft plastic and soft wood will clog up the diamonds. Do not use these bits to drill steel and iron, it can chemically react with a carbon in diamonds. Drilling in these materials can be done efficiently with HSS, cobalt and carbide bits (read our cobalt vs carbide drill bits).

Diamond Drill Bits for Stone

diamond drill bits for stone
Diamond drill bits for stone made by Bosch

Drilling the stone is a hard task, and I prefer to use Bosch type diamond tip drill bits. I have drilled a lot of stone tile and they work better than twist bits. With Bosch bits you can even put the bit on the stone and hit back of it with a hand to make a start.

Some handymen use SDS bits without hammering mode, but in my experience they are more prone to cracking and chipping of stone.

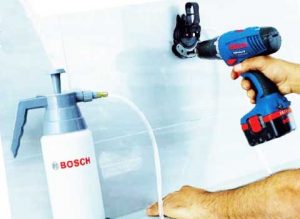
When drilling holes in stone, always cool the drill bit with water and do not overheat it to avoid damaging. It isn’t difficult, just try holding a wet sponge near the bit whilst drilling and moisten the tool with water.

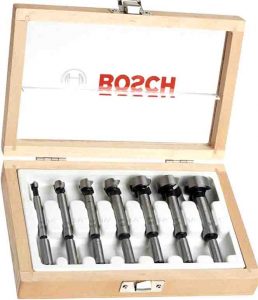
Using centering aid for diamond tip drill bits helps a lot. It saves working time and increases the quality, preciseness and quality of the holes. The tool has a suction cup to place it tightly on the surface provides reliable adhesion. Bosch aid is mostly made of plastic (?3.52 ounces) and comes with the cooling system that works very well with hard stone tiles.

diamond coated drill bit aid
Diamond coated drill bit aid – Bosch Professional 2608598142

Dewalt Diamond Drill Bit

Dewalt Diamond Drill Bit

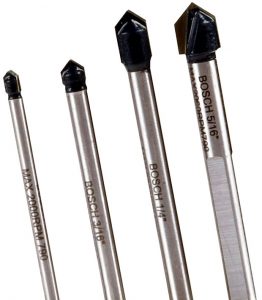
Dewalt Diamond Drill Bit – 5/16″, 5/8″, 3/8″, 3/16″, 1/4″, 1/2″, 1″ or 1 1/3″

Good idea here is to work with the bit submerged in water pool made of a clay ring around the working area.
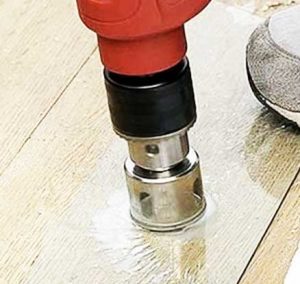
Diamond tip dremel bits are is designed for durability and efficient cooling with reverse spiral thread to deliver continuous water feed for increased speed and dust removal.  The tool is great for drilling in granite and quartz.

drilling in the pool of water
Work in the pool of water with a slow speed and the drill bit will last always forever

Be patient, don’t hurry and keep firm pressure, the bit will do the work under the weight of the drill. You can also use an aid or template to make a start. With a diamond tool you are able to achieve perfect results!

Drilling holes in glass

Before drilling a glass you should check if it is tempered. If it is tempered, do not try to drill it. If you even will edge sand it, the entire pane will shatter into small pieces about 1/4″. Sometimes toughened (not tempered) glass can be successfully drilled, but the balance of the tensile stresses will be interrupted. It may shatter into a pieces at any time.

Nevertheless, you can drill a hole in the glass with diamond bit. Put the glass on straight surface and secure it, make a pool of water or WD40 around the hole. With a lubricated bit, all you need is to take your time and drill with light, constant pressure at a slow speed. Overheating and high force increase the likelihood of cracking or fracturing the glass.

Glass drilling bits set
Glass drilling bits set by Drillpro

Using proper diamond drill bit in drill press and with soft even pressure will definitely give you successful result.

Conclusions

Diamond tools are not that expensive nowadays and they are very effective. In my experience, problems are more often associated with misuse of bits than with bad quality. Try and you will succeed!

Makita chain mortiser: best tool for framing, making dovetails, tenon sides, etc

best chain mortiser
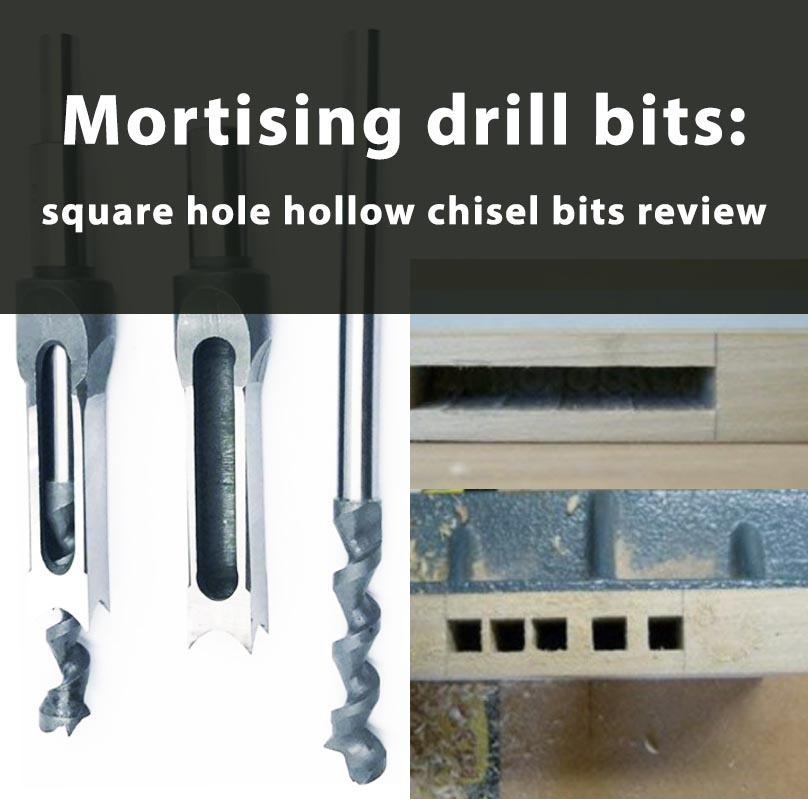
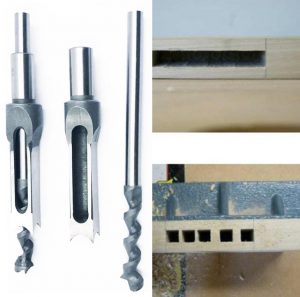
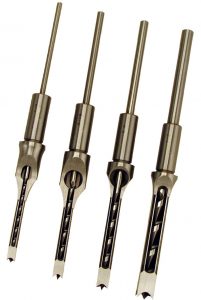
Chain mortiser is a unique tool helping you to do framing quick and effective. It saves more than enough time and efforts to justify its cost of use. Of course, you always can make frame mortises with chisel and drilling work, but your shoulder and wrist joints won’t thank you, especially when you are getting older. Nobody of my professional woodworkers regret buying the chain mortiser. They also use it any time that they need to hog out material – dovetails, sides of tenons, mortises, etc.

Chain Mortiser: Why Do You Need It

chain mortiserTimber framing is very labor-intensive. And if you use only hand tools it gets just crazy. It you need to finish the barn before you get old, use power tools and don’t underestimate the labor involved. I have the Makita chain mortiser, and it’s brilliant and fast. The machine is easy to use and cuts very quick once you have got everything marked up. It’s also no problem to come in from both sides on larger pieces.

A chain mortiser can be a bit intimidating at first, but you’ll get used to it  pretty quick. And although it isn’t often noted for accurate work, you can repeatedly and comfortably use the unit to within 1/8″ on your layout lines with the balance being finished with framing chisels.

Stationary chain mortisers are also widely used in the furniture industry. The horizontal slot mortiser is the best choice for a small shop to produce accurate and repeatable results, even with a novice operator. The low rpm is convenient for horizontal boring and dowel drilling.

The size of mortise required on almost any oak framing is too big (say 40 wide, 150 long and 100 deep in a 200 x 200 beam) for a  mortising attachment and square hollow chisel drill bit. Another advantage of the chain mortiser is mobility. You can’t get a piece of 200 x 200 oak into a pillar drill. With a mortiser, you carry the unit to the post. You can even make a mortices high above the ground, with the machine clamped to a vertical beam.

Of course, you can get a good forstner bit the size required, drill out as much the wood as you possible and pare back the rest with a chisel. Or just use a chain mortiser and do it quickly.

Makita chain mortiser

Even if you only do one project with your Makita chain mortiser and sell it on it will be worth it in the efforts you save. This fantastic tool will save you days and your sanity! 12 amp 100 volt models have enough power to use it without any problems.


makita chain mortiser with replacement chain
Makita 7104L Chain Mortiser

Mafell chain mortisers are top end machines no question, the Festool units are a beast as well. Both are pricey, but the Festool is waaaay tool expensive. The Makita is a little slower but affordable option.

This chain mortiser is productive and reliable machine. You can use it for months and years with tightening and oiling the chain as the only maintenance. The chains are quite expensive, but you can cut each beam for a 30 x 50 foot barn using the original chain. Just let the weight of the unit do the working and don’t force it too much.

Chain mortiser tips and tricks

Do not rush

A chain mortiser is quick and productive tool, and it is possible to do a lot of damage to a timber when you make a mistake with layout. A boring machine or drill drill gives you more time to think. Attentiveness = accuracy, as ever.

Chain sharpening

Mortise chains are expensive and Makita says they can’t be sharpened, but but there are plenty of companies who will do it for you. Just google and you’ll find quite a few.

Safety

A good operator is the best safety. Chain mortiser is a cutting power tool and accidents unfortunately happen.

Reselling

A chain mortiser is an expensive, but easy-to-sell tool. You can build few frames and then maybe resell the unit and lose a couple hundreds on it. Believe me, such a ‘renting’ is something you would gladly do for a couple hundred dollars. Or, if you don’t want to invest (at least temporarily) then a a chisel and drill will be your companions on a trail of misery.

Conclusions

I vote for getting the chain mortiser. The traditional methods are good, I admire and respect, but sometimes you need to conserve your energy for tasks that don’t have power assistance option. And you’ve certainly  seen lots of people looking for used ones so it won’t be a problem reselling it.  The chain mortiser was the first tool I bought other than chisels when I started framing.

I don’t like buying a second hand, but if you are not ready for such investment, carefully check chain condition, locks, etc carefully. A used tool may not look great, but main parts shouldn’t be worn out. If you are buying the first mortiser, look for a brand new one with a warranty.


Best Drill Press Mortising Attachment in 2021: Mortise Drill Press Review

Best Drill Press Mortising Attachment in 2021: Mortise Drill Press Review
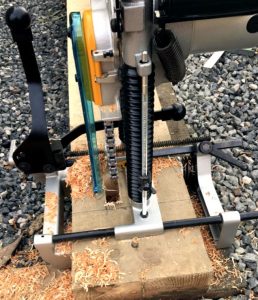
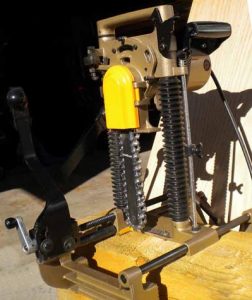
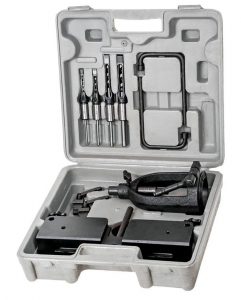
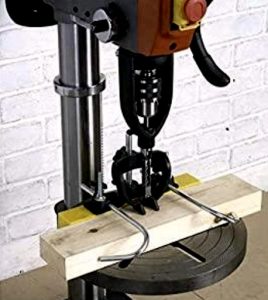
Beginner woodworkers often wonder should the buy a mortising attachment for a drill press or they need a mortizer. Most of professionals who make dozens of mortise and tenon joints a week do not recommend mortise drill press and steer you towards a dedicated device. Nevertheless, I use an attachment on my drill press for occasional use, and it works perfect for what I need to use it for. Read our article to make an informed decision and buy the best attachment for your needs.

Hollow Chisel Mortiser Attachment for Drill Press

Hollow chisel attachments work well for occasional use, especially if you don’t need to work with really hard wood. Yes, a drill press has less leverage and its quill feed mechanism is more on lighter duty side. Therefore, mortising will be harder both fore the machine and your arms. But mortise drill press makes all right and if you are a hobbyist, DIYer or don’t have more shop floor space for a dedicated machine, the hollow chisel mortiser attachment is a good choice. It is also good for beginners. Good attachments last long and you can sell it later to use the money for buying a chain mortiser machine.

Ironton Mortising Attachment

Ironton mortising attachment comes with with four chisel shank sizes: 1/4″, 3/8″, 1/2″ and 5/8″ and works well with a Craftsman 1/2 hp craftsman 34985 and Delta benchtop drill press and others – different size collars for different machines.

I’ve also used the adapter on a 16.5″ Delta stationary press with satisfactory results. My way of using the DP attachment is running the chisel at lower speeds, about 800 rpm and get no smoking whatsoever. It allows to work without burning or any problems and extends the life of the hollow chisel and auger bit. As for the setup time, it takes about 10 minutes to get started. Not a big problem.

drill press mortising attachment.
Ironton drill press mortising attachment.

Ironton mortising attachment is a good starting tool to start getting into mortising. It will allow you to create a square mortise hole with minimal time and effort. Of course, you can’t expect a $60 machine to do the work of a $400 mortiser. Don’t hurry up and don’t expect to quickly carve a large size mortise out of solid hardwood. This tool is able to make nice cuts and may last for many years.

And one more detail. If you have never used mortising attachment, invite a fellow specialist for the first time or watch the tutorial videos on YouTube. Using the machine seems to be quite difficult at first.

Woodstock Mortise Drill Press Kit

Woodstock attachment comes in carrying case with cast iron chisel holder and fence. There are  1/4-Inch, 5/16-Inch, 3/8-Inch 1/2-Inch chisels in the sets, 3 two-piece  and 3 split bushings

mortise drill press
Woodstock D4031 mortise drill press kit

The chisels in the set are roughly machined and need to be sharpened as all cheap ones. The case is on low quality side too, the parts easily pull out of their seats when shaken. And all this for about $190. I think, the Ironton looks better for its money.

Sealey Wood Mortising Attachment

There are three 1/4″, 3/8″, 1/2″ square hollow chisel bits in the Sealey mortising attachment kit, collar diameters are  40, 52, 55, 60 and 65mm.

The set works well so long as you don’t try to over do it. For its $100 anyways. It is fine in pine, even with a biggest chisel upto full depth, but  it struggles a bit in hardwood. The accuracy is descent. The only con of the attachment is a plastic fence. Most of us prefer a cast iron locating rail.

hollow chisel mortiser attachment drill press
Sealey MA10 hollow chisel mortiser attachment drill press

In summary – the attachment does it’s job especially in softwood for the odd job, but if you have a lot to do buy a dedicated Mortiser. And no one will stop you from selling this set on eBay for a few dollars cheaper (see also best mortise chisel set review).

Mortise Drill Press: Conclusions

The main problem with the drill press mortising attachments is set up time. But if you can leave the tool on a drill press full time it’s OK. Besides, for For about $50-60 you probably can’t go wrong. Yes, mortising machines produce better cuts, but I’ve never had any complaints on my drill press. However, I suspect that the use of the attachment on a cheap small presses will cause “flex”, amplify any play in the DP quill and produce a poor cut. But nobody is going to make huge mortises on a compact drill press, right?

Mortising drill bit: square hole hollow chisel mortising bit review

If you want to create mortise and tenon joints quickly and easily, mortising bit is a no-brainer choice. They are not expensive and may significantly reduce labor time and construction costs. Read our review to choose the best mortise drill bit for your project!

Mortising Bit – What it is And How it Works

Mortising drill bits in a common meaning are tools that can drill out a square holes. In fact these bits are used with a “dedicated” mortise machine also known as a hollow chisel. You also can find mortiser square drill bit that works on a drill press (with a mortising attachment).

mortising bit
Mortising bit – the quickest way to make mortise-tenon joint

Basically, mortiser square drill bit is a drill bit that works inside a hollow chisel. A lot of force is needed to push the square chisel in the round hole. The cleanliness of the bottom is similar to Forstner bit. In general, square hole mortiser drill bits work well but they are tedious for large areas.

Choosing Mortise Drill Bit

I’ve purchased mortise drill bit set and use bits a lot. The 1/4″, 5/16″ and 3/8 are the most used. In those sizes, the Powermatic brand bits a pretty good.  I have also had good experience with the bits sold by Woodstock. The Austrian bits made by Delta don’t seem to hold their cutting edge as well.

mortise drill bit set
Great mortise drill bit set – Powermatic 1791096

Powermatic chisels are super sharp, nicely ground and the edges are smooth and straight so you don’t really need to polish and sharpen them. There are minimal burrs on the chisels. The Auger bits inside the chisels are also sharp, and well fitted. Therefore, if you are looking for quality, Powermatic are the best. They produce superior results comparing to anything I have used.

High quality bits are pretty expensive and last long with proper use and sharpening. Some of my colleagues don’t like sharpening and the low price  bits are preferable for them. Indeed, you can just throw the bit in a trash when it becomes dull. The 1/4″ bits heat up and break, whether they cost $30 or $90, if you abuse them too much without cooling down. Using cheaper bits lets you be less careful with them, and you may like it.

mortise bit set
Cheap mortise bit set – twice as many bits for half the price of the Powermatic

Mortise Chisel Bit Tips and Tricks

Sharpening and honing the chisel might make some difference to how the cheap mortise chisel bit perform. So, try to buy a set of cone sharpeners and work with the chisel.

mortise chisel bit sharpener
Mortise chisel bit sharpener SCOTTCHEN PRO

Many of the carpenters I know also polish the outside faces of their square hole mortiser drill bits to reduce friction and make withdrawing them easier. I think, spraying the chisel with a little Dri-Cote won’t hurt either.

Do not overheat hollow chisel mortiser bits. All they build up heat. Let them cool from time to time. Avoid overheating and ruining them, pay attention to their temperature during use. If you overheat even the best bit, it will lose the temper and become useless.

Set up your mortise bit correctly. The auger end should extend the correct distance below the bit. Sharpen both chisel and auger bit. Do not use too large mortiser square drill bit. For example, a small Jet mortiser even with sharp drill bit set struggles with 1/2″ and 3/8″ is it’s comfortable maximum.

Choosing a Mortising Bit: Conclusions

Cheap mortising bits as they come from the store are not ready for use. If you want them to work well they need to be sharpened and polished on the outside of the chisels. It doesn’t take a lot of time but saves much efforts later. Expensive tools are ready-to-use and work better, but you still need to be careful and do not let them overheat.

My advices is to buy cheap bits if you have a good floor stand mortiser. Good powerful and sturdy machine will deal even with a roughly machined chisel. Cheap bits are more cost effective and you don’t have to worry too much about.

If you use drill press with mortising attachment, buy the best bits or you can afford. High quality bits facilitate the work of the equipment. You will need to brace the table and take a good deal of pressure so it will be a workout.

Choosing the best bandsaw for resawing in 2021

best bandsaw for resawing
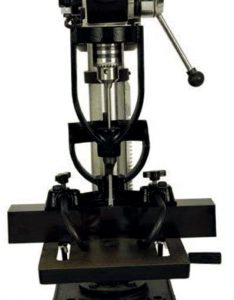
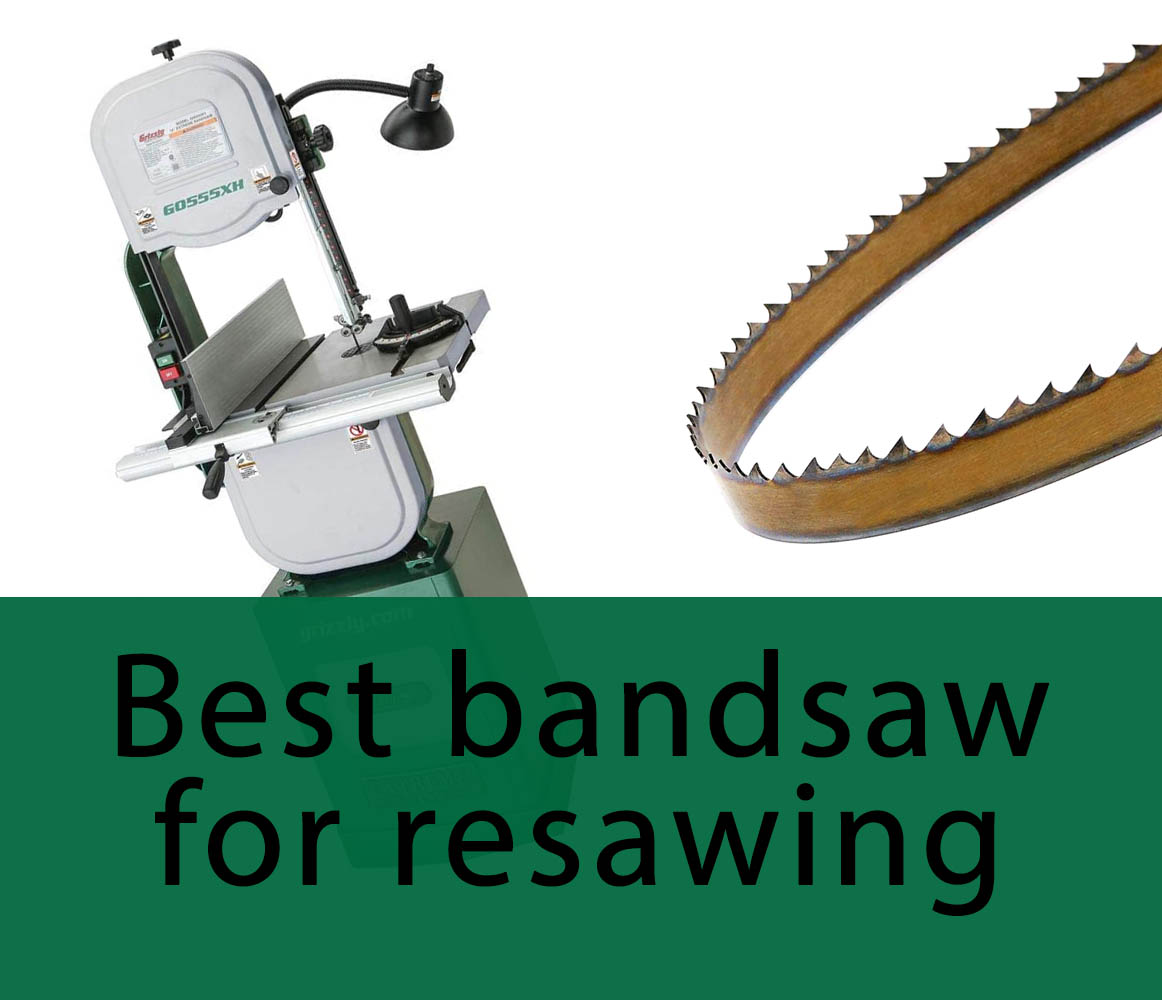
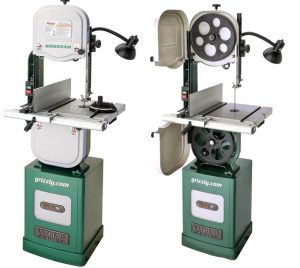
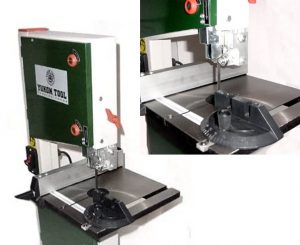
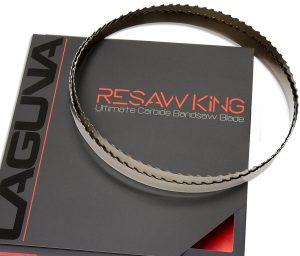
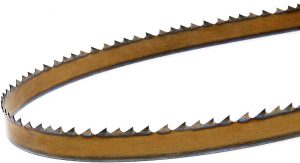
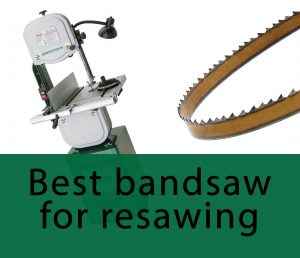
Nothing could be worse using a crappy bandsaw to do a bunch of stuff,  nobody wants struggling and complaining about it the whole time. We’ll help you to find best bandsaw for resawing with a lot of oomph to be super happy with it. And for affordable price.

What is resawing on a bandsaw

Resawing is a pretty common task for woodworking. For example, most cabinet doors are build now days are book matched panels. The best way to thin stock and maintain higher yield for  6/4″ or 8/4″ boards is resawing.

Resawing wood a is cutting a sawn plank into thinner ones with a bandsaw. So you are splitting the thickness of the wood to get two thinner slabs. Although resawing is a type of rip-cutting, however, not all rip cuts are resaws. Resawing cut runs through the wood width and this fact distinguishes bandsaw resawing from bandsaw ripping where the blade runs through the stock’s thickness.

resaw bandsaw
Resaw bandsaw

The bandsaw is far safer than a circular saw, because it doesn’t cause kickback. Bandsaw blade cuts extremely efficient, relatively easily and quickly. It also wastes minimal wood and cutting. All you have to do is cut straight lines.

Best bandsaw for resawing

Big and expensive saws

In my practice nobody has ever told me that the bandsaw he has is too heavy, too powerful or too big. If you resaw large amounts of wood everyday, it’s better to save up and wait for what you want if you can’t afford it now.

And the reasons are:

  1. Resawing puts a whole different performance demand on the tool than just cutting furniture legs or something.
  2. Every time I talk to an friend who bought a tool what “would get the job done at the moment”, it sounds like the machine somehow disappoints them but they don’t want to admit that. Most of cheap bandsaws do their job more or less acceptable, and work for many years without breakdowns. If you really need a better bandsaw, this can be said to be a disadvantage, you get stuck with what you bought.
 what is resawing on a bandsaw
Best bandsaw for resawing – Grizzly Industrial G0555XH 14″ 1-3/4 HP Resaw Bandsaw

In other words, try to focus on what you won’t be getting if you don’t choose wisely.

All of the maid in Italy bandsaws: Mini-Max, Agazzani, Laguna are great  but highly priced. Industrial grade Grizzly saws come with much lower price but nearly as good at a quality and productivity. I would get the biggest Grizzly bandsaw that fit the budget and then put a high quality carbide-tipped resaw blade on it.

Benchtop saws

You should try to get the best bench bandsaw your budget allows, even (in fact, especially) if it is a bench model.

Of course, the large Laguna or Agazzani are a dream machines. But they are too rich for occasional-user blood. Some of the modern benchtop saws are quite good.  In addition, there are often restrictions on the unit size due to lack of workshop space. With limited space, choosing machine size is a tough decision, but my best advice is still to buy the most expensive bandsaw you can afford. If that’s small, try to purchase the best one you can.

Don’t be afraid of the Taiwan-made saws such as the Deltas, Grizzly or Jet. They are pretty good machines for the money if you get one used. But I’d avoid small Craftsman benchtops. Of course, it has good reviews and the price is about $200. But, it is really too small and the motor doesn’t have enough power to do any real resawing. New Ridgid machines look real good and I really like them. Their old band saw models had quite a few bad reviews, the newer models are significantly better.

best benchtop bandsaw
Best benchtop bandsaw – Yukon Tool YTBS10 12 Amp 10-Inch Unit

With low cost units probably you’ll need to make some upgrades, such as installing urethane tires, adding better tension crank and tension spring. Adding a Kreg Bandsaw is also very common.

With a 1/2″ wood slicer such a unit can resaw 6″ veneers  down to 1/32″ thick quickly and very accurate. Adding a riser block kit will rise resaw capacity up to 12″. With an Olsen 1/8″ blade the bandsaw will be able to do tight curves,  bandsaw boxes, or scroll patterns very efficiently, so it will become one of the most used tools in your shop, maybe next to the circle saw.

Best bandsaw blade for resawing

I’ve had the Laguna bandsaw for about five years and have used many blades by different blades. Some of them did well and others not so good.

Some time I’ve just been buying cheap blades from local box store. Of course, they were less than impressive in quality and efficiency. But at $10 per blade you can buy just stockpile a few of each size.

At the end of the experiment I’ve decided that good blade will last longer than cheap junk. And think about how much is your time worth, how much time do you spend changing blunt blades and buying another? I don’t shell out for the best of the best but it’s pretty accurate to say that you get what you pay for. That also depends on what you are using the unit for and what wood you are cutting. Of course, resawing sugar maple will kill a blade  far quicker than resawing poplar. I’ve also found that almost all cheap blades are not exactly the length claimed. For example, I have one 93.5 is closer to 92.5 and required major adjustment to get to fit. Other four blades were within simple tensioning distance.

Therefore, personally prefer to buy middle priced blades. Even if the result is a little more expensive cut, I will benefit in terms of efficiency and quality.

Best blade for resawing on 14″ bandsaw

I read somewhere that 1/2 inch blades are the widest ones recommended for a 14 bandsaw. And in my practice, the 14″ bandsaw is perfectly able to resaw with a 1/2 inch blade.

When I am asked about the best blades for resawing, the first brand that comes to mind is Laguna. These do an excellent job cutting, they cut straight and true. But they are really expensive. As I mentioned above, the highest price does not guarantee the best performance for every dollar spent. So before I load up on expensive blade, I do my own evaluation and comparison. And please, adjust your bandsaw properly, otherwise it will knock out a brand new blade. If the tool is set up correctly a decent quality blade can last a very long time.

best blade for resawing on 14 bandsaw
Best blade for resawing on 14 bandsaw – LAGUNA TOOLS Resaw King with C8 carbide tipped teeth

The one thing you should remember is the saw up to it? What horsepower is your saw and what are you trying to resaw? The 3/4 hp saw will have difficulty resawing. A 14″ 2 horsepower steel frame Grizzly bandsaw resaw with a 1/2 inch blade  with excellent results. It also is able to work with a 3/4″ 3 tooth blade, and  I didn’t feel the need to go with that big of a blade.

I’ve also used Timberwolf blades some of them had weld issues, so I could see them slightly moving backwards and forward (but not side to side, so it  is not so important). Both 1/2″ and a 3/4″ Timberwolf blades works great.

best bandsaw blade for resawing
Good 3/4″ resaw blade for a fraction of Laguna cost – Timber Wolf Bandsaw Silicone Steel

Conclusions

If you are cutting large amounts of wood every day, an industrial band saw from known brand is your best choice. If your budget is tight, used equipment can be a good alternative. But for occasional DIY projects, a compact table saw is fine.

In any case, be patient to spend a lot of time on getting your blade tensioned and squared just right. And you will definitely be nervous when starting to cut material. But in my experience the difference between a band saw with a decent setting and a band saw with a good setting is huge. Spend a decent amount of energy end time on setup and tweaking the saw to get it just right, it will pay off.

Best oscillating tool blades in 2021: saw, cutting, tile and drywall blades

best oscillating tool blades
Best oscillating tool blades in 2021: saw, cutting, tile and drywall blades

I have been using a multimaster tool in my work for around four years and have worn out a lot of blades: Fein, Makita, plenty of cheap Home depot blades, even Imperial blades. Most of them have shown efficiency significantly less than expected, but I’ve created my own set of best oscillating tool blades that includes saw, cutting, tile, drywall blades by several brands. And the set is very reliable and effective.

Types of oscillating tool blades

Sanding blades


best oscillating tool blades
Bosch Starlock Sanding Oscillating Saw Blades – Check the Price on Amazon

In addition to sawing, the multitool can be used for quick sanding purposes. With a wireless tool is especially convenient, you don’t need to dig up the extension cord. Just set the sanding attachment and get it done. Mos of sanding attachments, are available in triangle and circular shapes. Both are good, but I prefer the triangle shapes.

Bosch sander pads are perfectly compatible with Makita, Milwaukee and any Starlock oscillating tool. Some people complain that it melts after overheating, but myne works well. Don’t pushed too hard when sanding with a power tool, it isn’t a manual sanding block. Let the multitool do the work for you.

Best saw oscillating tool blades

best oscillating tool blades
Best oscillating saw blades – 40 PC Accessory Kit that Fit almost any tool

These blades are most common. A straight blades are good for plunge cuts, for linear long cuts better to use a round saw blade. You can also use a wood blades to cut multiple materials, such as drywall, paneling, plywood, etc. But you’ll get the most of your multitool if you use specially designed blade for a specific material.

My advice here is to purchase an accessory kit that fits  Dremel, Milwaukee, Rockwell,  Chicago, Bosch, Fein, Makita, Multimaster, Craftsman and Rigid. If you use a multitool for lots of various works from cutting drywall to cutting nails, this set of well made blades that are pretty cheap and last long if you work with proper material, labeled on each piece. They are good enough to do the job and purchase another set when these will worn out.

Cutting

Cutting blades for multi tool are designed mostly for light work with a soft materials: rubber, carpet, leather, and so on. Cutting blade can also be used for removing old caulk.

Blades for grout removal

best oscillating blades
Best oscillating blades for grout removal – DEWALT DWA4219

An oscillating tool can help you to quickly remove the old grout. The grout removal blades can have carbide or diamond edges. Carbide edged blades are enough for the most of applications. Diamond edged tools are more expensive but run faster and last longer when used with proper cooling.

I prefer to use carbide DEWALT blade for grout removal. This is the best tool to remove old grout. The DeWalt cuts through grout very fast and last long. All you need is a spray bottle to mist the grout line before cutting to avoid fine dust in the air. It holds up pretty well it is the cheapest blade among trustworthy brands.

Polishing

Your multitool can make polishing much easier. You can find different densities pads, just like regular sanding paper. Using polishing pads you can achieve a beautiful polished finish on steel,  chrome, wood and other materials.

Rasping

oscillating saw blades reviews
Best rasping blade in our oscillating tool blades review – Dremel Carbide Rasp

Rasping blades work great for coarse sanding of fillers (read also our drill sander attachment review), wood, concrete, or even bricks. As usual these blades are available in round and triangular shapes, but sometimes you can find finger-shaped one.

My choice here is Dremel carbide rasp. This is a 24 GRIT rasp and the manufacturer picked the 24 grit rating for a good spacing between bits for easy removing debris from the carbide. It’s good, you don’t need to clean the blade every few minutes. With this blade grinding is effective enough and much safer and accurate than using an angle grinder. You can work with concrete, epoxy, mortar, etc.

Best oscillating tool blades by brand

Up until a few years ago, there were a bunch of blades patterns/style. Each brand seemed to have their own hole pattern for the tool attachment. Then the blade manufacturers figured out how to make multiple hole cheme in the blades to fit almost any tool brands.

So, the “universalness” is provided rather in the design of the tool than the blade. Oscillating tool attachments are now a lot more universal than before, even the cheap no name blades. But of course, not all tools and blades are interchange.

Rockwell oscillating tool blades

Rockwell accessory kit

I have Rockwell oscillating tool blades, they are a 10 pack from Amazon for  for about $25. They work efficiently in removing old subfloor glue from joists. I’ve also used them to trim the bottom of the trim around all doorways to slip the laminate under the trim. Just lay a scrap piece of laminate, place the oscillating tool blade on top of it and cut the trim around the doorway at the perfect height. These oscillating blades absolutely cut where and in a way no other sawing tool can.

Imperial Blades

Imperial blades drywall blade
Imperial blades amazing 4-in-1 drywall blade

The only brand of oscillating tool blades I know who makes them in the USA i Imperial Blades. Moreover, I noticed that their blades almost in all of the god lumber yards that I visit. These blades aren’t often sold at big box stores, the price is at about $30 per blade. But after a 10 months of usage, cutting embedded 16d nails out, I still haven’t unwrapped the second blade of the carbide “MetalHead” type that is now called the “Storm CarbideExtreme”. The blade number is “360” for carbide tool and 330, the 340, etc, for titanium coated tips.

I’ve been using another Imperial blades on my Fein tool since they came out. If you look on Amazon, can even find them cheaper than $16. I usually buy them in 5 or 10 at a time, they are cheaper in the set.

Bosch Blades

One alternative to expensive Imperial Blades is one model of Bosch blade with carbide made in Switzerland. The tool is not as long as the Imperial 360, and also isn’t as wide or as thick. But at least there is an option.

Fein oscillating tool blades

fein oscillating tool blades
Fein oscillating tool blades – E-Cut Saw Blade for Wood, Drywall and Plastic

About five years ago I wasn’t spending too much money on tools and Fein oscillating tool blades was the only option for me. And the prices were very high at that time. I should say that switching to the Fein 250 after low power Dremel tool was like going from an old carriage to a brand new Ferrari. It had much less vibration, noise and overall feel.

The Fein 350 or supercut is most likely much better than 250. So in my opinion, buy the best quality you can, you wont regret it. In my experience they last longer, but like any cutting tool, feed and speed make the difference.

Conclusions

Multi tools are a little weird devices that you can’t understand why everyone loves them so much until you own one. And as soon as you purchase one, you start thinking why not doing it sooner: they are really good at making “impossible” jobs very easy!

My advice is to buy best quality blades that are designed for the right type of job. Preferably Imperial Blades, but if you don’t use them every day, something cheaper (Fein or Bosch) will be good. Sure, some cheap noname disposables may be useful but if you try really good blade once, you’ll never look back!

But there is one detail. It’s a bit like choosing a handsaw. If you saw everything, sooner or later you will hit a nail a damage the tool. So, for used plastic and used fence boards buy a cheap saw and throw it away once a month. But if your work with clean wood and need to cut quick and precise, buy a tool of a different class.

What is the best drill bit for porcelain tile

what is the best drill bit for ceramic tile
What is the best drill bit for ceramic tile

Drilling holes in tile wall is a pretty common task. Installing soap dishes and paper rolls hardware, hanging mirrors, etc is all that requires wall anchors and drilling through tile. In most cases you also drill through the cement or bricks behind it to to secure the mount. In our article we’ll help you to find out, what is the best drill bit for porcelain tile.

If your work is urgent and there are no tile bits at hand, you can use a masonry bit. It is harder to start drilling as it tend to wander and move from the starting hole. Using the masking tape helps a lot, but it’s still a bit tricky. Therefore, the tiles bits are a worthwhile investment in my opinion.

What is the Best Drill Bit for Porcelain Tile

I think that drilling ceramic tiles is a job serious enough to not be sure of your drill bits. I have used many of these, from cheap Home Depot tools to Bosch for small holes and diamond drill bits for hard work and am happy to share my experience with you.

Bosch carbide tipped tile drill bits are quite inexpensive, but high quality tools. These work really well if you keep a spray bottle to keep them from overheating. Bosch bits drill porcelain pretty good, and I can feel them grind through. The tip is sharp and prevents wandering and walking of the bit. 1/8″, 3/16″, 1/4″, 5/16″ bit set will cover most of your needs. I always use an 1/8″ to start, then move up in diameter.

what is the best drill bit for porcelain tile
Bosch Carbide Tipped Glass, Ceramic and Tile Drill Bit Set – one of the best answers to “what is the best drill bit for porcelain tile” question

My colleagues use a spring punch to mark the hole with a small chip in it, but I usually don’t because of worry about cracking a tile, even it is a very slight risk.

Once I drill through the tile, I switch to a regular masonry bit and set the drill up to full speed but without using the hammer mode. Very rarely when the wall is very tough, I have to use hammer keeping it steady and straight to prevent damaging the tile.

Yeah, all the bits, even expensive don’t last forever. But high-quality ones last long, I have had mine quite a while and most of them are still sharp enough.

For occasional use you can also use cheaper bis such as this 10 Pieces ceramic tile bits set that comes in sizes 1/8, 5/32, 3/16, 1/4, 5/16, 3/8, 1/2″. A larger range of sizes may be useful, while a slightly lower quality may be acceptable if you rarely drill tiles.

best drill bit for tile
10 pieces masonry drill bit set for tile

I was also using the Ryobi porcelain bits, but they didn’t hold up for more than a four or five holes.

Best drill bit for ceramic tile

best drill bit for ceramic tile
Bosch natural stone tile set – best choice for ceramic tile

Drill bits for ceramics and porcelain differ, check the specifications of the tool to make sure it is specifically designed for ceramics.

I’ve had good results with Bosch “Natural Stone Tile” drill bits on hard ceramic tiles. As usual, spray bottle required. Drill carefully, don’t overheat and this bits will chew thru tile in seconds. Having someone else spray the water helps a lot.


Best Diamond Drill Bit for Porcelain Tile

I prefer to use a porcelain bits with electroplated diamonds. You need to drill with them at a low RPM and a lot of water. Make the tile surface wet, hold the chuck of the drill between your thumb and forefinger starting at a nearly 45º angle. Touch the tile with spinning bit, it will prevent the tool from skipping across the surface.

After the little lip is started cutting, work further on 90 degrees to the tile. Ask your colleague to shoot a stream of water into the surface your grinding through.

My favorite diamond bits for porcelain are Neiko. These work good for porcelain, ceramic, glass and marble as well, and they are strong enough to make the hole in the toughest tile!

best diamond drill bit for porcelain tile.jpg
Neiko Diamond Hole Saw Drill Bit Set – Best Diamond Drill Bit for Porcelain Tile

Hole saws with pilot bits do not work properly on tile. They are designed for stone and clay. On porcelain the carbide bit often pops out. So hole saws CAN work but they work slow and their edge can easily crack the tile. And even with these use squirt bottle shooting water every few seconds into the hole.

Diamond tipped core drill bits are designed for drilling at moderate speed with plenty of water. All you need – just start at an angle and don’t overheat them.

diamond bit for porcelain
1/4″ Inch Diamond Core Drill Bits for Porcelain and Ceramic Tile

I’ve also had decent luck with the Milwaukee diamond drill bits. I’ve made a lot of holes with them at slow speed and keeping them wet with spray. Surely if you are professional, you should have a cache of bits that are sometimes hard to get locally more than 2-3 at a time. Many fresh bits as you go will save lots of time. Way worth it.

Tips and Tricks

If your task is really difficult and (or) you want 100% confidence in the results, make a template of the hinge holes out of plywood or plastic sheet. Find the position on the wall and fix the template on the tile with a hot glue. Insert your bit or hole saw into the holes and at a 90 degree angle. With an exact layout you don’t have to worry about the bit wondering and your holes will be perfectly oriented. Even using a bit of masking tape helps a lot because it gives you a way to mark on the tile and stops the drill bit from moving around at the start.

If you drill too fast and press to hard, you can overheat both the tile and drill bit. The bit will dull quickly and heat will rise even more. Tile heating could have it crack.

Avoid drilling too close to the edge of a tile, that also increases the risk of tile damage. Use the drills lower speed and don’t use the hammer function.

To drill through the tile neatly put a bit of masking tape on the location of the holes, this also allows you to mark accurately where you want to drill as well as protecting the tile. Then slowly drill through the tile with a tile/glass bit, use the drills lower speed and do not use the hammer function.

Best Shop Vac for Woodworking 2021 – Dust Collection, Fast and Efficient

best shop vac for woodworking dust collection
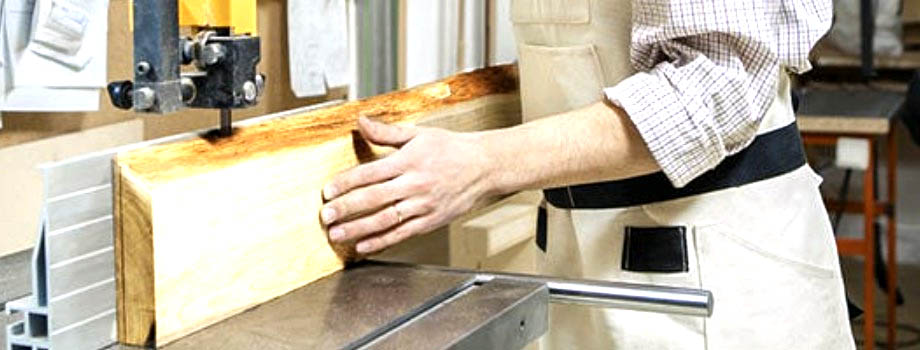
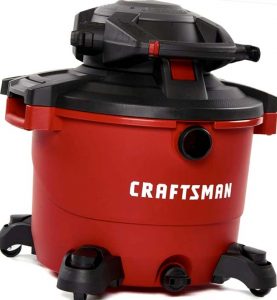
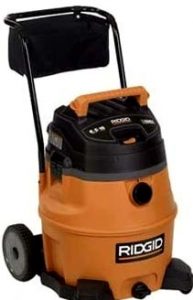
Even having good dust collection system in the shop, you really need to purchase a vac for use as dust collection for small power tools, cleaning up the fine dust here and there without spewing it back out, etc. Best shop vac for woodworking should be quiet with very good filtration, it must be reliable enough to work flawlessly for a long time. It’s great if you can plug your power tools into vac and it will turn on when you turn on the tool. We’ll discuss brands you should consider and give you our recommendations to make informed decision.

If the quality is in the first place: Best shop vac for woodworking brands

The Festool and Fein are the two brands that get talked about the most. Both are expensive quite a bit, but you will be amazed at how quiet they are, and of course, you can plug your power tools into it.

what is the best shop vac for woodworking
Best professional shop vac for woodworking shop – FEIN Turbo II X AC HEPA

One of the best setups you can have is pairing an Oneida Ultimate Dust Deputy with Fein dust extractor. You will mount the deputy atop the vac and roll around together. The set collects all dust and dirt whatever you need, with hardly anything ever making inside the vacuum and into the filter bag.

The Festool vacuums come with very efficient filtration system, and when using the dust deputy, will work for a long time with high suction power. You just empty the deputy when it fills, clean vac filters occasionally and it will work for many years.

Another fact not mentioned is that the higher price vac do not use the air pulled in by the vacuum to cool the motor. On these type vacs the motor is cooled by it’s own fan and does not overheat if the airflow is restricted through your vac hose.

Festool and Fein are both high-performance vacs. Festool comes with ability to adjust suction at the unit. The older Feins also had this setting, but it is not  available on some newer items. Full suction power is not needed every time you use the vac, but when connected to an Orbit Sander or even drill sander attachment, full suction helps to operate better.

Best intro shop vacs for woodworking

As mentioned earlier, most of the better vacuums out there are much quieter than the cheaper ones that are available. But if you don’t use them 24/7, it is may not be so important.

For example, you can buy a 16g Shop Vac from less expensive brand like Craftsman, 5g bucket with lid, good dust deputy and an iVac switch. This set will save to you literally hundreds dollars. Yes, the set won’t be so quiet, but you can Spend the savings on other goodies.

best intro shop vacs for woodworking
Craftsman – may be the best intro shop vacs for woodworking – check the price

My DIY enthusiastic friend is amazed how well his Dust Deputy works. I saw his system, the deputy works really effective and everything end up in the bucket under it. The vacuum is not even shop vac, but it has HEPA filters, so in fact it works as good as high dollar vacuums.

Apart from a little more noise, this system has another disadvantage. It’s not mobile, but is permanently mounted in the attic of the shop with the pipes and  several inlet ports where needed. The vac does a great job of vacuuming the floor and collecting the dust from the smaller tools.

Best Ridgid shop vac for woodworking

best ridgid shop vac for woodworking
Best Ridgid shop vac for woodworking – 31693 WD1851

I have also seen at work a Ridgid shop vac. According to my feeling, it is much quieter than Craftsman. Another great option is that you can buy a HEPA filter. With an iVac switch and a HEPA filter it costs less than $200 – less than half the cost.

In my opinion, optimal Ridgid vac is 14 Gallon vac, for example Ridgid Wet Dry Vac. It has a rugged construction and with a wet dry vac you will meet the demands of any cleaning job. I do like the pricey vacuums talked about above, Fein, Festool etc., but I Ridgid’s work great enough for occasional work and the customer service is great.

I think, Ridgid vacs are cost effective solution, especially if you have a central collection system for the big tools. And if not, you always can hook up a Ridgid through a DIY Thien top-hat separator on a can setup for your semi-stationary tools. With a separator a bag and HEPA filter will rarely need attention since the top-hat collects all very well.

Conclusions

For a professional who uses shop vac every day Festool and Fein tools are no question choice. There is nothing more more valuable than your health and productivity.

For a DIYer and occasional use cheaper devices may be up to par. You may well run out with more noise and less reliability if you use the device once a month. After all, when using this way it will still last forever, and the impact of dust on your lungs will be less significant than inhaling air near a busy road.

If you really want to get high effective and low cost solution, you really can. Just buy a dust deputy, middle-priced HEPA vac and iVac switch. This set will meet most needs. You can choose any models with needed equipment/features/capacities and save a lot of money.

Forstner Bit vs. Hole Saw: Which One to Use?

Forstner Bit vs. Hole Saw

When I started stuffing my carpentry toolbox, Forstner bit vs. hole saw was quite an important and relevant issue. And now that I have both, I can share my experience with you.

Using Forstner bits

Forstner bits work great for anything needing high precision and a clean finish (see also best Forstner bit set review). They are also more “powerful” and with low speed and feed you can easily cut hardwood where hole saw will end up burning itself. The other pros of a Forstner bit is that it can drill as deep as you need. Of course, a hole saw cuts only as deep as the height of the bit allow.

hole saw vs forstner bit - Irwins are the winner
14-Piece IRWIN Forstner Bit Set – check Amazon

All that is needed is to keep the bit sharp. Of course, anything beats a dull Forstner bit. Blunt edges splinter plywood, and tend to overheat quickly. As a result, the steel deteriorates and even after sharpening the bit does not work well. The best forstner bits will serve you for a very long time, you just need to work slowly and keep the tool sharp.

Fortunately, even if you are a complete novice when it comes to sharpening  tools, you can sharpen a Forstner bits and it won’t take much. Just like a chisel, flatten and smooth the bottom, and then lightly sharpen the angle. It is convenient to use a small and smooth file. And although the bit may not become as sharp as brand new, but the difference will be huge!

Now I have own set of Forstner bits 1/8 – 3-1/4” in size and they are from a different manufacturers that I acquired over the years.

Hole Saw – works great if used properly

Hole saw is very useful instrument for construction and rough work. The tool leaves a rougher finish and worse and has less precision in diameter. It can easily be +/- 1/8″ or even more from the desired size.

I also often use my hole saw kit. Recently work with the tool on my drill press table build. Just put the tool on the drill press and cut the hole. It was chattering while cutting, but did the job with ease.

Hole saw vs forstner bit 2 hole
Jellas inexpensive 19pcs Hole Saws – check the price

The hole saw cuts with more sawing action while the Forstner bit is more like a chisel. After drilling you just split the circular material with a screwdriver or a chisel and remove it.

You can drill out in one go only full depth of the saw. Further cutting becomes a problem, but it is doable. You can also use a dremel bit for cutting wood for final processing. I sharpen bits all the time. But hole saws are pretty cheap so it’s no big loss if its butchered while sharpening.

A hole saw is able to drill precise holes too. You have to account for the actual size of the resulting hole and not the stated size. But I prefer Forstner for fine work and use hole saws mainly for drilling a big starter hole in finished cabinets to cut in receptacles.

I use like Irwin hole saws since they seem to be the most precise. I’ve measured many of them with dial calipers in the store. The Irwin saws are also a lot easier to get the cut-out piece out of the bit after drilling.

Irwin hole saw vs forstner bit tolerance is almost the same
Irwin hole saws are most precise – check Amazon

Conclusion: Forstner Bit vs. Hole Saw

A hole saw is usually used for cutting through holes in thin material. Forstner drills are great for drilling clean, precise holes that can be blind and flat bottomed or go fully through the workpiece.

Hole saws are quite a bit cheaper than a Forstner bits and it does not cut the entire volume of material into shavings. Saw cuts the wood around the perimeter and this is often an advantage – you can make the hole faster and with less effort.

In general, the answer to Forstner bit vs. hole saw question depends on how large of a hole you need. For small diameter holes less than 1 3/4″ I prefer a Forstner bit. Larger diameters are easier to cut with hole saws. They sometimes create a lot of burn marks, so if for a better looking holes I use Forstners too.

With both tool types it is important to clamp the wood to the table whenever possible

Read also our “Forstner bit vs spade bit” article

Forstner Bit vs Spade Bit – How to Make the Right Choice

Forstner Bit vs Spade BitNovice woodworkers often wonder about the advantages and disadvantages of the various tools that can perform similar functions and forstner bit vs spade bit problem is one of the most common.

Should you use a spade bit or forstner one? Which bit will provide the best performance and accuracy? We’ll help you to find answers!


What are they designed for?

Spade bits are mostly used for rough drilling in wood. They are good for faster cutting in construction where tear out doesn’t matter, such as holes in floor joints, studs, etc. The bits are ordinarily available in diameters from ¼ to 1½ inches.

Forstner bits have cylindrical cutter around the perimeter, it helps to guide the bit into the material and shears the wood fibers at the edge of the bore. The cylinder may also have teeth that add more cutting edges to cut faster. Forstners are commonly available in sizes from 0.3″ to 2.0″ diameter. But you can find bits up to 4″ (see also our best Forstner bit set review).
Both Forstner and Spade bits make flat bottom holes. Since both bit types remove a large volume of wood and drill large holes, you shouldn’t go too quick.

If you are going to drill into end grain, neither Forstner bits nor spade ones work very well at the bottom of the hole, when they chop the fibers across the grain.

Forstner Bit vs Spade Bit: cleanliness and precision of the cut

Spade tends to leave quite a messy entry point and starts a bit wobbly and at times. They also tend to cause splintering when they emerge from the workpiece. You can avoid this by finishing the hole from the opposite side, but it takes extra time and effort. So in general, spade bits are and good for rough holes through stock.

A Forstner bit makes holes with much cleaner sides. The bottom is also more clean and flat, so you can make specific depth holes easier. You can think of the Forstner bit as a rotating plane. It “shaves” the hole. But the planes work good only at slow speeds and light pressure. Even then Forstner bits heat up pretty quickly. Toothed bits works quicker, but the result is not so precise.

Thus, if you just want to make a hole, the spade bit will do it quickly, but if you need a consistent diameter hole with smooth sides, use the Fortsner.

Efficiency comparison

Spade bits are intended for high speed use and are most often used with electric hand drills. You can even use them to cut thin aluminum and copper. Spade drill bits also work better with plastics as they are less prone to overheating and melting the material. You can also sharpen and even tune up a spade bit to make a cleaner cut. Sharpening Forstners is much difficult.

Forstners are not high-speed bits at all. With them you should use the slowest speeds. And make sure that you do not apply a lot of pressure when using them, especially when drilling hardwood. You can use Forstner bits in a hand driven drill but they work much better in a drill press because of the extra control of downward force that a press can apply. I use them in a handheld drill too, but I gotta put some weight into it, and clean out the hole more often.

So, when working in rough construction with pine or other soft woods, spade bits are much more efficient. But for fine woodworking I would say spend a little more money and buy some good Forstner bits.

Forstner Bit vs Spade Bit in a drill press

Forstners deliver much better results than spade bit when used in a drill press. A spade bit works like a chainsaw, where a Forstner bit cuts more like a table saw with a fine blade.

With Forstner bits you can drill overlapping holes, and they are the only bits that are suitable for this. They also drill into angled sides vertically, making hole alignment and spacing easier than with any other drill bit. And while even in a drill press, the spade drill works faster, the versatility, precision and cleanliness of the Forstner drill make it the undisputed winner.

Conclusions

The winner of forstner bit vs spade bit question depends on the project, because if you won’t mind shaving the hole down a little bit spade bits are just fine.

Spade bits are much cheaper and good for rough holes through stock. They are flat, compact, and lightweight, you can easily carry them in your toolbox.

Forstner bits chip less, have cleaner cuts but work much slower, are more expensive, take up more space and weigh more.

Due to the complex design and high cost, best Forstner bit set is carried in a box to avoid damaging the cutting edge on the inner cylinder. This is convenient in the workshop, but not at all suitable for those who carry tools with them.

Most times, better to use the Forstner bits in a drill press, whereas the spade is often used in a corded drill.