Blog

Best rebar bender: electric and manual rebar bending machines review

manual and electric rebar bending toolIf you have a lot of custom bends and cuts, rebar bender is a GREAT tool. One of my project included bending about 500 braces with 2-3 bends each. I can’t imagine how I’d made this task so quick and accurate without my manual rebar bending machine. Since that time I have had many other bends, and it was so much easier with the tool than with a homemade jig.

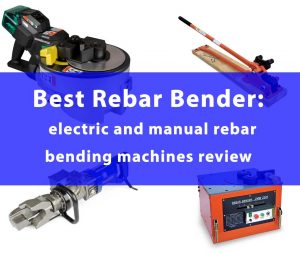
Best rebar bending tools

Manual rebar bender

I don’t really like open jaw manual rebar bender type, cast iron heads,  feeded from either side are better. Anyway, maximum size of rebar to cut and bend with a manual tool is usually 5/8″ grade 60 rebar. You should consider that it’s hard and wont bend a full 90° without taking an extra “bite”.

manual rebar bender
BN Products MBC-16B manual rebar bender and cutter

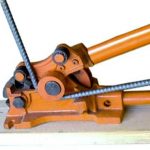
BN Products manual bender and cutter has a long handle and a cam mechanism that with greater leverage. Comes mounted on 2″x8″x60″ wood base with adjustable 2-1/2″ bending roller, replaceable cutting jaws and a lifting ring with chain to make it easier to carry. It is heavy duty device. Even if you buy it for a single project, you can resale this any day of the week after your done with a little discount.

Crescent HK Porter 3/8″ and 1/2″ manual rebar bender is an improved “hickey bar” to bend No3 and No4 rebars. You can regulate the leverage from 21″ to 35″ with a pushbutton. The indexing head helps to grip rebar securely for more convenient work. You can also purchase single-sized No5 and No6 models.

Crescent HK Porter
Crescent HK Porter #3 & #4; #5; #6 tool

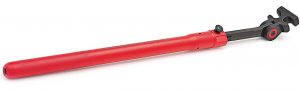
The tool is tough and very versatile. It is able to pivot the head to make bends in tight places in a more convenient way. The extendable handle is an awesome design, allows to set the handle length just right and makes the tool easy to store. The bender provides way better leverage than the other designs available.

Electro- hydraulic rebar bender

In this section, we will discuss a combined electro-hydraulic rebar bender – a machine that uses a hydraulic plunger and an electrically driven oil pump.

There are many tools of this type on the market and almost all of them have a similar design under different brands. One of the best of the hydraulic rebar benders is a Happybuy 800W

hydraulic rebar bender
Happybuy 800W hydraulic rebar bender

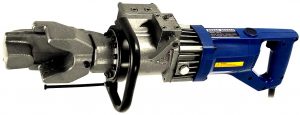
The unit comes with a low noise electric motor that is able to bend #5 grade 60 rebar within 5 seconds. Bending angle is set by adjustable positioning bolt to work with any angle up to 130°. The size and weight allows you to carry and operate the tool with two handles.

With the hydraulic rebar bender there is no need to pull the rebar out of the pit or use a leverage. Just measure and mark the bar and pull the trigger. The only downside is that this thing is hard to carry around. But, nevertheless, it is a fast, simple and efficient unit. The Hitachi tool we will discuss below has no hydraulics (so it’s simpler and more reliable) and has electronic angle adjustment, but it is much more expensive.

Electric rebar bender

Hitachi VB16Y Rebar Cutter/Bender is one of the best portable electric rebar bending machine. And if you really need table bender, you may make table around it pretty easily. But now when we have a lot of bending and cutting to do, I work off of the trailer. Its deck height is a lon more convenient than working off the ground. From the trailer, I make the repetitive turns easier and more accurate.

VB16Y electric portable rebar bender comes with 530W motor and uniformly bends up to No.5 Grade 60 rebar up to 180 degrees angle. Cutting and bending is made in about 3.1s and 5.1 s respectively.

portable rebar bender and cutter
Hitachi VB16Y portable rebar bender and cutter

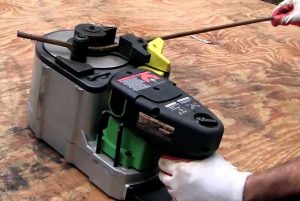
In my opinion, this portable rebar bender/cutter is a must have for any  professional concrete installer. Nothing will beat portability and accuracy of this microprocessor controlled device. Of course, the bigger table top models are nice but at 200 or so pounds the manufacturers version of portable and ours are different.

Tips and tricks

Do not bend the reinforcing bar more than the specified diameter, primarily for reasons:

  • Too small bend diameter can cause damage to the bar which impairs the tensile strength of the bar. Tight bending frequently result in outright fracture and may also result in microscopic damage which is not evident.
  •  Less than ACI/CRSI minimum diameter bends do not reliably perform in concrete. They can lead to excessive crushing of the concrete inside the bend and fracture of the bar.
  • The challenging part is getting the first little bit of the radius to actually be a radius.
  • The more the inner bend diameter, the less force you need. The difference between a 10″ and a 5″ diameters is about 100 tons.
  • Manual tools are good for 1/2″, but if you need to work with a lot of 5/8″, spend the extra money for the hydraulic rebar bender

Conclusions

If you are not professional and make a handful of simple right angles, buying bender not worth it. You always can make a jig or use a tube. An oxy-acetylene torch outfit is good to cut the rebar, and  you can bend BIG rebar when you heat it up with the torch

For regular use my advice is to buy a BN manual bender for a couple hundred bucks, for professional use a Hitachi VB16Y for about $2000 is great. Serious daily bending needs a table top for about $3500.


Diamond Tip Drill Bit for Stone, Tile and Glass Choosing the Best tool 2021

diamond drill bit.jpg
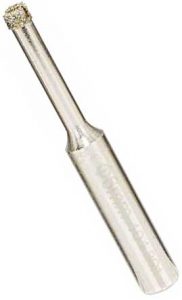
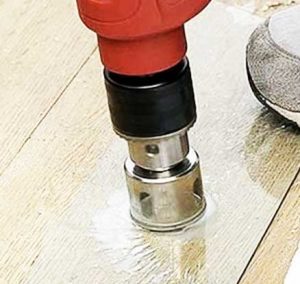
Drilling hard and tough materials such as  porcelain, ceramic, stone, glass, and marble needs some extra cutting power. Twist diamond tip drill bits have little pieces of diamonds embedded in the metal base. Diamond drill bit is particularly useful in bathroom and kitchen applications to make holes in tiles for vanities and mount towel racks. Read our article to find out what tool you should purchase and, most importantly, how to use it correctly.

Diamond Drill Bit: what are they and why do you need them

Typical diamond drill bit comes in a range of diameters up to 2″. Larger holes are made with core bits (read our best diamond hole saws review).

diamond tip drill bit
Diamond tip drill bit set – BGTEC 6/8/10/12/14mm with hex shank

Into the metal structure of the drill bit tip are embedded industrial grade diamonds. Drill bits that cut faster has a shorter lifetime, at a slower rate and proper cooling the life of the tool can be extremely long. The more the number of diamonds, the higher durability is. Light-set bits with less crystals drill more aggressively and wears out faster.


Electroplated, or coated diamonds are bonded to the drill bit using nickel in a single layer,  and although they won’t last as long as sintered, they are a cheaper alternative.

Sintered diamond drill bits – the diamond grit has been bonded to the matrix at very high temperatures and therefore has several layers of diamonds which by dressing or cleaning with an aluminium oxide stone will help maintain the life of your drill bit or burr revealing a new layer of diamonds each time.

 tiny jewelry bits
Tiny jewelry bits

Electroplated diamonds are coated onto the drill bit tip in a single layer,  these are the cheapest and popular tools for DIY and home use. “Sintered” bits have several diamond layers of diamonds and they are expensive professional tools with a long lifespan. Sintered diamond drill bits are popular among stone carvers, sculptors and glass engravers.

Using diamond drill bits on soft plastic and soft wood will clog up the diamonds. Do not use these bits to drill steel and iron, it can chemically react with a carbon in diamonds. Drilling in these materials can be done efficiently with HSS, cobalt and carbide bits (read our cobalt vs carbide drill bits).

Diamond Drill Bits for Stone

diamond drill bits for stone
Diamond drill bits for stone made by Bosch

Drilling the stone is a hard task, and I prefer to use Bosch type diamond tip drill bits. I have drilled a lot of stone tile and they work better than twist bits. With Bosch bits you can even put the bit on the stone and hit back of it with a hand to make a start.

Some handymen use SDS bits without hammering mode, but in my experience they are more prone to cracking and chipping of stone.

When drilling holes in stone, always cool the drill bit with water and do not overheat it to avoid damaging. It isn’t difficult, just try holding a wet sponge near the bit whilst drilling and moisten the tool with water.

Using centering aid for diamond tip drill bits helps a lot. It saves working time and increases the quality, preciseness and quality of the holes. The tool has a suction cup to place it tightly on the surface provides reliable adhesion. Bosch aid is mostly made of plastic (?3.52 ounces) and comes with the cooling system that works very well with hard stone tiles.

diamond coated drill bit aid
Diamond coated drill bit aid – Bosch Professional 2608598142

Dewalt Diamond Drill Bit

Dewalt Diamond Drill Bit

Dewalt Diamond Drill Bit – 5/16″, 5/8″, 3/8″, 3/16″, 1/4″, 1/2″, 1″ or 1 1/3″

Good idea here is to work with the bit submerged in water pool made of a clay ring around the working area.
Diamond tip dremel bits are is designed for durability and efficient cooling with reverse spiral thread to deliver continuous water feed for increased speed and dust removal.  The tool is great for drilling in granite and quartz.

drilling in the pool of water
Work in the pool of water with a slow speed and the drill bit will last always forever

Be patient, don’t hurry and keep firm pressure, the bit will do the work under the weight of the drill. You can also use an aid or template to make a start. With a diamond tool you are able to achieve perfect results!

Drilling holes in glass

Before drilling a glass you should check if it is tempered. If it is tempered, do not try to drill it. If you even will edge sand it, the entire pane will shatter into small pieces about 1/4″. Sometimes toughened (not tempered) glass can be successfully drilled, but the balance of the tensile stresses will be interrupted. It may shatter into a pieces at any time.

Nevertheless, you can drill a hole in the glass with diamond bit. Put the glass on straight surface and secure it, make a pool of water or WD40 around the hole. With a lubricated bit, all you need is to take your time and drill with light, constant pressure at a slow speed. Overheating and high force increase the likelihood of cracking or fracturing the glass.

Glass drilling bits set
Glass drilling bits set by Drillpro

Using proper diamond drill bit in drill press and with soft even pressure will definitely give you successful result.

Conclusions

Diamond tools are not that expensive nowadays and they are very effective. In my experience, problems are more often associated with misuse of bits than with bad quality. Try and you will succeed!

Finding best drywall sander: electric power sanders and sanding poles

I know guys who used pole sanders for the first ten years and power sanders for the last five and they say electric units are better. With an electric sander  the work becomes quicker and less dust gets into the air. If you choose proper tool and use it right, sanding becomes much easier. Read our article to find the best drywall sander and get more efficient at your job.

Best Electric Power Sander for Drywall

With a shop vac, electric devices do the job clean and tidy. You can keep a house clean for the owner and keep dust out of the kitchens, door and window frames. It works very well and help work faster. The sooner you finish the task, the more money you make, isn’t it?

WEN 6369 is the best ?9.2 pounds middle priced drywall sander for hard to reach places. The variable speed 5 Amps motor operates in the 600 to 1500 RPM range. The device performs much better than expected at around $130 price and will pay for itself after the first project.

best drywall sander
WEN 6369 – the best drywall sander for hard to reach places

Telescope handles can reach lengths up to five feet away and flexible dust vacuum hose stretches up to 15 feet. Just use gentle pressure, set an appropriate speed, use correct grit and it will leave you with a beautiful smooth finish ready for primer. When using with a shop vac, about 90% of dust gets to a vacuum bag, which is a real relief.

Porter-cable 7800 is more expensive professional 1400 to 2000 RPM drywall sander with 13 foot vacuum hose. 4.7Amps motor is located on opposite from the head end of handle and provides better control and balance.

Best electric sander for drywall
PORTER-CABLE 7800 – best electric sander for drywall

At 8.5 pounds, this machine is one of the lightest powerful tools on the market. When it’s hot and humid, you just can’t overestimate fast and efficient work of the Porter-cable sander when all the dust goes into the bag and the power sander saves you tons of time. Yes this machine is nearly 3x the cost of a pole sander, but for a professional work it is the best choice. The cheaper models are heavier and put the motor at the head which makes the top heavy and uncomfortable, especially for working all day.

Best Cordless Drywall Sander

Cordless sanders are the future without doubt. You still need to pair the tool with the vac and it can also be battery powered. Some machines have a wireless control allowing users to automatically turn off and on the dust extractor. Remote pairing with the dust vac helps to extend dust extractor battery life without manual control.

Battery powered tool are heavier because of the battery weight, but it is usually located near the handle and it helps to balance the weight. For example, DeWALT DCE800B is 13 pound device with 20 Volts brushless motor that can be used with Dewalt cordless or another shop vac. The price without battery and hose is about $440.

best cordless drywall sander
DeWALT DCE800B  – best cordless drywall sander

In my opinion, cordless drywall sander is the best tool in small remodel applications niche. I see the following uses: paint prep (improve adhesion by sanding and vacuuming at once); drywall patches; flattening veneered walls; finishing flat wooden surfaces.

Best Drywall Sanding Pole

Even if you use the electric sander on all the flat large areas, you often need to use a pole sander on inside corners. Most of the the power devices doesn’t reach all the way there. If you don’t have to sand all day long, pole sanding is not that difficult. Just don’t strain, work measuredly and unhurriedly. I would also not use the power tool for final sanding, the pole one is better at this.

One of the best classic rectangular sander s are made by Columbia taping tools. They are professional units with a reliable and convenient heads with low gravity center to prevent flipping. The paper is fixed with quick clamps for easy install and removal. The surface is equipped with a rubber pad. The locking screw prevents the sander from coming unthreaded while sanding. Overall quality is nice, the head is stable a lot more difficult to flop over on you. The pivot works very smooth, much better than in the cheaper tools.

best drywall sanding pole
Columbia Pole Sanderbest drywall sanding pole head

A round 360 pole sander is also a good tool to try. It is multi-directional, doesn’t flip over and removes a lot of material really fast. Round sanders also have a foam pad behind the hook and loop where the disc attaches. In this way you can get full pressure and press down hard. Extra foam helps redistribute the pressure doesn’t create extreme friction causing the wall tearing.

best drywall pole sander
Full Circle Radius360 Tool – best drywall pole sander

The Radius360 attachment fits a standard extendable Woolster and similar painting poles. You can also attach a shop vac hose to the painters pole, it  will significantly reduce the dust in the air. Sandpaper discs in the pack are pretty cheap and they will last you entire house painting project and more.

Conclusions

When I’ve borrowed my first drywall sander, I thought it was slower that pole. This tool is just like any other new device, you should use the unit for a few days to get used to it and to be more effective. But when you learn to work with this tool, you will never go back to manual sanding.

Deck paint vs stain: finding the best coating for wood, siding and concrete

Deck paint vs stain
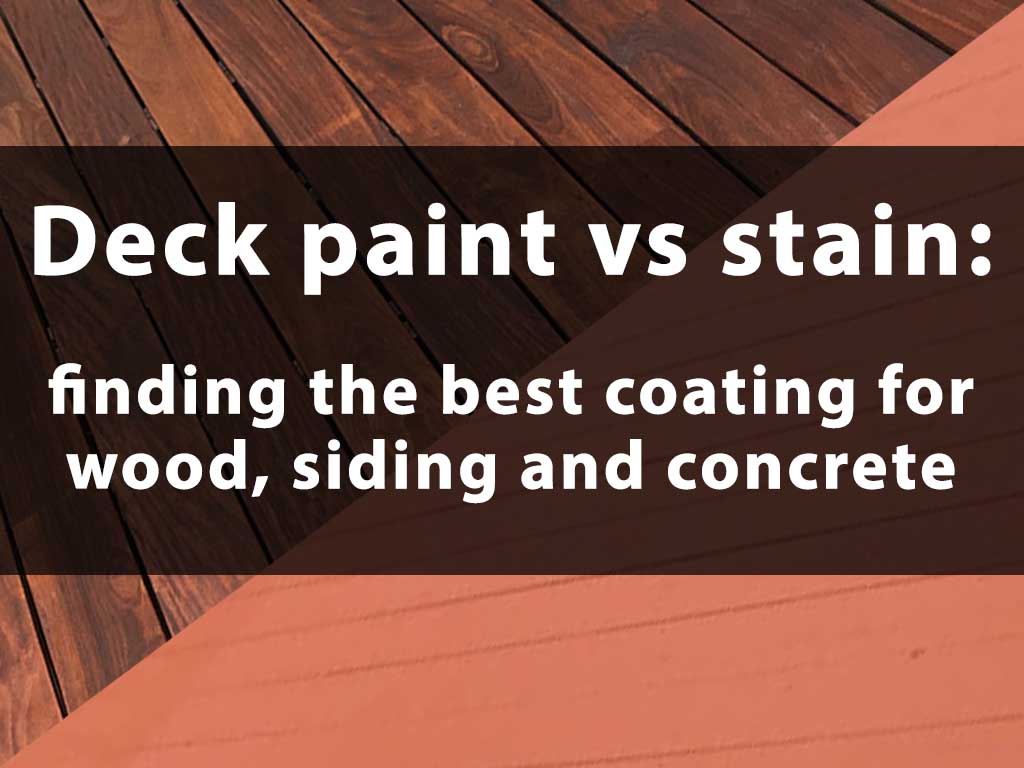
When your deck, siding or floor are exposed to wind, water and especially salty air, they should be protected. In this article we’ll discuss the advantages and disadvantages of deck stain vs paint, their durability, preparation processes and some tips and tricks to help you achieve the best results.

Solid color deck stain vs paint

When choosing a wood finish, you should consider that nothing lasts forever on it. You may expect two or three years of wearability on horizontal and five or more on verticals. Paint and solid deck stain are more tough but tend peel under foot/pet traffic.

Solid color deck stain

Although I’ve seen reviews about solid stain peeling, in my practice it sometimes fades, but never peels! If you’ve tried to remove all of the old paint, you can see why this is extremely valuable. The stain is also easy to spray, brush or clean-up.

Like anything else, the result depends on preparation work. Taking into account harsh seasonal changes it’s unreasonable to think a finish will last five years on the deck, but it will last for a long time if the surface is pressure washed first and sanded as needed. I recommend Cabot solid stains and can’t see them failing unless used on a deck without cleaning.

Oil based deck stain

painting a deck vs staining a deck
Flood CWF-UV – the best answer to the painting a deck vs staining a deck contest

Oil based wood finishes are good for dried out and weather beaten exterior wood. They protect against moisture, mildew and ultraviolet rays damage. Flood series CWF-UV stains are one of the products I have used successfully. It can be easily re-coated without doing much preparation. All you need is to clean and apply another coat.

I prefer cedar or mahogany tones mainly because of the greater, in my opinion, UV protection. Using a little bit of cleaner will help, but usually I simply do a light (about 2200 psi) pressure wash of the surface.

white deck stain vs paint
TWP-1501 Cedar tone VOC Stain

TWP 1501 stain is also one of the best and highest quality wood finish on the market. I used it on my deck and I am 100% satisfied after 2 years. It is a low oil based stain and it’s the only deck stain recognized by the EPA as a wood preservative. It is wear-resistant and blocks UV damage well, especially darker colors. The stain penetrates very well and can be easily applied with a deck brush. I had a good results after preparation cleaning with oxiclean and pressure washing.

Paint

A light coat of brown paint on the deck looks great and naturally. You can  also easily mask some dents and choose any tone to meet your designer ideas, get it made up to match any color of wall paint that you want.

Good paint is pretty wearable but you should be ready that your perfect deck will become less attractive in a few years when the paint will partitionally chip away. And once you’ve applied the paint, staining becomes more labor intensive because of the need to remove all the paint. You’ll need to power wash it and use a hand sander or oscillating tool with sander attachment to to remove the remaining paint. Be sure to wear a mask when sanding treated wood. Nasty stuff in that dust. You may also use a products made especially for peeling paint

White deck stain vs paint

Solid and oil based white stain holds up on both wood and pressure treated wood much better than paint which tends to peel up from the surface. The solid deck stain may peel, but it is less noticeable and you need less prep when applying finish and when it comes time to recoat.

water based white wood stain
Water based white wood stain – General Finishes

The difference between white deck stain vs paint lies in the work principle. The stain penetrates into the wood and the paint lays on the surface. In this way you will achieve good results if use a primer. So, if the wood or PT are dry and well weathered, applying a coat of oil-base external wood primer and two coats of oil paint should give good results. A latex house paint with 1 prime coat and two finish coats will last even longer both functionally and aesthetically.

latex satin white deck paint
Valspar 1500 latex satin white deck paint

Staining exterior wood is fine, priming and painting is also good,  it’s all a matter of the look you prefer. The paint gives off a sheen from high gloss to satin and stain is gonna give you a flat look.

Concrete Pool Deck Stain vs Paint

concrete pool deck stain vs paint
INSL-X Acrylic Concrete Stain Paint

The stain is a penetrating finish and it retains most of the surface roughness. It is questionable, what lasts longer in the concrete pool deck, nevertheless  the stain seems to be better to the touch, but retains more dirt. The paint forms a layer which is better to clean up from dirt, but if the preparation isn’t perfect, it will peel.

Concrete, wood, anything that is steel porous will accept the stain. But it won’t work over something that was already painted.

In my opinion, unless you have good concrete, applying both paint and stain might not be effective. Old concrete will not stop cracking or chipping being treated with a thin layer of stain or paint. Soon enough you will end up with paint and concrete chips. I think, in such cases only rubber tiles  or deck repair will help, but they are much more expensive than a coating of stain or paint.

Tips and tricks

  • There is no need to regularly use a power washer on a deck. A lot of people do it, but as a result they just tear up the wood. Use a washer only as a preparation before using stain or paint and let the chemicals do the work.
  • A roller and brush is the way to apply finish. The roller really pushes the stain into the wood pores and it is what you need. Just be careful with the tool and avoid rolling partial boards to minimize the chance of lap marks.
  • If you your deck boards have fuzzy feel after cleaning, sand them, it wouldn’t hurt. After sanding wash off the dust and wait until drying. Take your time, two or even three days of dry weather will be fine. A couple of dry days after finishing is enough for the coating to gain strength.

Conclusions

Both stain and paint will last long if you prepare the deck well and in accordance with the instructions. I would prefer the stain because it is easier to prepare and reapply. But if the deck is already painted, I would probably repaint it, unless the paint is too loose and easy to remove onto bare wood.

Makita chain mortiser: best tool for framing, making dovetails, tenon sides, etc

best chain mortiser
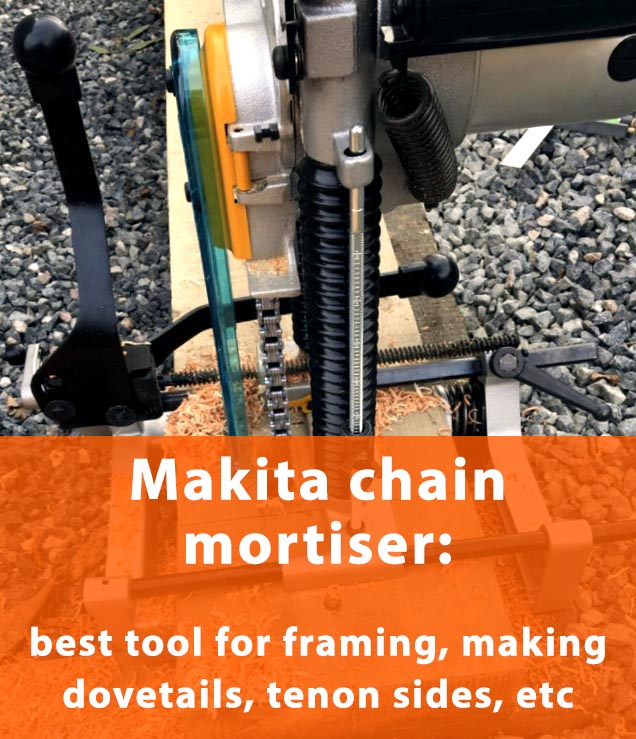
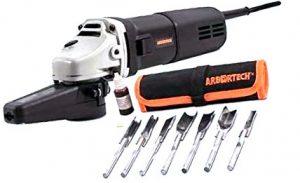
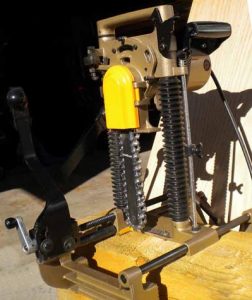
Chain mortiser is a unique tool helping you to do framing quick and effective. It saves more than enough time and efforts to justify its cost of use. Of course, you always can make frame mortises with chisel and drilling work, but your shoulder and wrist joints won’t thank you, especially when you are getting older. Nobody of my professional woodworkers regret buying the chain mortiser. They also use it any time that they need to hog out material – dovetails, sides of tenons, mortises, etc.

Chain Mortiser: Why Do You Need It

chain mortiserTimber framing is very labor-intensive. And if you use only hand tools it gets just crazy. It you need to finish the barn before you get old, use power tools and don’t underestimate the labor involved. I have the Makita chain mortiser, and it’s brilliant and fast. The machine is easy to use and cuts very quick once you have got everything marked up. It’s also no problem to come in from both sides on larger pieces.

A chain mortiser can be a bit intimidating at first, but you’ll get used to it  pretty quick. And although it isn’t often noted for accurate work, you can repeatedly and comfortably use the unit to within 1/8″ on your layout lines with the balance being finished with framing chisels.

Stationary chain mortisers are also widely used in the furniture industry. The horizontal slot mortiser is the best choice for a small shop to produce accurate and repeatable results, even with a novice operator. The low rpm is convenient for horizontal boring and dowel drilling.

The size of mortise required on almost any oak framing is too big (say 40 wide, 150 long and 100 deep in a 200 x 200 beam) for a  mortising attachment and square hollow chisel drill bit. Another advantage of the chain mortiser is mobility. You can’t get a piece of 200 x 200 oak into a pillar drill. With a mortiser, you carry the unit to the post. You can even make a mortices high above the ground, with the machine clamped to a vertical beam.

Of course, you can get a good forstner bit the size required, drill out as much the wood as you possible and pare back the rest with a chisel. Or just use a chain mortiser and do it quickly.

Makita chain mortiser

Even if you only do one project with your Makita chain mortiser and sell it on it will be worth it in the efforts you save. This fantastic tool will save you days and your sanity! 12 amp 100 volt models have enough power to use it without any problems.


makita chain mortiser with replacement chain
Makita 7104L Chain Mortiser

Mafell chain mortisers are top end machines no question, the Festool units are a beast as well. Both are pricey, but the Festool is waaaay tool expensive. The Makita is a little slower but affordable option.

This chain mortiser is productive and reliable machine. You can use it for months and years with tightening and oiling the chain as the only maintenance. The chains are quite expensive, but you can cut each beam for a 30 x 50 foot barn using the original chain. Just let the weight of the unit do the working and don’t force it too much.

Chain mortiser tips and tricks

Do not rush

A chain mortiser is quick and productive tool, and it is possible to do a lot of damage to a timber when you make a mistake with layout. A boring machine or drill drill gives you more time to think. Attentiveness = accuracy, as ever.

Chain sharpening

Mortise chains are expensive and Makita says they can’t be sharpened, but but there are plenty of companies who will do it for you. Just google and you’ll find quite a few.

Safety

A good operator is the best safety. Chain mortiser is a cutting power tool and accidents unfortunately happen.

Reselling

A chain mortiser is an expensive, but easy-to-sell tool. You can build few frames and then maybe resell the unit and lose a couple hundreds on it. Believe me, such a ‘renting’ is something you would gladly do for a couple hundred dollars. Or, if you don’t want to invest (at least temporarily) then a a chisel and drill will be your companions on a trail of misery.

Conclusions

I vote for getting the chain mortiser. The traditional methods are good, I admire and respect, but sometimes you need to conserve your energy for tasks that don’t have power assistance option. And you’ve certainly  seen lots of people looking for used ones so it won’t be a problem reselling it.  The chain mortiser was the first tool I bought other than chisels when I started framing.

I don’t like buying a second hand, but if you are not ready for such investment, carefully check chain condition, locks, etc carefully. A used tool may not look great, but main parts shouldn’t be worn out. If you are buying the first mortiser, look for a brand new one with a warranty.


Best Mortise Chisel Set: important features, sizes, hand chisel sets review

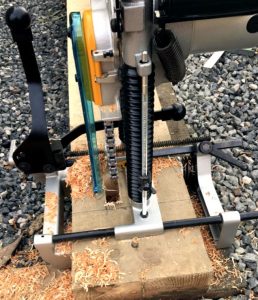
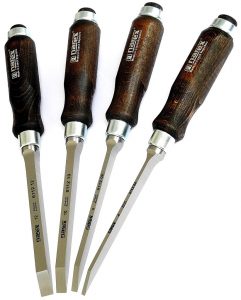
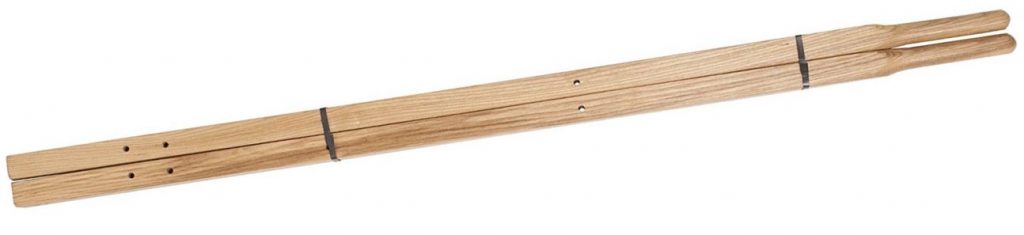
Mortise chisel should have enough thickness to withstand malleting into the wood  and levering out to remove chips. Blade angle of the tool is designed to resist abuse and prevent chipping the blades. They are heavier, come with massive beech or oak handles to take pounding. However, we will help you to find your best mortise chisel set that will be easy to handle and a joy to use. Read our article to make a good decision!

What features should the the best mortise chisel set have

For paring chisels, wear resistance is most important quality, but for mortise chisels, I believe, this feature is somewhat secondary. My opinion is that ability to withstand the pounding trumps its ability to hold a the cutting edge sharp for a long time.

The oval handle helps to keep the blade square to the mortise and the slight relief of the non-parallel blade sides makes it easier to use.

Some carpenters prefer Japanese steel, so they’ll vote for a Japanese mortise chisel. They are easy to sharpen and hold an edge for a long time. 6 mm  Japanese mortise chisel instead of 1/4″ is not a problem, if you’re making a regular mortise and tenon joint, you just set your marking gauge based on your chisel, so whether it’s 1/4″ or 6mm doesn’t matter.

Sash mortise chisels are lighter version of the tool and work good for chopping the relatively shallow mortises. Most common and versatile are heavy duty sash mortise chisels. Having the square chisel section, they are a little less comfortable to use but they are also less expensive and more reliable – good choice for the occasional mortise (see also chain mortiser machine for large volumes of wood and square hollow chisel mortise drill bit for using with a drill press)

Crown Tools mortise chisels

Crown Tools Mortise Chisels are made by reputable European tooling company. The steel is high carbon and not top notch, but they are very heavy duty. The chisels are well built, the sockets and handles are very sturdy. A leather washer is fitted between the blade and handle to absorb shock. The tips dull  with heavy use, but for mortise chisels occasional sharpening is not a problem.

best mortise chisels
Crown Tools 5/8″ Mortise Chisel
hand mortise chisel set
Crown Tools 1/2″ Mortise Chisel

The Crown tools chisels are a good way to start. They are not the best, but you can afford them as a good set of chisels. If sharpened properly and guided by the right hands they are nice tools.

Narex mortise chisel set 2,900

Narex mortise chisel set
Narex mortise chisel set – (4-pcs chrome-manganese Rc59 steel)

I’ve bought the Narex mortise chisel set, and it works fine for me. Keeping it sharp is not a problem at all. I use chisels frequently and rarely have to take the tools back to the stones. While I prefer traditional “pigsticker” handle, Narex handles are easy enough to use. The set was about $75 and it was more than I had budgeted myself. Nevertheless, they are great tools, and they should last me a long time. And I keep HF chisels for riskier work.

The blades are the same thickness and the smaller is taller than wider. They are sharp out of the box but you may made them crazy sharp. I don’t see much sense in this, but many of my friends spend 10 mins per chisel to polish the bevel using fine diamond stone and strop. I think it’s better to quickly knock the non-cutting edges down with stone or sandpaper since all edges are moderately sharp including corners of the shaft.

Narex chisels cut mortises with clean sides and they won’t bend when you lever out the waste. They stay sharp for a long time and leave a shiny surface on the wood end grain of each cut.  Narex cut through hardwood like a hot knife through butter. They are moderately priced, but have similar quality to the most expensive brands and with some care will last just as long.

I would recommend Narex mortise chisel set to anyone as reasonably priced high quality tools.

Tips and tricks

Sharpening

Sooner or later the chisel becomes dull or bump into a nail and you’ll sharpen it.  Make sure that you are not overheating the tip. Moderate heat from grinding won’t be a problem. If the tip is too hard and chips easily, you could heat it and let it cool slow. That would soften the steel up a bit.

What size mortise chisel do I need

In general you’re going to use a tool about 1/3 the width of the mortise stock. In this way for typical 3/4″ mortise you need a 1/4″ (or 6-8mm) chisel. 7/8″-1″ mortises are made with a 5/16″ chisel and thicker than 1″ – a 3/8″ chisel. If you are going to buy two chisels, I recommend to get 1/4″ and 3/8″ tools.

Three chisels set should be 1/4″, 5/16″ and 3/8″. Some carpenters who work with a heavy tables and workbench type pieces, substitute the 1/2″ for the 5/16″.

Conclusions

I am very impressed with Narex chisels. Good steel, sharp from the box, relatively flat backs. I sharpened all 10 in about an hour. The only con is they are metric, but wood sizes don’t really follow rigid standards, nobody really care if it is 10mm instead of 3/8?? See also Mortising drill bit: square hole hollow chisel mortising bit review

Best Drill Press Mortising Attachment in 2021: Mortise Drill Press Review

Best Drill Press Mortising Attachment in 2021: Mortise Drill Press Review
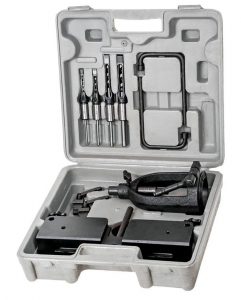
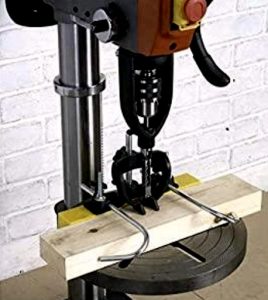
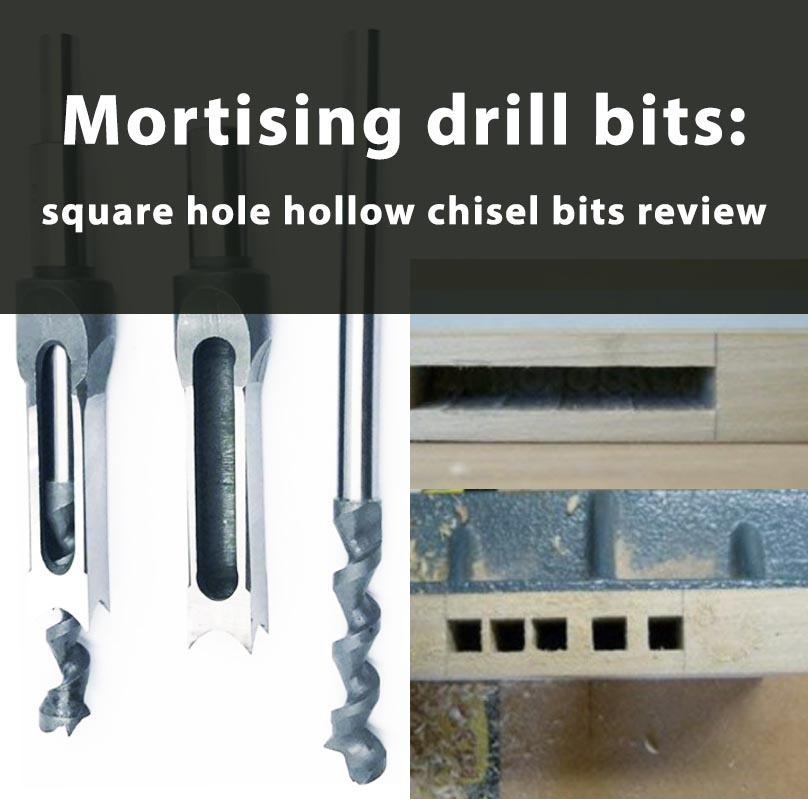
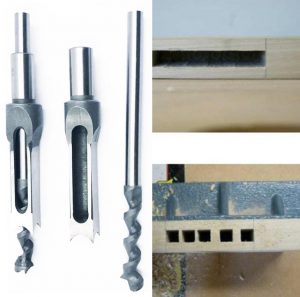
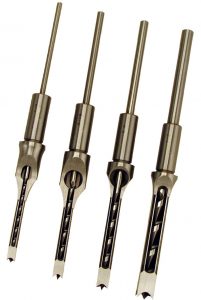
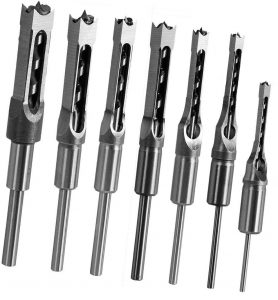
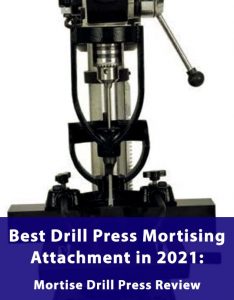
Beginner woodworkers often wonder should the buy a mortising attachment for a drill press or they need a mortizer. Most of professionals who make dozens of mortise and tenon joints a week do not recommend mortise drill press and steer you towards a dedicated device. Nevertheless, I use an attachment on my drill press for occasional use, and it works perfect for what I need to use it for. Read our article to make an informed decision and buy the best attachment for your needs.

Hollow Chisel Mortiser Attachment for Drill Press

Hollow chisel attachments work well for occasional use, especially if you don’t need to work with really hard wood. Yes, a drill press has less leverage and its quill feed mechanism is more on lighter duty side. Therefore, mortising will be harder both fore the machine and your arms. But mortise drill press makes all right and if you are a hobbyist, DIYer or don’t have more shop floor space for a dedicated machine, the hollow chisel mortiser attachment is a good choice. It is also good for beginners. Good attachments last long and you can sell it later to use the money for buying a chain mortiser machine.

Ironton Mortising Attachment

Ironton mortising attachment comes with with four chisel shank sizes: 1/4″, 3/8″, 1/2″ and 5/8″ and works well with a Craftsman 1/2 hp craftsman 34985 and Delta benchtop drill press and others – different size collars for different machines.

I’ve also used the adapter on a 16.5″ Delta stationary press with satisfactory results. My way of using the DP attachment is running the chisel at lower speeds, about 800 rpm and get no smoking whatsoever. It allows to work without burning or any problems and extends the life of the hollow chisel and auger bit. As for the setup time, it takes about 10 minutes to get started. Not a big problem.

drill press mortising attachment.
Ironton drill press mortising attachment.

Ironton mortising attachment is a good starting tool to start getting into mortising. It will allow you to create a square mortise hole with minimal time and effort. Of course, you can’t expect a $60 machine to do the work of a $400 mortiser. Don’t hurry up and don’t expect to quickly carve a large size mortise out of solid hardwood. This tool is able to make nice cuts and may last for many years.

And one more detail. If you have never used mortising attachment, invite a fellow specialist for the first time or watch the tutorial videos on YouTube. Using the machine seems to be quite difficult at first.

Woodstock Mortise Drill Press Kit

Woodstock attachment comes in carrying case with cast iron chisel holder and fence. There are  1/4-Inch, 5/16-Inch, 3/8-Inch 1/2-Inch chisels in the sets, 3 two-piece  and 3 split bushings

mortise drill press
Woodstock D4031 mortise drill press kit

The chisels in the set are roughly machined and need to be sharpened as all cheap ones. The case is on low quality side too, the parts easily pull out of their seats when shaken. And all this for about $190. I think, the Ironton looks better for its money.

Sealey Wood Mortising Attachment

There are three 1/4″, 3/8″, 1/2″ square hollow chisel bits in the Sealey mortising attachment kit, collar diameters are  40, 52, 55, 60 and 65mm.

The set works well so long as you don’t try to over do it. For its $100 anyways. It is fine in pine, even with a biggest chisel upto full depth, but  it struggles a bit in hardwood. The accuracy is descent. The only con of the attachment is a plastic fence. Most of us prefer a cast iron locating rail.

hollow chisel mortiser attachment drill press
Sealey MA10 hollow chisel mortiser attachment drill press

In summary – the attachment does it’s job especially in softwood for the odd job, but if you have a lot to do buy a dedicated Mortiser. And no one will stop you from selling this set on eBay for a few dollars cheaper (see also best mortise chisel set review).

Mortise Drill Press: Conclusions

The main problem with the drill press mortising attachments is set up time. But if you can leave the tool on a drill press full time it’s OK. Besides, for For about $50-60 you probably can’t go wrong. Yes, mortising machines produce better cuts, but I’ve never had any complaints on my drill press. However, I suspect that the use of the attachment on a cheap small presses will cause “flex”, amplify any play in the DP quill and produce a poor cut. But nobody is going to make huge mortises on a compact drill press, right?

Best replacement wheelbarrow handles in 2021: handle kit review

replacement wheelbarrow handlesWhen my neighbor moved, he gave me his old wheelbarrow. It was in a terrible condition, outside probably most of its life. The wood handles were on their way out via rotting and snapped on first heavy load. Nevertheless, solid replacement wheelbarrow handles brought it back to life and it is still in use.

Wooden Wheelbarrow Handle Kit

I prefer go wood handles because all my metal handle kits actually rust through rather quick. Paint rust and chips, just nasty. Good wooden handles don’t rust and will last a long time if the wheelbarrow is not left in the rain all year round. The wood handles are usually a much larger diameter, they are more controllable and a lot more comfortable as well.

wooden wheelbarrow handles

AMES Company wooden wheelbarrow handlesIf you want your wooden handles last for decades, treat them with linseed oil, thinned down a bit with paint thinner. Even if the wheelbarrow sat out in the sun, rain and snow, it will last almost forever. Some wood handles  kits have a coating on them, and I’d sand them a bit enough for the linseed oil to penetrate. The linseed oil almost does not weather away and your abused handles will be in great shape.

True Temper Wheelbarrow Replacement Handles

True Temper wheelbarrows come with a metal bucket and wooden handles, that are thinner than I want. They are quite lightweight but will serve you for years with moderate use.

wheelbarrow handle kit
Wheelbarrow handle kit – True Temper C Series Hardwood

Replacement handles are far better quality, made of hardwood and are more sturdy than the original ones. The finish is very thin and will begin peeling within a few months of sitting outside. Better to sand them out and oil to make them last.

Steel Wheelbarrow Handles

Steel handles are good for those who are rough on a wheelbarrow and the wooden ones did not cut it.

truper wheelbarrow handles - steel ones for really tough use
Truper wheelbarrow handles – steel ones for really heavy loads

If you want to extend working life of the metal, paint the handles and wedges with a rattle to help them survive after some time in the weather. Of course, some of the paint will flake off, but the handles will be in good shape.

Another con of the metal handles is rubber. With time it tend to get gooey and if you remove it, hot or cold handles are not pleasant also. In this respect, wood is always better.

Conclusions

As I mentioned  above, all you need is to buy or make sturdy wooden handles. If you take a few coats of linseed oil before install and once a year do an occasional ‘tuneup’ – it is usually all that is necessary for them to last 50 years 🙂 Oh, and wear good gloves. It protects your hands from lots of bad stuff and makes handles less irritating.


Mortising drill bit: square hole hollow chisel mortising bit review

If you want to create mortise and tenon joints quickly and easily, mortising bit is a no-brainer choice. They are not expensive and may significantly reduce labor time and construction costs. Read our review to choose the best mortise drill bit for your project!

Mortising Bit – What it is And How it Works

Mortising drill bits in a common meaning are tools that can drill out a square holes. In fact these bits are used with a “dedicated” mortise machine also known as a hollow chisel. You also can find mortiser square drill bit that works on a drill press (with a mortising attachment).

mortising bit
Mortising bit – the quickest way to make mortise-tenon joint

Basically, mortiser square drill bit is a drill bit that works inside a hollow chisel. A lot of force is needed to push the square chisel in the round hole. The cleanliness of the bottom is similar to Forstner bit. In general, square hole mortiser drill bits work well but they are tedious for large areas.

Choosing Mortise Drill Bit

I’ve purchased mortise drill bit set and use bits a lot. The 1/4″, 5/16″ and 3/8 are the most used. In those sizes, the Powermatic brand bits a pretty good.  I have also had good experience with the bits sold by Woodstock. The Austrian bits made by Delta don’t seem to hold their cutting edge as well.

mortise drill bit set
Great mortise drill bit set – Powermatic 1791096

Powermatic chisels are super sharp, nicely ground and the edges are smooth and straight so you don’t really need to polish and sharpen them. There are minimal burrs on the chisels. The Auger bits inside the chisels are also sharp, and well fitted. Therefore, if you are looking for quality, Powermatic are the best. They produce superior results comparing to anything I have used.

High quality bits are pretty expensive and last long with proper use and sharpening. Some of my colleagues don’t like sharpening and the low price  bits are preferable for them. Indeed, you can just throw the bit in a trash when it becomes dull. The 1/4″ bits heat up and break, whether they cost $30 or $90, if you abuse them too much without cooling down. Using cheaper bits lets you be less careful with them, and you may like it.

mortise bit set
Cheap mortise bit set – twice as many bits for half the price of the Powermatic

Mortise Chisel Bit Tips and Tricks

Sharpening and honing the chisel might make some difference to how the cheap mortise chisel bit perform. So, try to buy a set of cone sharpeners and work with the chisel.

mortise chisel bit sharpener
Mortise chisel bit sharpener SCOTTCHEN PRO

Many of the carpenters I know also polish the outside faces of their square hole mortiser drill bits to reduce friction and make withdrawing them easier. I think, spraying the chisel with a little Dri-Cote won’t hurt either.

Do not overheat hollow chisel mortiser bits. All they build up heat. Let them cool from time to time. Avoid overheating and ruining them, pay attention to their temperature during use. If you overheat even the best bit, it will lose the temper and become useless.

Set up your mortise bit correctly. The auger end should extend the correct distance below the bit. Sharpen both chisel and auger bit. Do not use too large mortiser square drill bit. For example, a small Jet mortiser even with sharp drill bit set struggles with 1/2″ and 3/8″ is it’s comfortable maximum.

Choosing a Mortising Bit: Conclusions

Cheap mortising bits as they come from the store are not ready for use. If you want them to work well they need to be sharpened and polished on the outside of the chisels. It doesn’t take a lot of time but saves much efforts later. Expensive tools are ready-to-use and work better, but you still need to be careful and do not let them overheat.

My advices is to buy cheap bits if you have a good floor stand mortiser. Good powerful and sturdy machine will deal even with a roughly machined chisel. Cheap bits are more cost effective and you don’t have to worry too much about.

If you use drill press with mortising attachment, buy the best bits or you can afford. High quality bits facilitate the work of the equipment. You will need to brace the table and take a good deal of pressure so it will be a workout.

Choosing the Best Electric Chisel in 2021: Power Chisels Review

best electric chisel
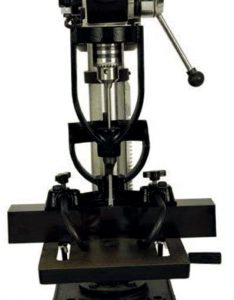
Do you want to do the work a normal hammer and chisel can do faster and easier? The electric chisel will help you to perform a pretty smooth, controllable and continuous carving with perfect depth and direction control. Moreover, you can find many chisel profiles for a decent price and change your chisel blade at the click of a button. Intrigued? Read our article to find out more!

What is an Electric Chisel and how it works

The power chisel uses a reciprocating action, with the user simply guiding the tool during carving. Electric chisels are used to make joints, precise corners, for wood carving, etc.

Carving process is different to shaping (see also best Dremel bit for cutting wood). The carving is achieved by slicing the chisel by pushing it into the wood. On the other hand, a rotary tool shapes wood by its abrasive nature and leaves much rougher finish than hand chisel.

In my opinion, using a power chisel is not “really” carving and nothing is like hand made. However, electric chisels reduce work time and increase productivity in a pleasant finishing phase.

Once again, neither rotary tool, nor electric chisel can’t do everything. Power tools leave machine marks you need to remove, and very fine details like fur, hair and feathers need to be carved by hand chisel.

Power chisels review

Arbortech power chisel

The most common use of Arbortech tool is to take out the bulk of the wood and finish off using the power sanding and hand chiseling for a finer finish. The the tool works really efficiently and is easy to use.

arbortech power chisel
Arbortech power chisel

The chisel is equipped with a 710W motor and the blade makes up to 11000 strokes per minute for continuous cutting even in the hardest wood. The noise and vibration are relatively low for the power. Good news here are for allergists and asthmatics: it makes chips and not dust. The chips are also easier to clean up.

My advice is also to get better chisel pack for a larger variety of uses and cut types. The blades included in the set are of inferior quality, do not hold an edge and need to be sharpen too often.

Of course, it is noisier and heavier than hand chisels. It’s too heavy to hold comfortably for a long time. The wrists became sore after 5-10 minutes and I couldn’t achieve the results I want with this carving chisel. You have to use a little oil every 15-20 minutes. It isn’t a big deal, one way or another you need to rest your hands.

Lighter electric wood carving chisel

An Automach electric chisel is much lighter, less powerful but more convenient for detailed carving. The vibrations are almost invisible, the noise is low too.

The chisel is equipped with 80W motor, the body is made of aluminum. The weight is 1.75 pounds (Arbortech is about 6.4 pounds). Similar to previously reviewed device, the tool keeps blades motionless until pressed against wood. The chisel blade does at 10 000 one millimeter strokes per minute. The set Includes rear switch, 6′ cord, five blades and a hanger.

electric wood carving chisel
Smaller electric wood carving chisel – AUTOMACH Power Carver

This electric chisel is very good for detail work, it changes direction pretty much as you wish it to do, without tear out. And it makes much less stress on wrists, hands and arms. The only downside to this power chisel is that for about 20 minutes it gradually heats up until you can’t hold the tool comfortably. With 2 machines, you can let one cool while working with another.

The gouges included are decent quality, but if you order the Flex-cut Power gouges, it will be a good pairing. All in all the Automach electric chisel worth the price, it is very well made and will last forever for moderate duty tasks.

Power chisel for Dremel or similar rotary tools

You can attach power chisels to a Dremel or another rotary tool (see also best Dremel bit for cutting wood). These chisels are the most compact, lightweight and are the most convenient devices for carving small details. Since they don’t have own motor, the price is the lowest too.

Since the chisels for rotary tools are portable and compact, they are good for cleaning up difficult corners and working in tight places. These attachments are also pretty reliable, usually quite a few flexible shafts need to be changed without any problem with the device itself.

Given the extremely low power of Dremel tools and problems with flexible shafts fitting, my advice is to overpay an extra $50 and buy something like VEVOR Electric Chisel. It is equipped with a 350W variable speed motor and is capable of operating for hours under moderate load.

power chisel for dremel
VEVOR electric chisel with a rotary tool

Conclusions

The choice of an electric chisel depends on the tasks you set for yourself. The more material you need to remove, the more powerful and large the machine should be. At the same time, smaller units are easier to operate, better controlled and better at carving small details.