Best Router Table in 2021: Professional, Combo and Portable

A router table is a useful piece of equipment for woodworking at a garage or shop. Whether you are a professional carpenter or an enthusiast, the best professional router table will make the woodworking easier. It is essential to do some research before choosing the tool that really suits your needs. Where do you get started? Don’t worry, we got you covered!

Best router table

We’ll bring you a comprehensive list of the most advanced router tables 2021. By consulting several specialists and customer reviews, we’ve created  highlighted features along with pros and cons, and the article will help to choose the the most suitable tool for you.

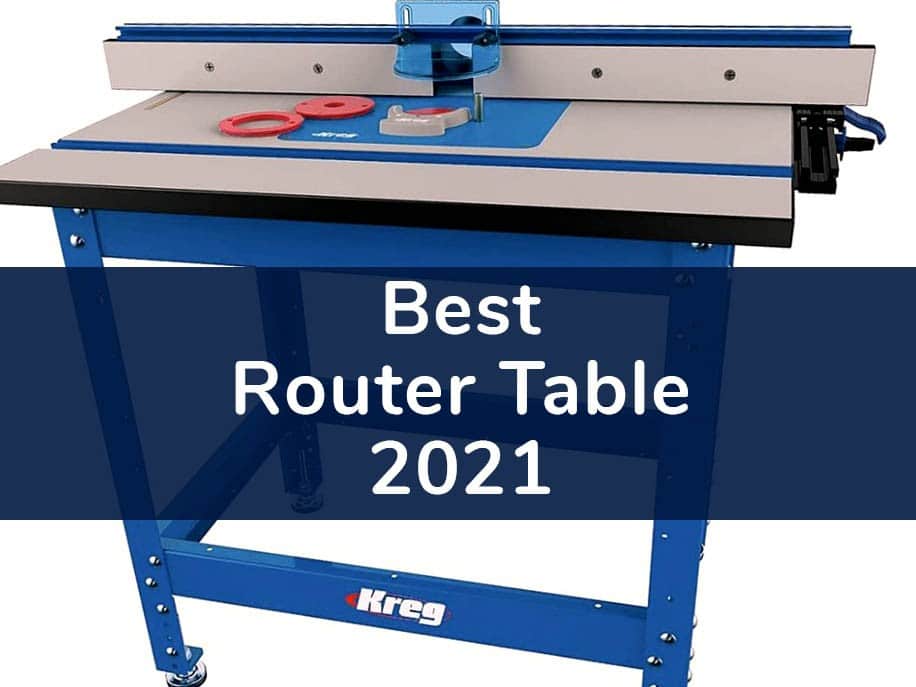
1.1 Best Professional Router Table: KREG Precision Router Table System

The KREG Table System is our top pick as the best professional router table. Its sturdy design and workspace make the tool perfect for larger wood pieces. You will not have to worry about any space limitation as it comes with a large user surface area.

best professional router table
Great professional router table – KREG Precision Router Table System, check the Amazon price

This router table is very versatile. Its system for height adjustment helps in routing with the most precision any level that is convenient for you.

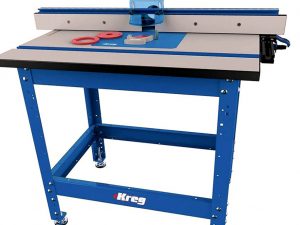
One of the best features of this table is its combination of miter and aluminum T-Track. It enhances the flexibility of your work. Moreover, it comes with numerous safety features such as two feather boards to prevent any accidents.

This professional router table has an excellent build quality. With its stainless-steel material, it can endure much weight.

best router table for the money
Excellent build quality, stainless-steel constructions, safety systems

The tool can collect large amounts of dust and makes cleaning the machine easier. Moreover, this feature also helps to keep your equipment clean and prolong its life.

The table is compatible with most wood routers and comes as a complete set. It includes a router table, steel legs with lockable casters, and a tabletop.

Another amazing feature of this best professional router table is its portability. You can move this router table around effortlessly. In this way, you can avoid carrying heavy wood to the router table each time.

If you are looking for efficient performance, precision, and stability, this router table is for you.

Pros

  • Sturdy surface
  • Portable
  • Adjustable height
  • Dust Port

Cons

  • Expensive, like any professional equipment
  • Fence could be better

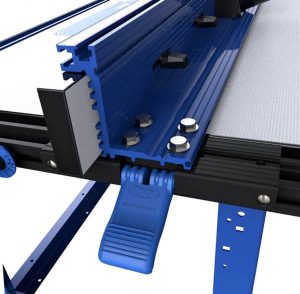
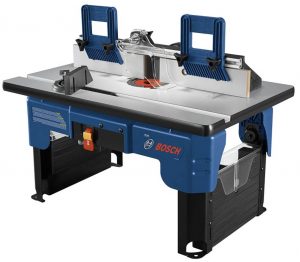
1.2 Best Router Table Combo: Bosch Router and Table Combo

If you are looking to buy both an efficient router and a router table, this is the best router – table combo.

Bosch router comes with a powerful 2.3 horsepower motor and a trigger control system in its handle. It offers better control, you can adjust the speed as you desire with a dial between 10,000 and 25,000 RPM.

Great router table combo
Router part of the most convenient router-table combo – Bosch 1617EVSPK Wood Router Tool

The router table in this combo is known to be one of the best ones available in the market. It comes with a router guide, pivot plate, attachment hardware, and many other components.

The table also comes with fine adjustments and is compatible with many routers. The Bosch router is, however, the most advanced router with above table adjustment. The Bosch router comes with threaded holes to to mount this fixed-based machine on to the Bosch router table quick and easy.

best router and table combo
Table for the most convenient router and table combo – Bosch RA1141 Portable tool

The router guide that comes with this router and table combo makes an excellent addition. It adds more versatility to the router.

You can also convert this router guide into a circular guide. It allows you to make precise arcs and circles of about 32 inches into your woodwork.

Pros

  • Stable and sturdy
  • Efficient router
  • Adjustable
  • Best compatibility

Cons

  • Expensive
  • Plastic legs

1.4 Best Inexpensive Router Table: Dremel 231 Portable Rotary Tool Sharpener and Router Table

If you are looking for a router table within a lower budget, this is the best inexpensive router table. It is multi-functional and is best for most craftsmen.

Its tabletop provides adequate surface area for your woodwork, taking into account device’s portability. It is also pretty easy to set it up and take it down. Moreover, this tool is lightweight and you can carry it around effortlessly. It is also compact, does not take up much space and is easy to store when you are not using it.

top Inexpensive Router Table
Dremel 231 Rotary Tool Shaper and Router Table – nice inexpensive router table

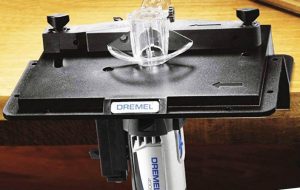
The Dremel router table also comes with one adjustable fence. Its predrilled holes establish secure connection to any surface that you prefer.

This tool is also very durable and you can also use it to cut wood (see also our related article best Dremel bit for cutting wood), but the small power of the power tool allows to use it only for light woodwork: small cuts, making grooves or slots and sanding items.

You can, nevertheless, accomplish efficient woodwork with this router table. It is one of the top inexpensive router table for light and precision work.

The disadvantage is that the router is compatible with corded and cordless Dremel routers and there is no guarantee that other tools will work with it.

Pros

  • Value for money
  • Good for precise work
  • Adjustable fence
  • Portable

Cons

  • Not very compatible
  • No Dust Ports

Conclusion

A router table enhances the efficiency and safety of your woodwork. The choice of a specific device depends on what tasks you set. Professionals typically require maximum performance, precision and reliability, which is why the renowned Bosch quality is the best fit. For amateurs and craftsmen who work on the road, compact versions are well suited. Go ahead and pick the one that suits your needs and preferences the best!


3 Basic Types of Wood Bits

There are three basic types of wood drill bits. Wood drill bits are, obviously, used for drilling wood.

Special wood drill bits are required for larger holes to be cut with greater accuracy.

The first type of wood drill bit is a lip and spur bit, which are also known as dowel bits. These drill bits are like standard twist drills but have a singular sharp center point and two outer cutting spurs. Because they have the single center point, it provides for a precise placement and the spurs provide a very clean hole. The lip and spur bit is particularly useful in dowel work where a precision hole is necessary for an accurate fit. Lip and spur bits are available in sizes from 3 mm to 30 mm diameters but the larger sizes of drill bits are quite expensive. Smaller sized lip and spur drill bits often come with dowel kits and usually come with an adjustable collar so the hole depth can be determined more easily. They also often come with indexing inserts, which are inserted into the hole to give you a center for drilling.

Another type of wood drill bit is a flat bit. Flat bits have a centre point but have a flat cutting edge and look similar to a spade. A sharp, flat bit will quickly cut a clean hole. These bits can be sharpened after use with a file. Flat bits are relatively inexpensive because of their uncomplicated construction. Flat bits are available in 6 mm to 38 mm sizes. A pumping action is required when using a flat bit to remove excess sawdust to help avoid their tendency to wander when drilling thick timbers. Some varieties of flat bits have a screw style thread instead of a center point to help pull the drill through the timber.

Auger bits are another type of wood drill bit that look like corkscrews. Auger bits have a wide chisel-like cutting edge which gets rid of the excess waste sawdust while you are working, and one outer spur which cuts into the wood in front of the cutting edge to produce a very clean hole. The deep coiled groove helps the waste sawdust to be removed quickly. Auger bits are usually slower drilling than flat bits, but thusly produce a cleaner hole in the wood. Because of the length of the corkscrew, the hole in the wood will be more precise. Auger bits are available in lengths of at least 100 mm up to 450 mm and in diameters of 4 mm to 30 mm. Auger bits can also be sharpened with a file.

Sizes Explained

You can actually custom order a drill bit to any size, but most drill bits – the actual cutting part on the end of the drill – are manufactured to standard sizes.

In the United States, fractional inch sizes are still used; in most other parts of the world, metric bit sizes are normally used.

Because of the two common different measuring systems – fractional and metric – it can be a little confusing buying the right drill bit size. To confuse things even more, there are two other ways of measuring – letter sizes and wire-gauge sizes.

If you are purchasing drill bit sizes in the United States, the size will probably be measured in fractions. The standard “twist” drill bits, which most people use begin at 1/64 of an inch and continue in 1/64 increments up to 1 inch. One disadvantage of this method of bit sizing is that the size increment between drill bits is extremely large for the smaller sizes – a difference of 100% between the first two sizes.

Metric drill bit sizes were introduced by the British Standard in 1959. The British Standard BS 328 identifies bit sizes ranging from the smallest, 0.2mm, to the largest which measures 25mm.

Letter sizes for drill bits are perhaps the easiest to understand. These bits are used to make precise small hole sizes and are simply labeled from the smallest – A – to the largest – Z. Even the largest of these is a mere 0.4 inches in diameter, so you would use letter sizes for detailed and close up work.

Wire gauge sizes, as the name suggests are standard measurements used for drilling holes for particular diameters of wire, especially wires conducting electricity. Most of these sizes are extremely small – a size AWG 36, for example is just 0.005 inches in diameter.

Drill bits with a “twist” on the end are also sold in standard lengths as well as sizes – the length is in proportion to the diameter of the bit.

Unless you are an expert and need a particular size, it is probably best just to purchase a variety of drill bits of varying sizes, ensuring you always have one that’s the right size for the job.

Drill Bits for Plastic

Plastic drill bits were designed to deal with such materials as Plexiglas® and Acrylite® along with other plastics.

It’s entirely possible that by looking at the title of this article you may be inclined to think that a new drill bit has been developed using plastic as the primary component of construction. However, when referring to plastic drill bits we are actually referring to a drill bit specifically designed to bore through a variety of plastics while producing a smooth hole.

Many have mistakenly tried to use a standard wood bit to achieve this goal and wound up with cracks and jagged edges in their plastic (we’ll talk more about this later).

If you are using a plastic drill bit for the first time it is important to make sure that when you drill as a guide for an attaching screw that you make the hole size slightly larger than the screw to allow for any contractions in the plastic.

While a standard drill can be used to drill holes in plastic, a drill bit specifically for plastics may have best results when a drill press is used. The primary reason this is true has to do with the slow even pressure needed to achieve the smoothest desired result. If you do need to use a hand drill, be sure to ask which plastic drill bit may be best to use with this type of drill.

There are nearly 90 separate drill bits for applications involving plastic – all an inch or smaller.

Some experienced handy folk have found that regular wood drill bits can be used for this application, but require modification to the existing drill bit. Small flats must be ground on each side of the edges that will cut into the plastic. The speed of the drill must be reduced to supply gentle, continuous pressure to the plastic material.

If you’d rather purchase the plastic drill bit you need simply visit your favorite hardware store or shop online for the greatest variety and information.

Tools and Bits to Drill Holes in Concrete?

If you have ever tried to drill holes in concrete using a regular drill and a high-speed steel drill bit, you know that it is a useless exercise. High-speed drill bits are perfect for drilling through wood, which is fibrous—the best way to make a hole in wood is to cut or slice your way through. The job goes faster with the sharper your drill bit is.

Regular twist drill bits are sharp at the tip as well as down the edges of their spiral flutes. Well made twist drill bits stay sharp for a long time; however, they become dull if they are exposed to hitting too many nails. Twist drill bits and regular drills can also make holes in metals, including steel. However, you can drill for a longer period if you use a drill bit made of material that is harder than high-speed steel, such as titanium or cobalt.

Drilling in concrete is a whole different ball of wax. Concrete is granular, where wood is fibrous and metals are generally smooth and monolithic. Concrete is made of grains of sand and chunks of gravel glued together with cement. Trying to drill through concrete with a regular drill bit or even a titanium or cobalt drill bit will dull the bit as fast as sandpaper. You cannot cut or slice concrete; you macerate it and pull apart the grains. When you clear away the powder of concrete, your hole is there.

Masonry drill bits were invented to drill through concrete. Masonry drill bits are a wedge of carbide, which is only a little less tough than diamond, which is attached to a spiral shaft. The shaft is not intended to stay sharp, but rather to gather the resulting powder and pull it out of the hole. The shanks of masonry drill bits are smooth and either hex-shaped or rounded. They can be used in your regular drill to drill through concrete, albeit quite slowly. If you need to make larger holes in concrete, then masonry drill bits are not going to meet the grade. You will need a hammer drill or a rotary hammer to achieve larger holes in concrete.

When to Pre-Drill

Ask twenty do-it-yourselfers how important pre-drilling is, chances are you’ll get at least ten different answers.

So, is pre-drilling necessary or just an added step almost never needed? That depends on many factors.

You need to pre-drill if:

  • You are using green wood. If the piece of wood you are drilling is heavy for it’s size, it is likely green, or young, wood OR
  • You are using treated wood. Treated wood is usually used for outdoor structures or decks OR
  • You are using hardwood. Birch, cherry, mahogany, maple, oak, poplar, rosewood, teak and walnut are all hardwoods OR
  • Your final hole will be larger than 3/8” OR
  • The wood you are using has been stored in humidity greater than 20% for more than 24 hours before drilling OR
  • You want to pre-drill.

You do not need to pre-drill if:

  • You are using dry wood that has not been pressure or chemically treated AND
  • You are using softwood like pine, cedar or redwood AND
  • The final hole will be smaller than 3/8” AND
  • The wood has been stored in dry conditions for more than 24 hours AND
  • You don’t want to.

Pre-drilling Tips

  • If you don’t pre-drill treated or green wood, it will likely split when it dries.
  • Hardwood typically takes years to completely dry so you should always pre-drill hardwood, since it’s possible it still has drying to do.
  • Holes larger than 3/8” can put undo stress on wood. If you pre–drill these holes before inserting a screw or nail, most of the wood will be removed from the hole before nail or screw is inserted, reducing stress.
  • Always pre-drill with a bit slightly smaller than the final hole.
  • If the final hole will be 3/4” or larger, pre-drill in increments of 1/4?. Example: pre-drill with 1/4” bit, then 1/2? bit, then 5/8” or 11/16” bit.