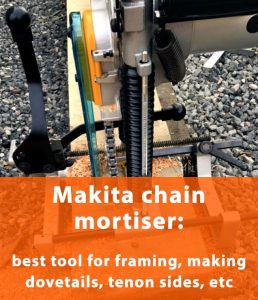
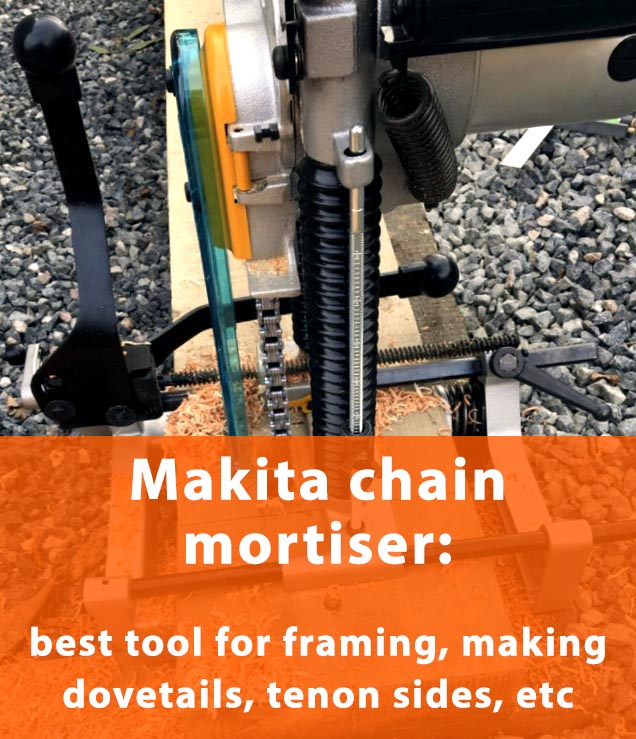
Makita chain mortiser: best tool for framing, making dovetails, tenon sides, etc

best chain mortiserChain mortiser is a unique tool helping you to do framing quick and effective. It saves more than enough time and efforts to justify its cost of use. Of course, you always can make frame mortises with chisel and drilling work, but your shoulder and wrist joints won’t thank you, especially when you are getting older. Nobody of my professional woodworkers regret buying the chain mortiser. They also use it any time that they need to hog out material – dovetails, sides of tenons, mortises, etc.

Chain Mortiser: Why Do You Need It

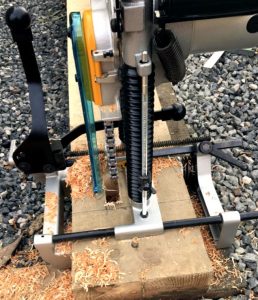
chain mortiserTimber framing is very labor-intensive. And if you use only hand tools it gets just crazy. It you need to finish the barn before you get old, use power tools and don’t underestimate the labor involved. I have the Makita chain mortiser, and it’s brilliant and fast. The machine is easy to use and cuts very quick once you have got everything marked up. It’s also no problem to come in from both sides on larger pieces.

A chain mortiser can be a bit intimidating at first, but you’ll get used to it  pretty quick. And although it isn’t often noted for accurate work, you can repeatedly and comfortably use the unit to within 1/8″ on your layout lines with the balance being finished with framing chisels.

Stationary chain mortisers are also widely used in the furniture industry. The horizontal slot mortiser is the best choice for a small shop to produce accurate and repeatable results, even with a novice operator. The low rpm is convenient for horizontal boring and dowel drilling.

The size of mortise required on almost any oak framing is too big (say 40 wide, 150 long and 100 deep in a 200 x 200 beam) for a  mortising attachment and square hollow chisel drill bit. Another advantage of the chain mortiser is mobility. You can’t get a piece of 200 x 200 oak into a pillar drill. With a mortiser, you carry the unit to the post. You can even make a mortices high above the ground, with the machine clamped to a vertical beam.

Of course, you can get a good forstner bit the size required, drill out as much the wood as you possible and pare back the rest with a chisel. Or just use a chain mortiser and do it quickly.

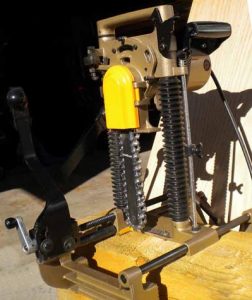
Makita chain mortiser

Even if you only do one project with your Makita chain mortiser and sell it on it will be worth it in the efforts you save. This fantastic tool will save you days and your sanity! 12 amp 100 volt models have enough power to use it without any problems.
YouTube video player


makita chain mortiser with replacement chain
Makita 7104L Chain Mortiser

Mafell chain mortisers are top end machines no question, the Festool units are a beast as well. Both are pricey, but the Festool is waaaay tool expensive. The Makita is a little slower but affordable option.

This chain mortiser is productive and reliable machine. You can use it for months and years with tightening and oiling the chain as the only maintenance. The chains are quite expensive, but you can cut each beam for a 30 x 50 foot barn using the original chain. Just let the weight of the unit do the working and don’t force it too much.

Chain mortiser tips and tricks

Do not rush

A chain mortiser is quick and productive tool, and it is possible to do a lot of damage to a timber when you make a mistake with layout. A boring machine or drill drill gives you more time to think. Attentiveness = accuracy, as ever.

Chain sharpening

Mortise chains are expensive and Makita says they can’t be sharpened, but but there are plenty of companies who will do it for you. Just google and you’ll find quite a few.

Safety

A good operator is the best safety. Chain mortiser is a cutting power tool and accidents unfortunately happen.

Reselling

A chain mortiser is an expensive, but easy-to-sell tool. You can build few frames and then maybe resell the unit and lose a couple hundreds on it. Believe me, such a ‘renting’ is something you would gladly do for a couple hundred dollars. Or, if you don’t want to invest (at least temporarily) then a a chisel and drill will be your companions on a trail of misery.

Conclusions

I vote for getting the chain mortiser. The traditional methods are good, I admire and respect, but sometimes you need to conserve your energy for tasks that don’t have power assistance option. And you’ve certainly  seen lots of people looking for used ones so it won’t be a problem reselling it.  The chain mortiser was the first tool I bought other than chisels when I started framing.

I don’t like buying a second hand, but if you are not ready for such investment, carefully check chain condition, locks, etc carefully. A used tool may not look great, but main parts shouldn’t be worn out. If you are buying the first mortiser, look for a brand new one with a warranty.
 

Best Drill Press Mortising Attachment in 2021: Mortise Drill Press Review

Best Drill Press Mortising Attachment in 2021: Mortise Drill Press ReviewBeginner woodworkers often wonder should the buy a mortising attachment for a drill press or they need a mortizer. Most of professionals who make dozens of mortise and tenon joints a week do not recommend mortise drill press and steer you towards a dedicated device. Nevertheless, I use an attachment on my drill press for occasional use, and it works perfect for what I need to use it for. Read our article to make an informed decision and buy the best attachment for your needs.
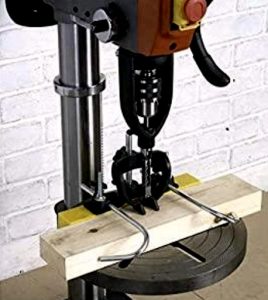
Hollow Chisel Mortiser Attachment for Drill Press

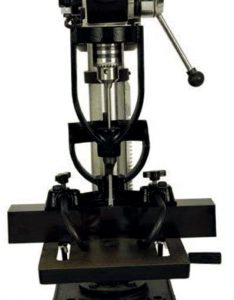
Hollow chisel attachments work well for occasional use, especially if you don’t need to work with really hard wood. Yes, a drill press has less leverage and its quill feed mechanism is more on lighter duty side. Therefore, mortising will be harder both fore the machine and your arms. But mortise drill press makes all right and if you are a hobbyist, DIYer or don’t have more shop floor space for a dedicated machine, the hollow chisel mortiser attachment is a good choice. It is also good for beginners. Good attachments last long and you can sell it later to use the money for buying a chain mortiser machine.

Ironton Mortising Attachment

Ironton mortising attachment comes with with four chisel shank sizes: 1/4″, 3/8″, 1/2″ and 5/8″ and works well with a Craftsman 1/2 hp craftsman 34985 and Delta benchtop drill press and others – different size collars for different machines.

I’ve also used the adapter on a 16.5″ Delta stationary press with satisfactory results. My way of using the DP attachment is running the chisel at lower speeds, about 800 rpm and get no smoking whatsoever. It allows to work without burning or any problems and extends the life of the hollow chisel and auger bit. As for the setup time, it takes about 10 minutes to get started. Not a big problem.

drill press mortising attachment.
Ironton drill press mortising attachment.

Ironton mortising attachment is a good starting tool to start getting into mortising. It will allow you to create a square mortise hole with minimal time and effort. Of course, you can’t expect a $60 machine to do the work of a $400 mortiser. Don’t hurry up and don’t expect to quickly carve a large size mortise out of solid hardwood. This tool is able to make nice cuts and may last for many years.

And one more detail. If you have never used mortising attachment, invite a fellow specialist for the first time or watch the tutorial videos on YouTube. Using the machine seems to be quite difficult at first.

Woodstock Mortise Drill Press Kit

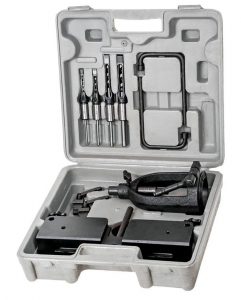
Woodstock attachment comes in carrying case with cast iron chisel holder and fence. There are  1/4-Inch, 5/16-Inch, 3/8-Inch 1/2-Inch chisels in the sets, 3 two-piece  and 3 split bushings

mortise drill press
Woodstock D4031 mortise drill press kit

The chisels in the set are roughly machined and need to be sharpened as all cheap ones. The case is on low quality side too, the parts easily pull out of their seats when shaken. And all this for about $190. I think, the Ironton looks better for its money.

Sealey Wood Mortising Attachment

There are three 1/4″, 3/8″, 1/2″ square hollow chisel bits in the Sealey mortising attachment kit, collar diameters are  40, 52, 55, 60 and 65mm.

The set works well so long as you don’t try to over do it. For its $100 anyways. It is fine in pine, even with a biggest chisel upto full depth, but  it struggles a bit in hardwood. The accuracy is descent. The only con of the attachment is a plastic fence. Most of us prefer a cast iron locating rail.

hollow chisel mortiser attachment drill press
Sealey MA10 hollow chisel mortiser attachment drill press

In summary – the attachment does it’s job especially in softwood for the odd job, but if you have a lot to do buy a dedicated Mortiser. And no one will stop you from selling this set on eBay for a few dollars cheaper (see also best mortise chisel set review).

Mortise Drill Press: Conclusions

The main problem with the drill press mortising attachments is set up time. But if you can leave the tool on a drill press full time it’s OK. Besides, for For about $50-60 you probably can’t go wrong. Yes, mortising machines produce better cuts, but I’ve never had any complaints on my drill press. However, I suspect that the use of the attachment on a cheap small presses will cause “flex”, amplify any play in the DP quill and produce a poor cut. But nobody is going to make huge mortises on a compact drill press, right?

Mortising drill bit: square hole hollow chisel mortising bit review

If you want to create mortise and tenon joints quickly and easily, mortising bit is a no-brainer choice. They are not expensive and may significantly reduce labor time and construction costs. Read our review to choose the best mortise drill bit for your project!

Mortising Bit – What it is And How it Works

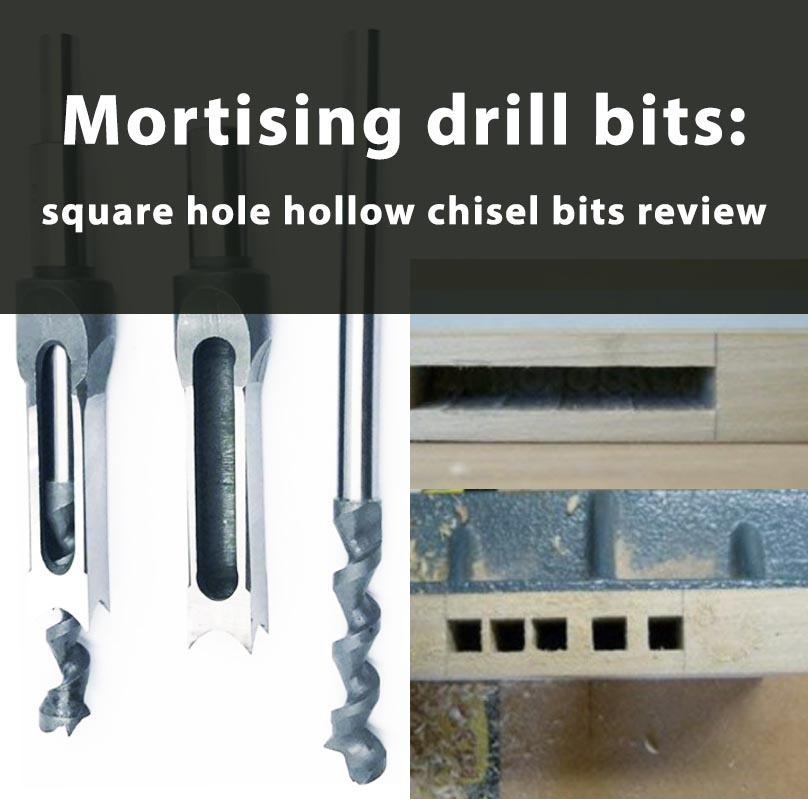
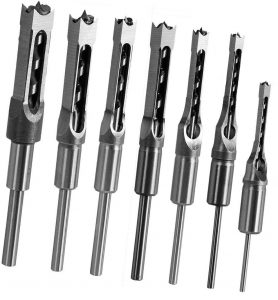
Mortising drill bits in a common meaning are tools that can drill out a square holes. In fact these bits are used with a “dedicated” mortise machine also known as a hollow chisel. You also can find mortiser square drill bit that works on a drill press (with a mortising attachment).

mortising bit
Mortising bit – the quickest way to make mortise-tenon joint

Basically, mortiser square drill bit is a drill bit that works inside a hollow chisel. A lot of force is needed to push the square chisel in the round hole. The cleanliness of the bottom is similar to Forstner bit. In general, square hole mortiser drill bits work well but they are tedious for large areas.

Choosing Mortise Drill Bit

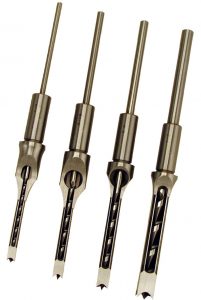
I’ve purchased mortise drill bit set and use bits a lot. The 1/4″, 5/16″ and 3/8 are the most used. In those sizes, the Powermatic brand bits a pretty good.  I have also had good experience with the bits sold by Woodstock. The Austrian bits made by Delta don’t seem to hold their cutting edge as well.

mortise drill bit set
Great mortise drill bit set – Powermatic 1791096

Powermatic chisels are super sharp, nicely ground and the edges are smooth and straight so you don’t really need to polish and sharpen them. There are minimal burrs on the chisels. The Auger bits inside the chisels are also sharp, and well fitted. Therefore, if you are looking for quality, Powermatic are the best. They produce superior results comparing to anything I have used.

High quality bits are pretty expensive and last long with proper use and sharpening. Some of my colleagues don’t like sharpening and the low price  bits are preferable for them. Indeed, you can just throw the bit in a trash when it becomes dull. The 1/4″ bits heat up and break, whether they cost $30 or $90, if you abuse them too much without cooling down. Using cheaper bits lets you be less careful with them, and you may like it.

mortise bit set
Cheap mortise bit set – twice as many bits for half the price of the Powermatic

Mortise Chisel Bit Tips and Tricks

Sharpening and honing the chisel might make some difference to how the cheap mortise chisel bit perform. So, try to buy a set of cone sharpeners and work with the chisel.

mortise chisel bit sharpener
Mortise chisel bit sharpener SCOTTCHEN PRO

Many of the carpenters I know also polish the outside faces of their square hole mortiser drill bits to reduce friction and make withdrawing them easier. I think, spraying the chisel with a little Dri-Cote won’t hurt either.

Do not overheat hollow chisel mortiser bits. All they build up heat. Let them cool from time to time. Avoid overheating and ruining them, pay attention to their temperature during use. If you overheat even the best bit, it will lose the temper and become useless.

Set up your mortise bit correctly. The auger end should extend the correct distance below the bit. Sharpen both chisel and auger bit. Do not use too large mortiser square drill bit. For example, a small Jet mortiser even with sharp drill bit set struggles with 1/2″ and 3/8″ is it’s comfortable maximum.

Choosing a Mortising Bit: Conclusions

Cheap mortising bits as they come from the store are not ready for use. If you want them to work well they need to be sharpened and polished on the outside of the chisels. It doesn’t take a lot of time but saves much efforts later. Expensive tools are ready-to-use and work better, but you still need to be careful and do not let them overheat.

My advices is to buy cheap bits if you have a good floor stand mortiser. Good powerful and sturdy machine will deal even with a roughly machined chisel. Cheap bits are more cost effective and you don’t have to worry too much about.

If you use drill press with mortising attachment, buy the best bits or you can afford. High quality bits facilitate the work of the equipment. You will need to brace the table and take a good deal of pressure so it will be a workout.